VW Golf Mk3 Timing Belt and Water Pump Replacement
The timing belt (cambelt) must be replaced at specific maintenance intervals. On average, replacement is required every 50,000–60,000 miles (approx. 80,000–90,000 km). This maintenance task should be taken seriously, as belt failure can lead to bent valves. You can read more about the consequences of timing belt failure in our blog. This photo guide covers the replacement of the timing belt and water pump on a Volkswagen Golf Mk3 with the 1.6 AEE engine.
On the third-generation Volkswagen Golf, the weak point is often not the belt itself, but the tensioner pulley. The outer race can crack, leading to belt failure and very expensive repairs.
Parts required for Golf Mk3 Timing Belt Replacement
The table below lists the part numbers for original components and the most popular aftermarket alternatives.
| Item | Part Number |
|---|---|
| Timing Belt (Cambelt) | VAG 032 109 119 G |
| Contitech CT 847 | |
| Gates 5428 XS | |
| Timing Belt Tensioner Pulley | VAG 030 109 243 K |
| Fenox R12159 | |
| SNR GT357.11 | |
| Water Pump | VAG 030 121 008 D |
| Fenox HB1704 | |
| INA 538 0031 10 | |
| Alternator Belt Tensioner Pulley | VAG 030 145 299 F |
| GBM GTA0410 | |
| INA 534 0123 20 | |
| Alternator Belt | VAG 030 145 933 E |
| Bosch 1 987 946 062 | |
| Contitech 6 PK 1070 |
You can purchase a VAG 032 198 119 timing belt kit, which includes the belt and tensioner, or aftermarket alternatives like INA 530 0167 10 or Bosch 1 987 948 046. Third-party manufacturers also produce timing belt kits that include the water pump, for example, Graf KP603-2 or Gates KP15428XS.
How to replace the timing belt and water pump on a VW Golf Mk3
It is recommended to replace the water pump at the same time as the timing belt. This is exactly what we will cover in this guide.

We recommend replacing the belt every 50,000–60,000 miles. Note that on these engines, the weak point is not the belt itself, but the tensioner pulley. Sometimes the outer race cracks, which leads to belt failure and very expensive consequences.
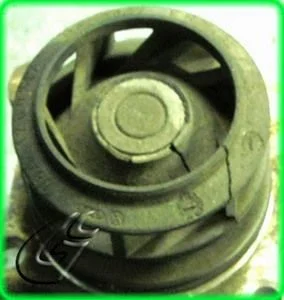
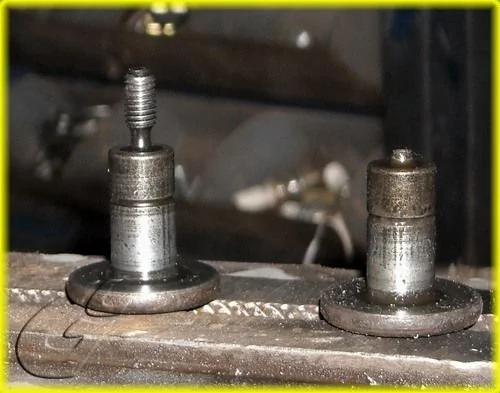
We also recommend changing the water pump at the same time. This is not necessarily because the bearings fail or they start to leak, but because genuine pumps have plastic impellers which often detach from the drive shaft.
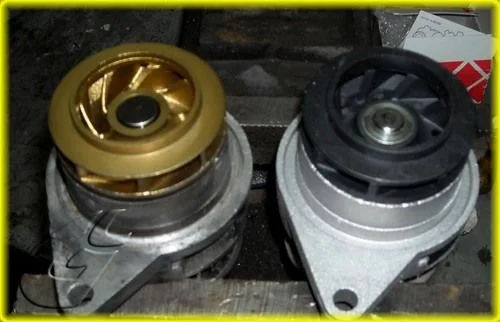
Aftermarket pumps are often available with metal impellers.

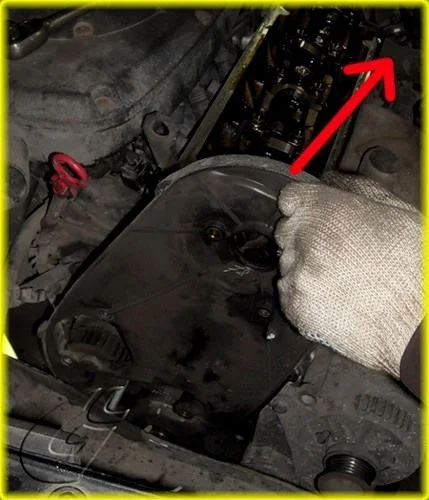
Remove the upper timing belt cover. Use a 15mm spanner to slacken the alternator belt tensioner and remove the belt.
Set the valve timing to the marks. To do this, align the mark on the camshaft sprocket with the tab on the timing belt cover.
The mark on the auxiliary drive pulley aligns with the second tab on the lower part of the cover.
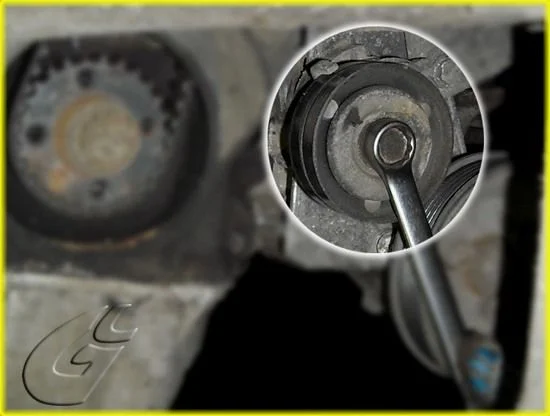
Undo the four 6mm hex (Allen) bolts on the auxiliary drive pulley. Clean the bolt heads thoroughly beforehand so you don't round them off.
Unscrew the alternator tensioner and remove the pulley to gain access to the cover securing bolts.
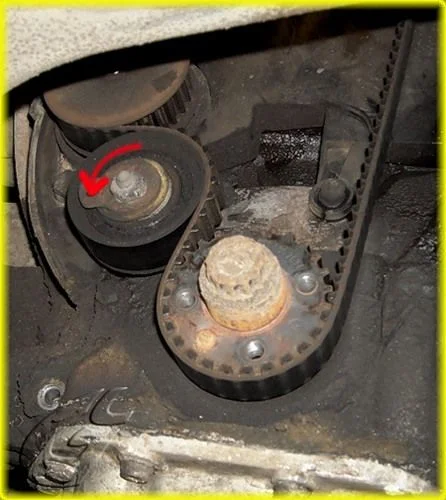
Unscrew and remove the remaining cover bolts. Loosen the timing belt tensioner.
Remove the belt.

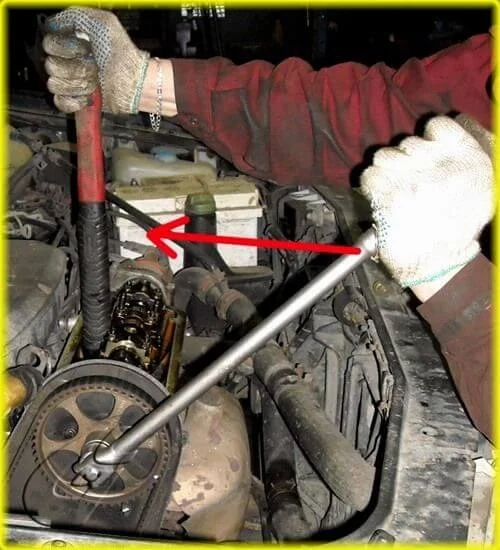
To replace the water pump, you need to remove the inner timing cover. This requires removing the camshaft sprocket. First, however, rotate the crankshaft about 30 degrees anti-clockwise using the centre bolt. This is to prevent accidental contact between the valves and pistons.
The easiest way to undo the camshaft sprocket bolt is with an impact wrench.
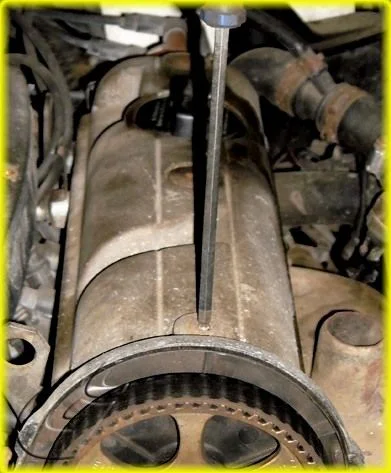
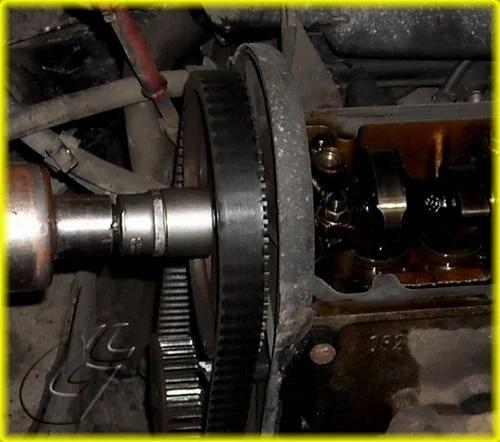
If you don't have one in your toolkit, remove the three bolts holding the rocker cover (valve cover) and lift it off.
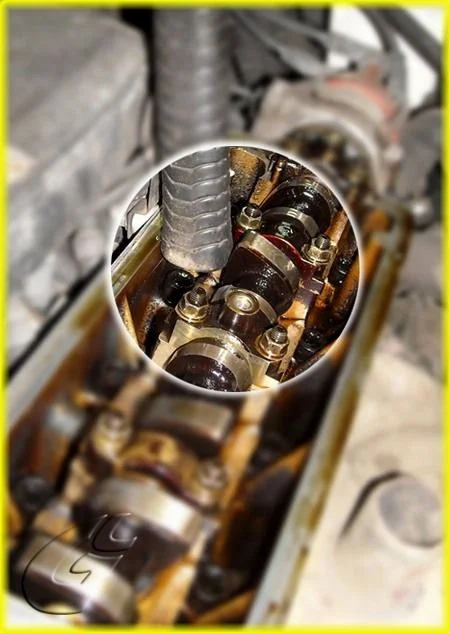
Then insert a wooden hammer handle between a camshaft lobe and the cylinder head.
Holding the cam steady, undo the centre bolt.

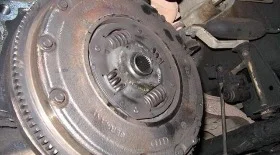
Remove the sprocket. Undo the bolts securing the inner cover.
Undo the two bolts securing the water pump.
Remove the cover.
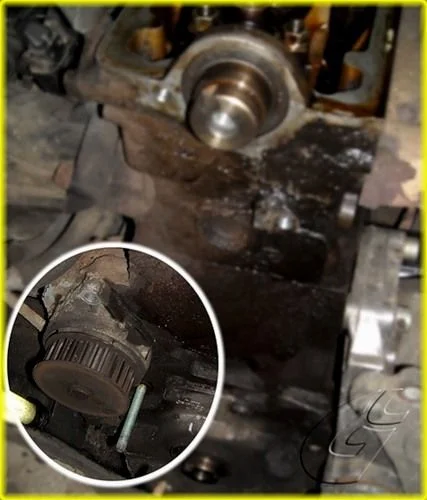
Usually, a pump that hasn't been touched in a long time will be seized solidly into the block.
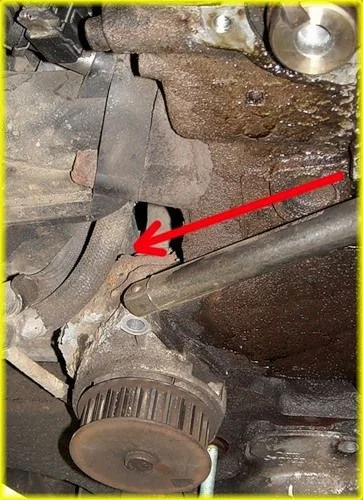
To get it out, try rotating it first by tapping the upper lug. Do this gently.
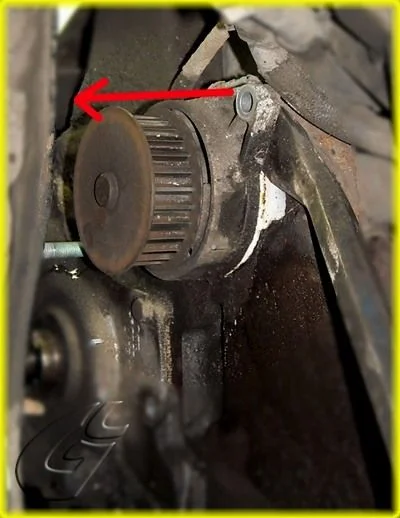
Then, use a pry bar or large screwdriver to lever the pump out completely.
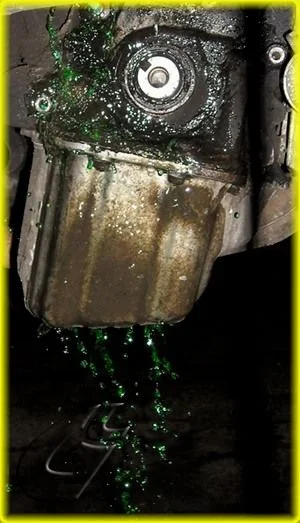
Bear in mind that the water pump is the lowest point in the cooling jacket, so coolant will inevitably pour out (have a catch pan ready). It will run down a dirty engine block, so it's not worth refilling. It is better to buy fresh coolant in advance.
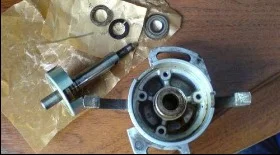
Insert the new pump. Fit the inner part of the cover, insert the bolts and tighten them.
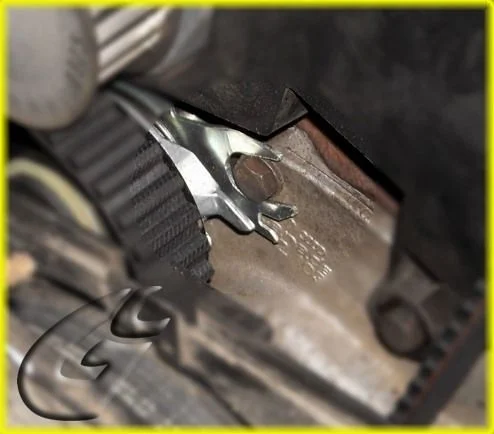
Fit the camshaft sprocket, applying thread locker to the bolt (unless you bought a new bolt beforehand). Tighten it, locking the shaft using the same method as before. Fit the new tensioner pulley. Ensure the U-shaped fork engages with the bolt head (the front cover securing bolt).
Check for Top Dead Centre (TDC) on the camshaft.
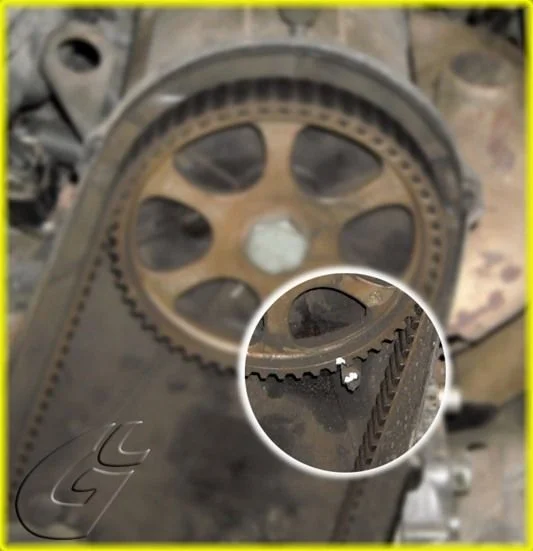
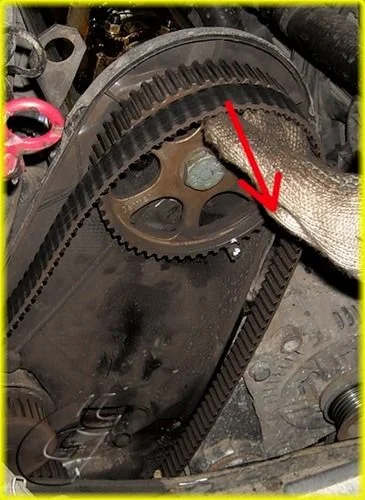
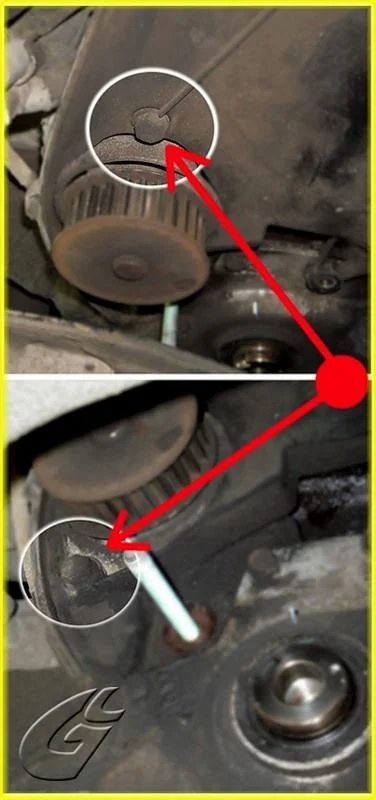
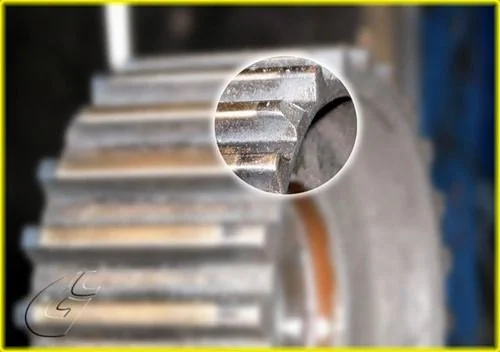
Rotate the crankshaft clockwise to TDC. Without the cover and auxiliary pulley, you can use the following marks: the chamfered tooth on the sprocket...
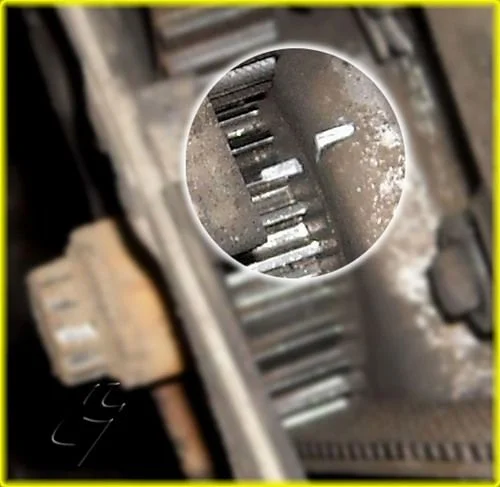
And the raised mark on the engine front cover.
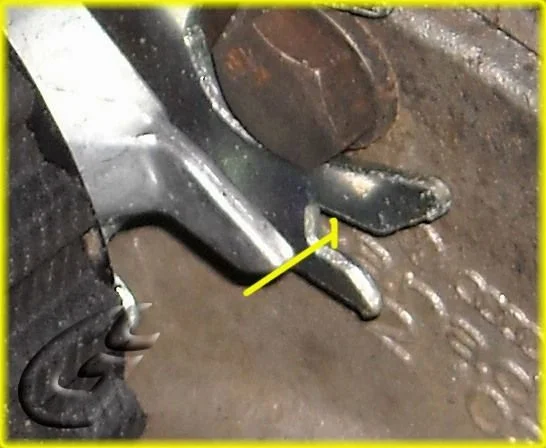
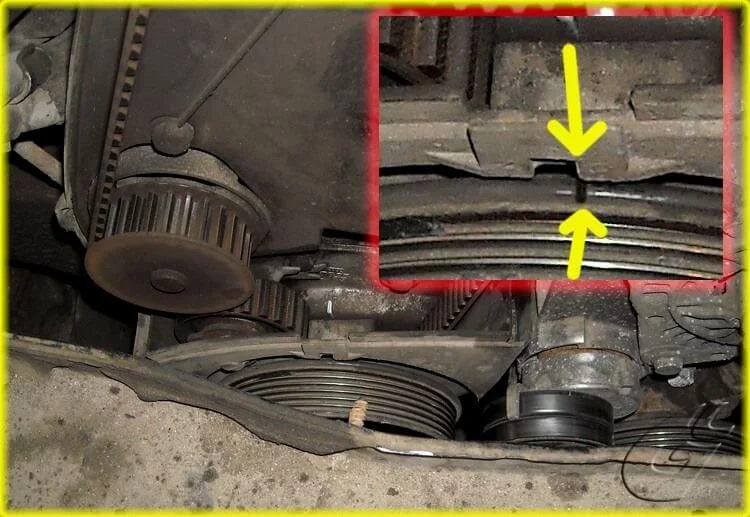
With both shafts set to TDC, fit the new belt. Using an Allen key, turn the tensioner clockwise until the pointer aligns with the notch on the backplate.
After turning the crankshaft a few times by hand, check that the timing marks still align and check the tensioner indicator. Adjust if necessary.
Reassembly is the reverse of removal: cover, pulley, alternator tensioner, alternator belt.
Be very careful when tightening the rocker cover bolts, as their design means they can shear off very easily.
Was this guide useful?
Your feedback helps us improve our content.
Related Materials


Discussion (0)
No comments yet!