DIY Wheel Alignment Guide

Incorrectly adjusted wheel alignment angles (tracking) lead not only to rapid tyre wear but also to increased fuel consumption and poor handling. Therefore, the adjustment procedure should be approached responsibly.
It is realistic to adjust wheel alignment yourself, but the procedure requires attention to detail and a flat surface. Stabilising the steering wheels is a crucial aspect of vehicle stability. The wheels must move in a straight line and return to the initial position independently after a turn.
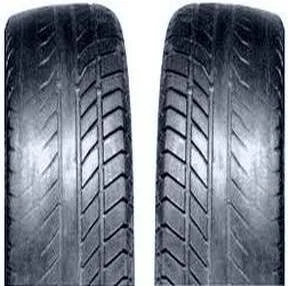
If the angles are incorrect, the wheels tend to drift to the side due to road irregularities while driving. The driver has to constantly correct the steering to keep the car on course. This is tiring, and steering and suspension components wear out faster.

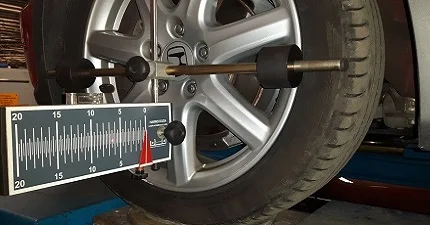
Stabilisation depends on two main parameters: Toe and Camber. Wheel alignment is usually performed on a specialised stand, but if you have the skills, basic adjustments can be done by yourself.
Signs that adjustment is needed
You can determine that the settings are off by the following symptoms:
- The car constantly pulls to one side when driving on a straight road.
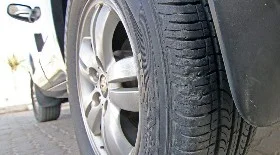
- Uneven tyre wear is observed (e.g., the inner or outer edge is worn down).
- The steering wheel is off-centre when driving straight.
- Tyres screech in corners even at low speeds.
The presence of even one symptom indicates the need for a check.
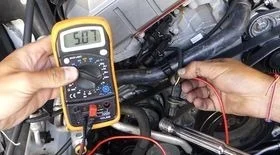
Tools and preparation
For the work, you will need:
- a ruler and a tape measure;
- chalk;
- a set of spanners;
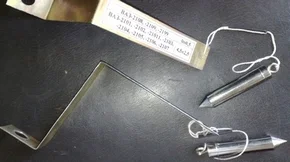
- a strong cord with a plumb line;
- an absolutely flat surface (an inspection pit is best).

How to find the steering "zero" position?
First, ensure the steering rack is in the centre of its travel. This is the "zero".
- Place the vehicle on a level surface.
- Turn the steering wheel all the way to one side.
- Rotate the steering wheel all the way to the other side, counting the exact number of turns.
- Divide the resulting number by 2 and turn the wheel back by that amount. This is the geometric centre of the rack.
In this position, the steering wheel spokes should be straight. If the steering wheel is crooked but the rack is centred, the problem lies in the installation of the steering wheel itself or incorrect track rod lengths.
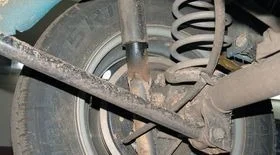
To adjust, loosen the lock nuts on the track rod ends. By rotating the rods, ensure that when the steering wheel is straight (locked in the centre), the wheels are pointing straight ahead.


How to adjust Toe (Tracking)?
Before starting, check tyre pressure and ensure there is no play in the suspension or knocking when turning the wheel. Play will negate any adjustment.
Toe is the difference in distance between the front and rear points of the wheel rims on the same axle.
A telescopic ruler is often used for measurement. The ruler is placed between the inner edges of the wheel rims at the front (at hub centre level). The scale is set to zero. Then the car is rolled forward so that the ruler is behind the wheel (at the same height). The difference in readings will show the toe value.
To adjust, rotate the connecting sleeves or the track rods themselves (depending on the design), changing their length. After setting, make sure to tighten the lock nuts.
Adjusting the Camber angle
Camber is the angle of the wheels relative to the vertical. Measurement is carried out with the car standing on the ground. If you jack up the car, the suspension will unload, and the angles will change.
Procedure:
- Set the wheels straight.
- Take a cord with a plumb line and hold it against the wing so that the string passes through the centre of the wheel.
- Use a ruler to measure the distance from the string to the upper and lower edges of the wheel rim.
The difference in these distances indicates the camber angle. If the distance at the top is greater than at the bottom, the camber is negative, and vice versa. Normal values depend on the specific car model (check your owner's manual).
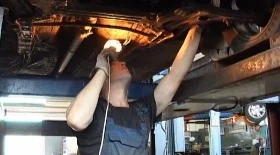
Eccentric bolts on the shock absorber struts or adjustment shims on the wishbones are usually used for adjustment (depending on the suspension type):
- Remove the wheel (if access is difficult) and loosen the bolts securing the strut to the steering knuckle.
- Move the steering knuckle (or rotate the eccentric bolt) in the required direction.
- Tighten the bolts.
- Mount the wheel, lower the car, bounce the suspension firmly a few times to let it "settle," and measure again with the plumb line.
When doing wheel alignment yourself, take measurements at least three times, rolling the car between measurements to eliminate errors from rim runout.
If the car still "pulls" after adjustment or uneven wear continues, the problem may be chassis or wishbone deformation, which requires diagnosis on a professional stand.

DIY adjustment allows you to save money, but for precise settings on modern multi-link suspensions, visiting a garage is recommended. You can also watch a video on the topic here.
Was this article useful?
Your feedback helps us improve our content.
Related Materials
Discussion (0)
No comments yet!