Renault Megane 2 Dipped Beam Bulb Replacement
This photo report shows how to replace the dipped beam bulbs on a Renault Megane 2. Changing the bulbs yourself is quite simple, although it requires a bit of effort.
However, many owners find the "through the wheel" method inconvenient as it requires working by feel. This report considers an alternative method — from under the bonnet. The vehicle's design restricts access to the left headlight from above, so you will need to remove the battery to perform the work. On the right side, there is less hassle: it is enough to unclip the washer reservoir filler neck and pull it aside.
Tools you will need include two spanners: a 10 mm ring spanner and a Torx key (or socket), as well as a screwdriver. You should also buy H7 standard bulbs in advance — for example, you can choose Philips H7 12972 PR C1.
The following bulbs are used in the Megane 2 front headlight:
- H7 — dipped beam;
- H1 — main beam;
- H11 — fog lights;
- W5W — side lights.
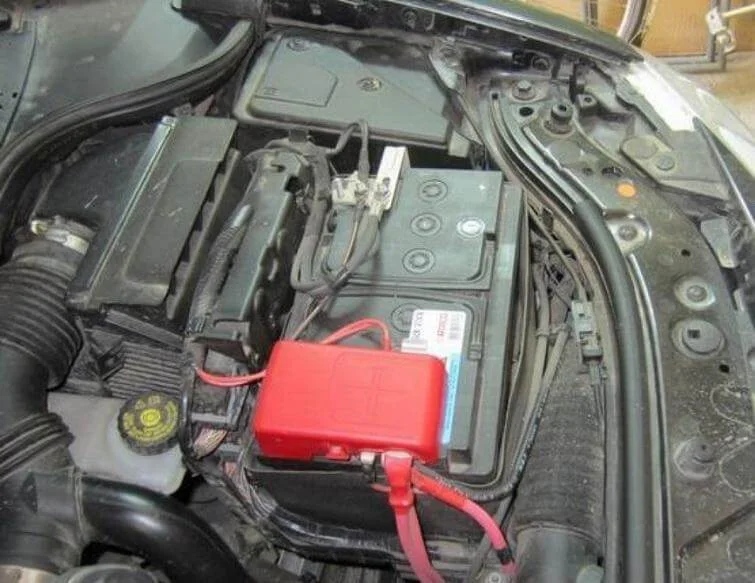
General view before starting work.
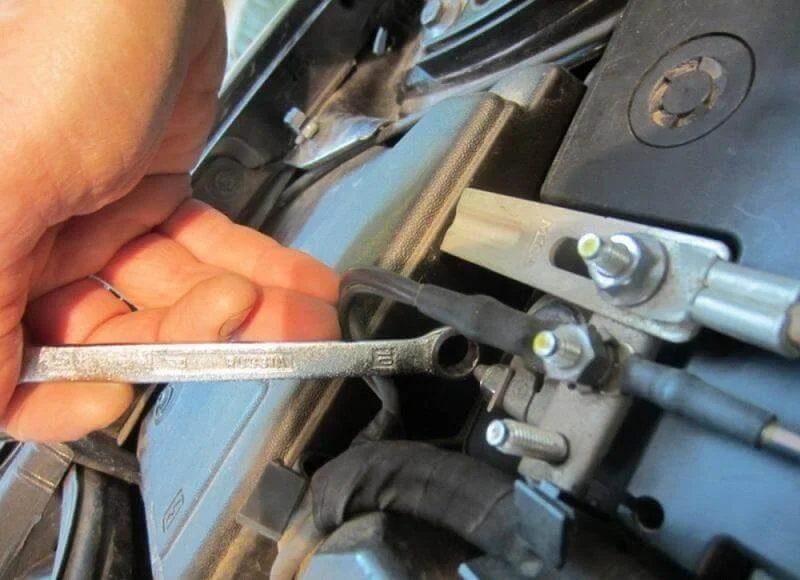
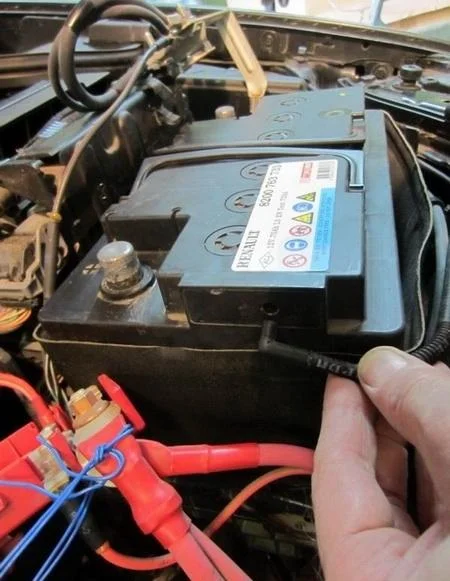
Switch off the ignition, then disconnect the battery terminals using a 10 mm spanner.
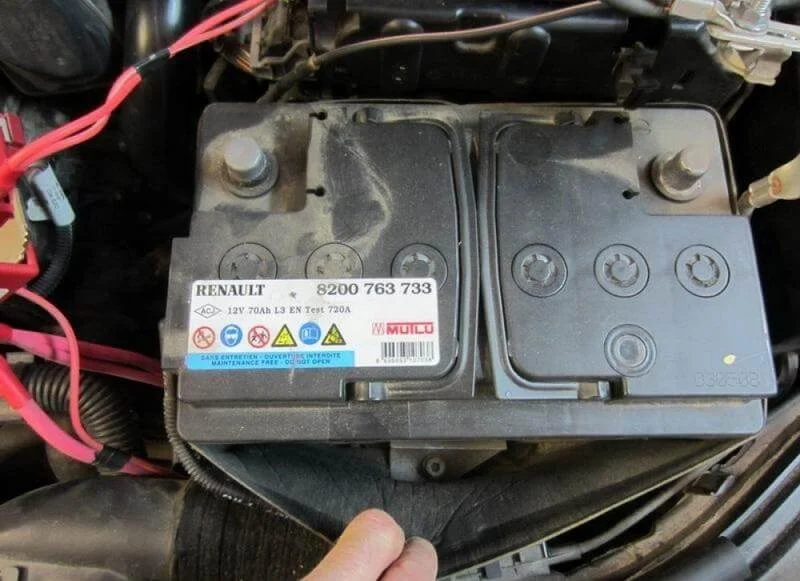
The battery securing plate is located under the cover in which the battery itself sits. Pull the cover back.
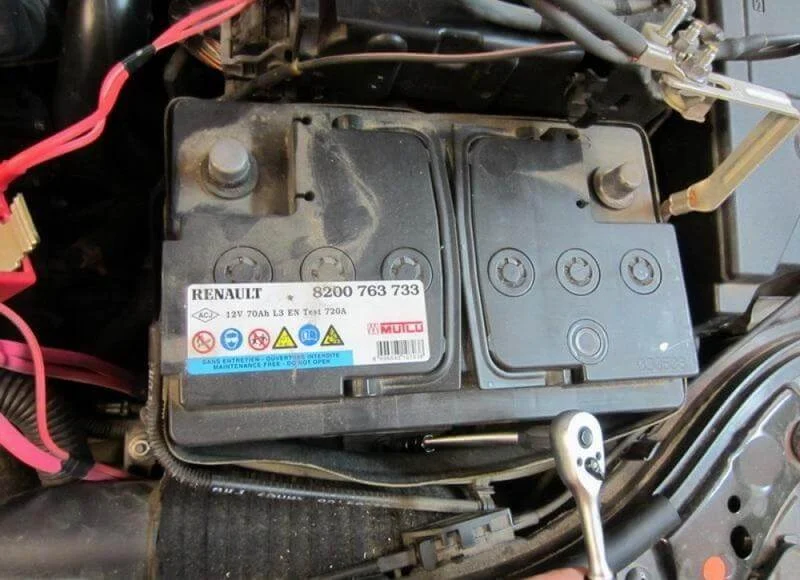
Remove the plate; for this, you will need a hex key (or socket) with an extension.

The plate and the necessary tool.
Do not forget to disconnect the breather tube as well.
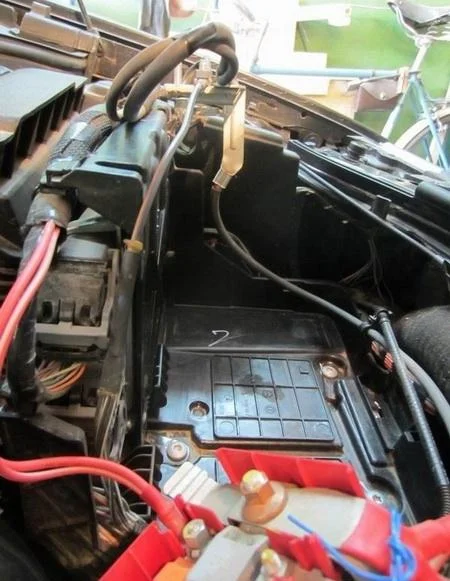
Remove the battery to gain access to the rear of the headlight unit.
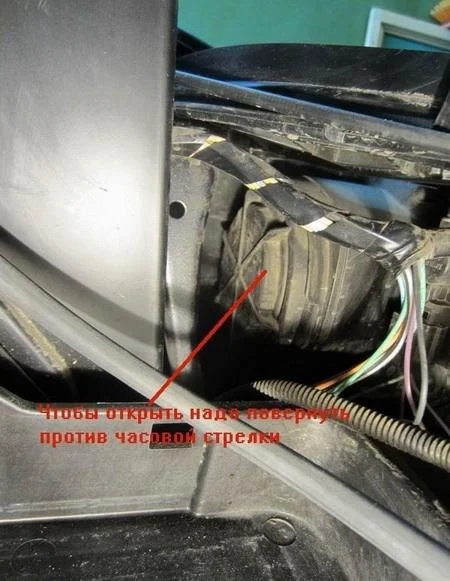
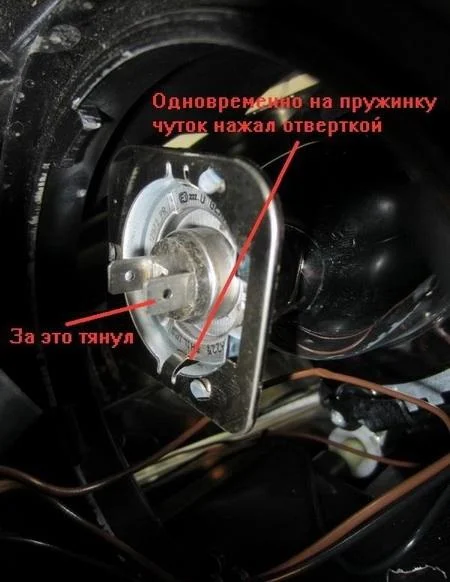
Locate the round protective cover for the dipped beam bulb. Open the cover by turning it anti-clockwise (approximately a quarter turn).
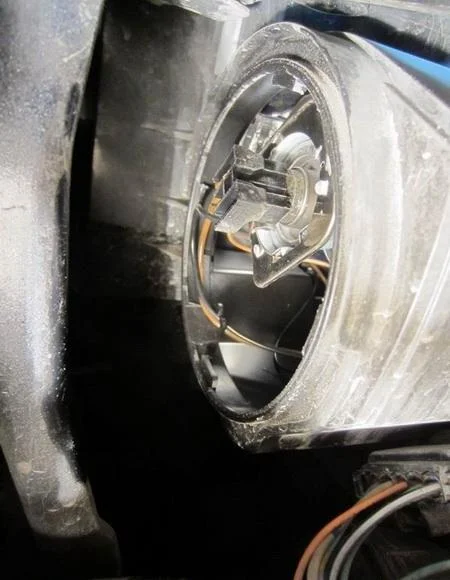
You must not pull the bulb itself by the terminal block wires — this could damage the wiring.
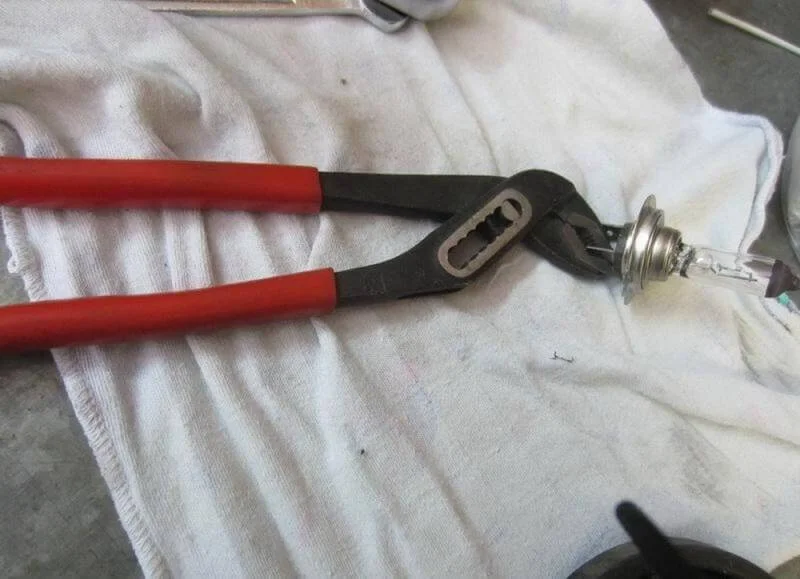
Remove the terminal connector (it simply pulls back). The bulb is held by a retaining spring. The photo shows holding the contact with a tool, but do not use force until the clip is unlatched. Using a long screwdriver, press down on the "tab" of the retaining spring from above to disengage it and fold it back. Only then will the bulb be released.
Insert the new bulb by the base (without touching the glass with your fingers). It fits into the slots, then snaps in with the spring.
Was this guide useful?
Your feedback helps us improve our content.
Related Materials


Discussion (0)
No comments yet!