How to Check Engine Oil Quality
Engine oil quality directly affects engine performance, service life, fuel consumption, dynamic characteristics, and the amount of lubricant lost to burn-off. All quality indicators of engine oil can only be determined through complex laboratory analysis. However, the most critical signs—indicating that the lubricant needs urgent changing or that you have purchased a counterfeit—can be checked independently.
How to Check Oil Quality
There are a number of simple recommendations for evaluating new engine oil.
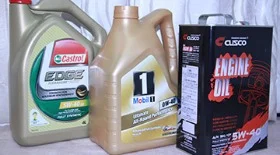
Appearance of the Canister and Label
Nowadays, alongside licensed oils, there are many counterfeits in shops. Manufacturers attempt to protect their products as much as possible. The latest trend is online verification using codes, QR codes, or via the manufacturer's website. There is no universal recommendation here, as every manufacturer addresses this issue in their own way.
When buying, you should inspect the quality of the canister and the label itself. Naturally, it must contain operational information about the oil inside (viscosity, API and ACEA standards, manufacturer approvals, etc.).
If the font on the label is low quality, applied at an angle, or peels off easily, you are likely looking at a counterfeit product and should refrain from buying it.
Detecting Mechanical Impurities
Quality control of engine oil can be performed using a magnet and/or two glass slides. To do this, take a small amount (about 20–30 grams) of the test oil, place a standard small magnet in it, and let it stand for a few minutes. If the oil contains many ferromagnetic particles, most will stick to the magnet. In high-quality factory oil, this check will show nothing.
Another method is using glass slides. Place 2–3 drops of oil on one piece of glass, then rub it over the surface using the second piece. If you hear a metallic squeak or crunch, or feel mechanical impurities, refuse to use it.
Checking Oil Quality on Paper
Another very simple test involves placing a sheet of clean paper at an angle of 30–45° and applying a couple of drops of the test oil to it. Part of it will be absorbed, while the rest will flow down. Look closely at this trail.
The oil should not be very thick or extremely dark. There should be no small black dots (mechanical impurities). The trail must be uniform.
The fact is, any oil begins to darken after just a few dozen kilometres of driving, which is normal (detergent additives are working).
Home Tests
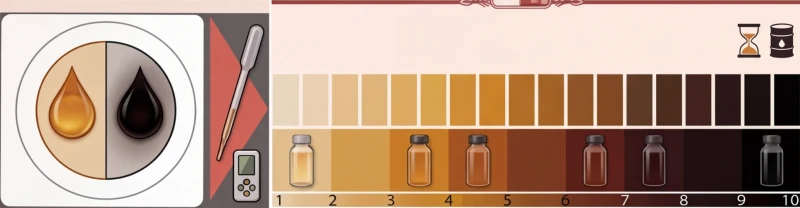
Place a small amount (100–150 grams) in a glass beaker for a couple of days. If the oil is poor quality, it is highly likely to separate into fractions. Naturally, such oil should not be used in an engine.
You can also freeze a small amount. This will give an approximate understanding of its low-temperature characteristics, particularly relevant for cheap or counterfeit oils.
Warning! It is strictly not recommended to heat oil to 100 degrees on a domestic stove. It is a fire hazard, and additive fumes can be toxic.
Viscosity can be checked using a funnel. Compare how many drops of new oil and lubricant from the sump drip through in the same period. If these values differ significantly, it is advisable to change the oil.
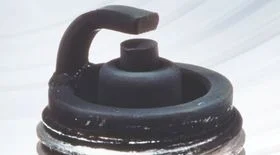
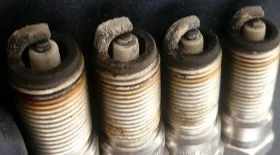
Indirect confirmation that oil has degraded is a burnt smell, especially if it contains many impurities or the oil level is low.
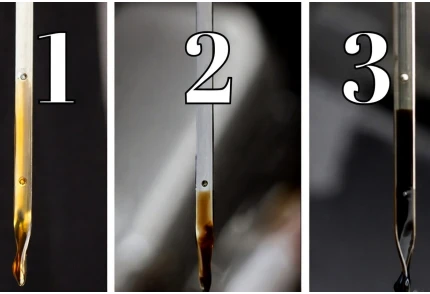
1 — fresh oil, 2 — oil after long mileage, 3 — black oil that needs changing
Another "DIY" test involves the dipstick:
- warm the engine and carefully wipe the dipstick dry;
- reinsert it and remove it again;
- assess how the oil drop forms.
If the drop has a medium consistency, the oil is usable. If it simply runs down (especially if it is very dark), immediate replacement is needed.
Price-Quality Ratio
A low price for a "premium" brand can be a sign of counterfeit goods. Try to buy engine oils in proven shops with official dealer agreements.
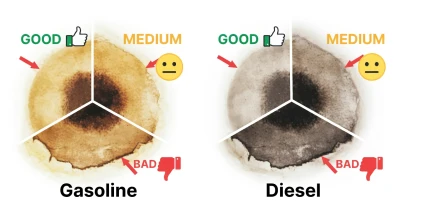
Blotter Spot Test
The most common method for determining working oil quality is the blotter spot test (drop test). It allows a quick check using just a single drop.
Soot (Zone 1)
Determines the level of soot, dust, and metals. With high-quality oil, the inner circle has a sharp outline.
Condition (Zone 2)
Determines the quality and condition. The darker it is, the older the lubricant.
Water (Zone 3)
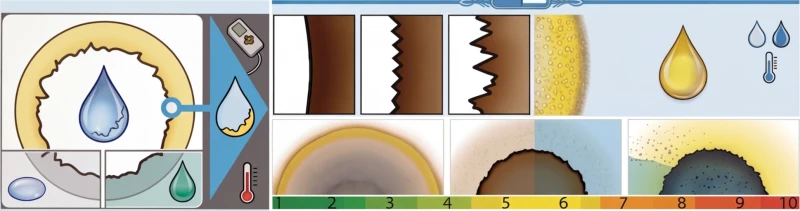
A zigzag contour between the 2nd and 3rd zones indicates water or antifreeze. A yellow ring ("corona") indicates glycol-based antifreeze.
Fuel (Zone 4)
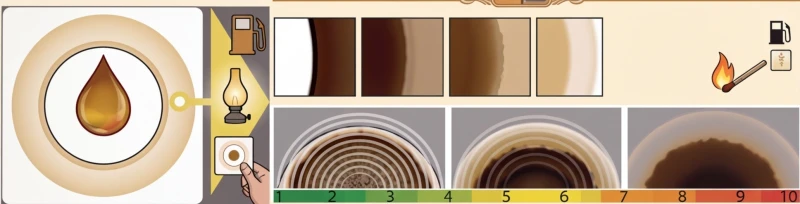
A light transparent ring outside the spot indicates fuel. The wider the halo, the more fuel is present.
Algorithm for Performing a Test Sample
- Warm the engine to approximately +50…+60°C.
- Place one or two drops on a clean white sheet of paper.
- Wait 15...20 minutes for the oil to absorb thoroughly.
Engine oil quality deteriorates abruptly: the older the oil, the faster it loses its protective properties.
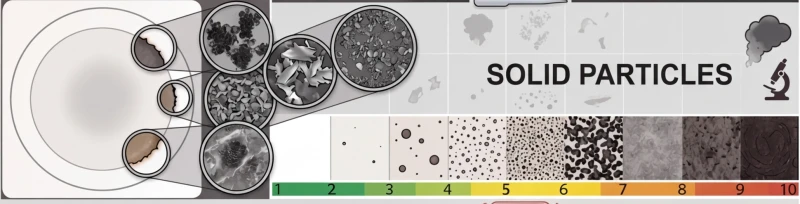
How to Determine Oil Quality by Spot Appearance
- Central core — where soot particles and impurities gather.
- Edge zone — oil absorbed without heavy impurities.
- Diffusion zone — can indicate water (zigzag edges).
- Outer ring — presence of fuel in the oil.

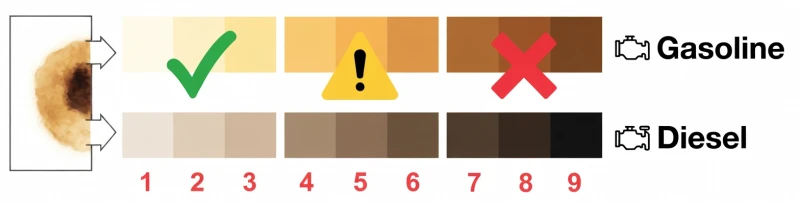
1 — Fresh oil, 2 — Slightly used oil, 3 — Used oil, 4 — Used oil with mechanical impurities, 5 — Used oil in satisfactory condition, 6 — Used oil in poor condition, 7 — Unusable oil, 8 — Oil from an overheated engine
Dispersant properties can be calculated with the formula: Ds = 1 — (d2/d3)². A value below 0.3 requires urgent replacement. Specialists recommend testing every 1,500–2,000 kilometres.
| Score (approx) | Condition Deciphering | Operation Recommendations |
|---|---|---|
| 1, 2, 3 (Good) | Core light or grey, edges smooth. No dirt or metal particles. | Operation permitted. |
| 4, 5, 6 (Average) | Core darkens, zone boundaries blur. Moderate wear products. | Permitted with periodic checks. |
| 7, 8, 9 (Bad) | Spot black, uniform, without clear zones. High impurity content. | Replacement needed. |
With LPG systems, oil may not turn black for a long time, but additives still wear out — follow the change schedule.
Improved Spot Test Method
Ready-made kits (e.g., MOTORcheckUP) provide special filter paper and reference scales.
In modern engines without dipsticks, rely on electronic sensors or visit a service centre.
Portable Pocket Oil Analyser
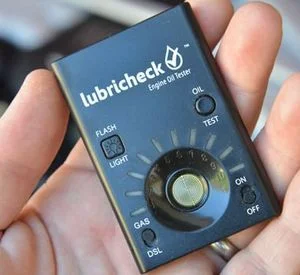
Portable analysers determine condition using algorithms, assessing soot, oxidation, water, or antifreeze.
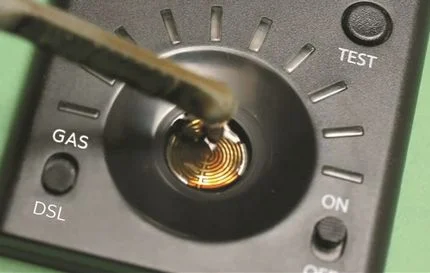
Devices like Lubricheck assess acid/base numbers and dielectric constant. Simple models show quality in points.
Was this article useful?
Your feedback helps us improve our content.


Discussion (0)
No comments yet!