Nissan Qashqai CVT Fluid Change
Warning: This guide is relevant for Nissan Qashqai J10 (2006–2013) with Jatco JF011E CVT. For the second generation (Qashqai J11, since 2013), different filters, gaskets, and fluid type (NS-3) are used, as it is equipped with Jatco JF016E CVT.
A photo report on the CVT fluid change for the Nissan Qashqai will help you handle this procedure yourself.
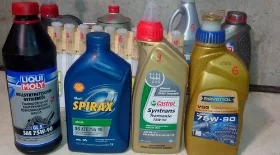
According to the maintenance schedule, the fluid change in the Qashqai J10 2.0 CVT should be performed every 60,000 km. However, considering severe driving conditions, it is better to do it every 30,000 km. For facelift models (Qashqai 1.6 CVT), this interval was extended to 90,000 km. Also, note that the CVT requires not ordinary ATF like an automatic gearbox, but NISSAN CVT Fluid NS-2 or NS-3 (KLE5300004) if you have the RE0F10E, JF016E/JF017E (CVT8) gearbox. A full change will require two 4-litre cans, although the gearbox holds 7.5 litres. If you don't remove the hoses from the radiator to drain from there, you'll need less. But if you are doing it, do it properly: flush the valve body (if the gearbox is jerking), clean the magnets and the sump.
Some might argue about the necessity, but to change or not is up to each owner. The fluid change procedure is not complicated, and as you can see from the slides, it can be done as a DIY job, although it is difficult to adhere to every single recommendation. Ideally, at a service centre, the Nissan Qashqai CVT fluid is changed with the removal of the sump and oil cooler radiator, cleaning of magnets, flushing of the metal filter, and at every third change, replacing the paper filter (fine filter located in the heat exchanger) and the metal filter (coarse mesh filter), followed by resetting the fluid deterioration data registered in the CVT ECU (oil pressure depends on this).
The procedure for changing the Nissan Qashqai CVT fluid requires the following tools and materials:
- Socket wrench or spanner (10mm and 19mm for the drain plug);
- Flathead screwdriver;
- Container for draining oil;
- Cleaner (brake/parts cleaner);
- Clean rags.
Naturally, you need to have:
- Fresh fluid (original code KLE5200004);
- Sump gasket (orig. no. 31397-1XF0C, also MITSUBISHI 2705A015);
- Sealing washer (no. NISSAN 11026-01M02);
- New paper filter cartridge for the heat exchanger (original NISSAN 31726-1XF00 or MITSUBISHI 2824A006), and if the CVT coarse filter is heavily clogged, you will need that too (orig. no. NISSAN 31728-1XZ0D or MITSUBISHI 2824A007);
- Oil cooler housing gasket (no. MITSUBISHI 2920A096);
- Funnel.
Once the Qashqai CVT fluid change procedure is complete, it is recommended to reset the fluid deterioration counter using a scanner.
When changing it yourself, regardless of the total 8-9 litres inside (FWD/AWD), only about 2/3 drains out, so a third of the old fluid mixes with the new, which naturally shortens its service life. That is why it is recommended to change the CVT fluid on the Nissan Qashqai more frequently than the official schedule suggests.
When changing the CVT fluid on a Qashqai, people also ask:
- How to check the CVT fluid level on a Nissan Qashqai?
- Power loss after CVT fluid change on Nissan Qashqai
- Do I need to change the CVT filter when changing the fluid?
- What happens if I use non-original fluid in the CVT?
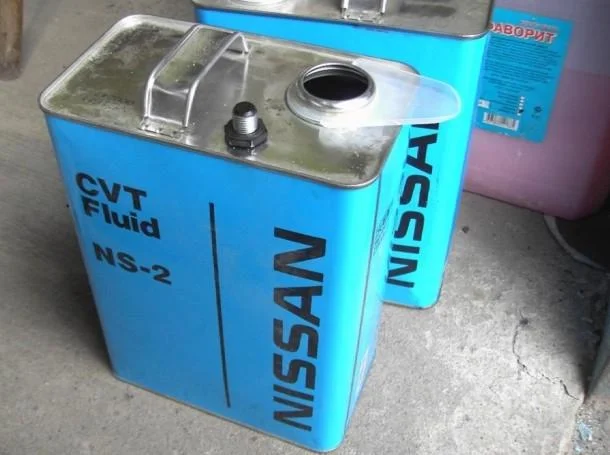
To change the oil in the CVT, you will need NISSAN CVT Fluid NS-2, original code KLE52-00004. You will need to purchase 2 cans of 4 litres each.
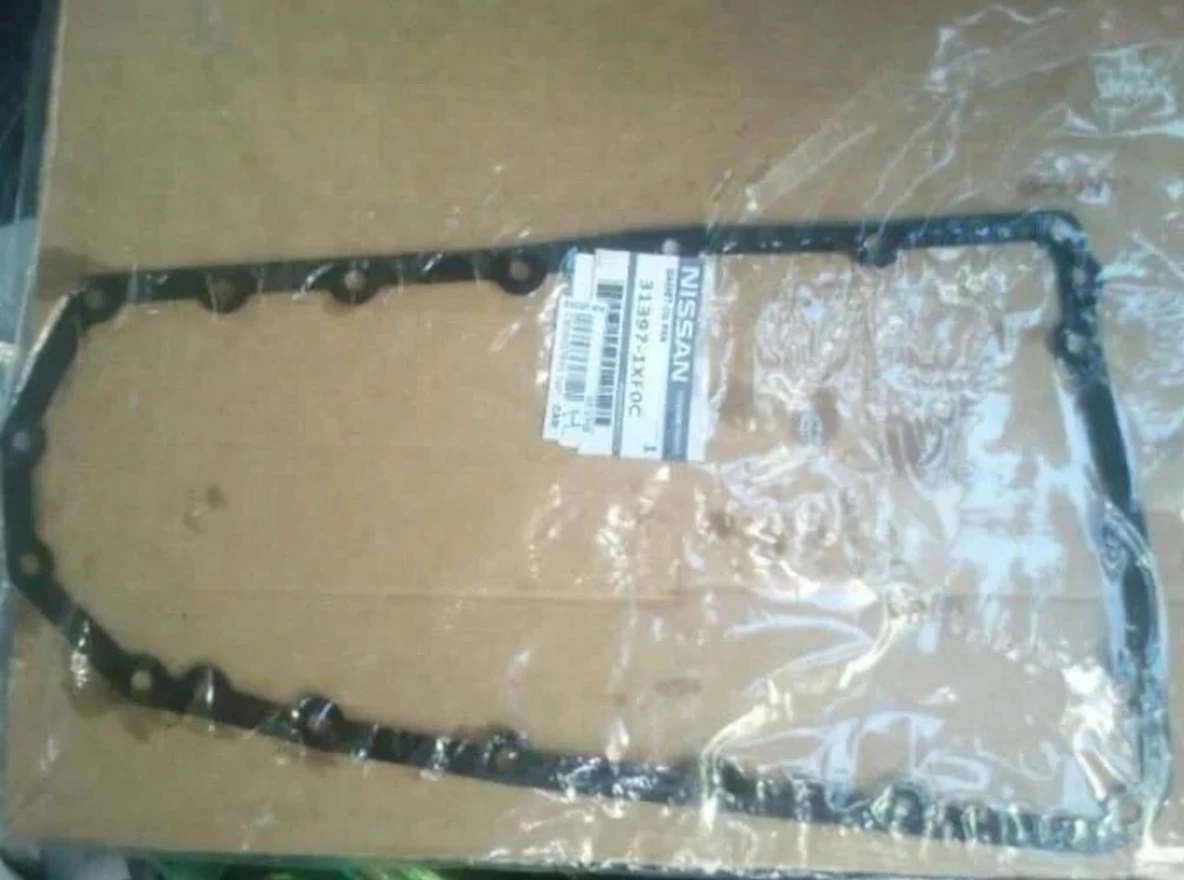
Since it is recommended to change the CVT fluid not only by removing the sump and cleaning the magnets but also by changing the filter, it is advisable to purchase a new CVT sump gasket NISSAN GASKET OIL-PAN with the original number 31397-1XF0C, as well as a few other small items...
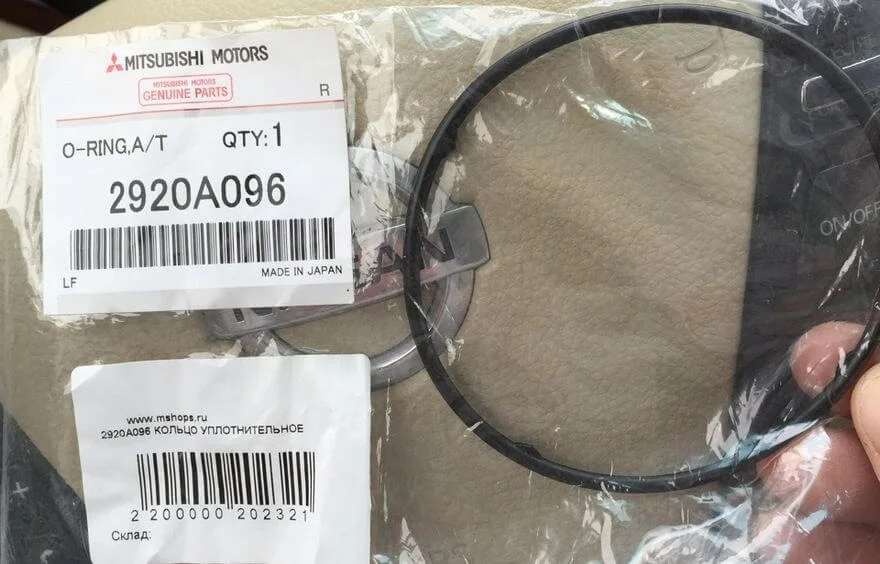
O-ring for the oil filter in the cooler.

Nissan 11026-01M02 (or updated part 11026-JA00A) — copper crush washer for the oil pan drain plug. Fits most Nissan models with Jatco CVT.
Mitsubishi 2824A006 — CVT oil cooler filter. It is recommended to replace the O-ring 2920A096 along with it.
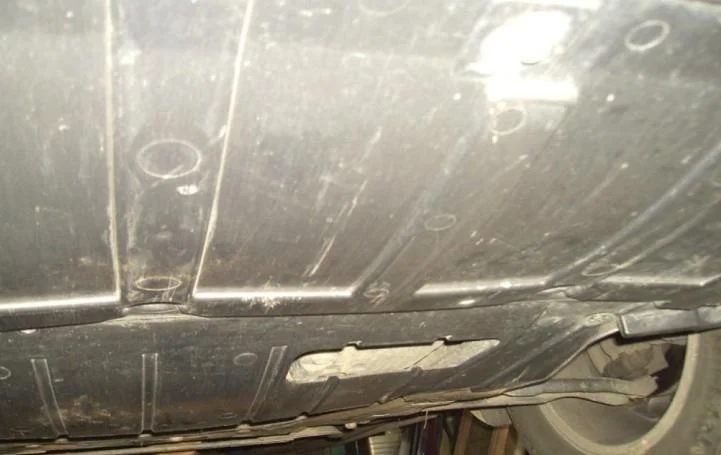
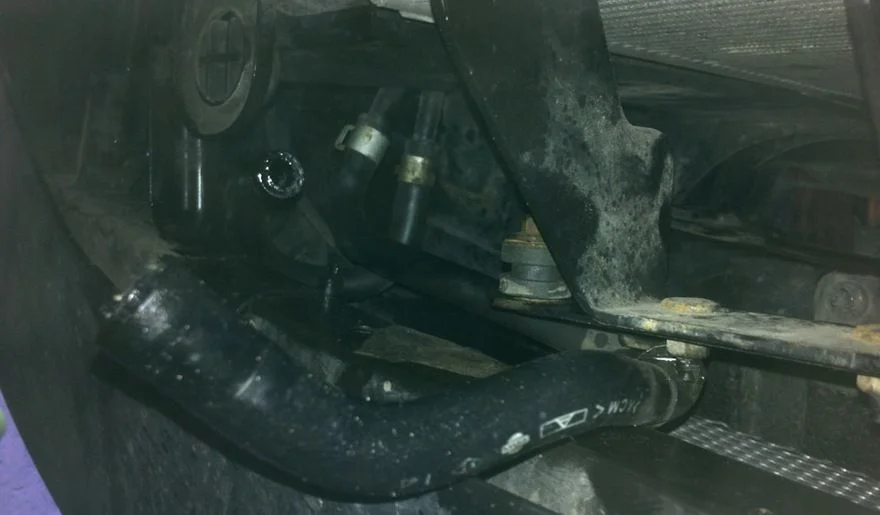
Before changing the CVT fluid, remove the engine/gearbox undertray according to the manufacturer's instructions or remove the rear part of the factory shield. Perform the removal over a pit, on a ramp, or a lift.
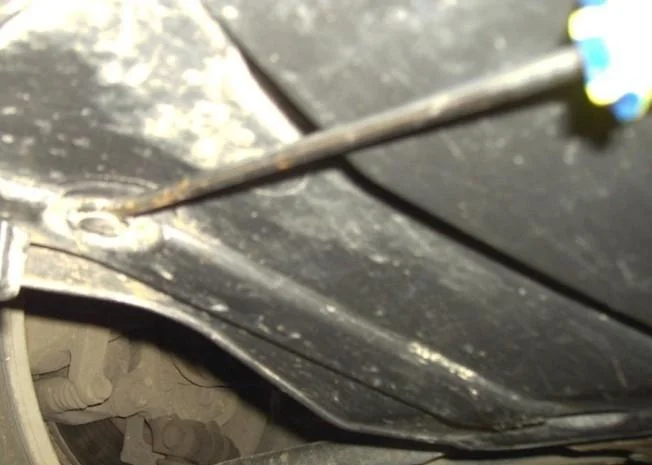
To do this, unscrew the 2 bolts (10mm) on the sides attaching to the front part of the subframe and remove 4 clips from the side parts and 1 clip from the front part of the subframe.
To remove the clips, pry the central part of the clip and pull it down by about 8 mm. After that, the clip can be easily removed from the hole.
It is convenient to unscrew the bolts with a socket, as they are recessed into the shield. However, you can manage with a regular open-ended spanner.

When access to the engine compartment is open, you can proceed to the fluid change procedure itself.
The CVT fluid change must be performed with the engine and gearbox warmed up. Before starting to drain the oil, remove the CVT dipstick and check the level.
To remove the dipstick from its tube, use a flathead screwdriver to press the locking tab and pull the dipstick upwards.
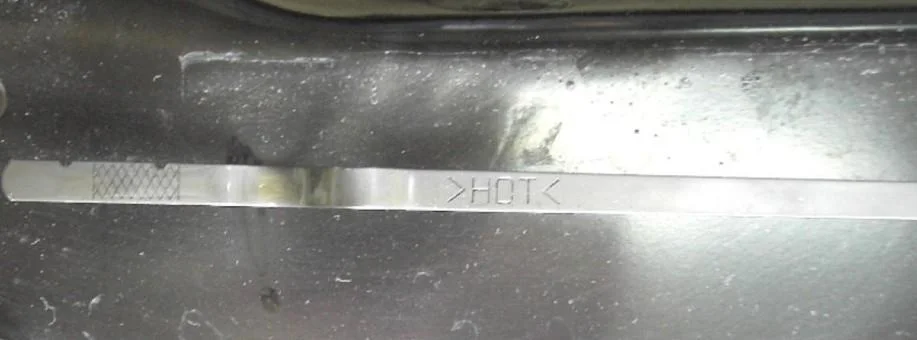
On a warmed-up gearbox, the oil level will be above the hash marks on the dipstick and towards the >HOT< inscription.
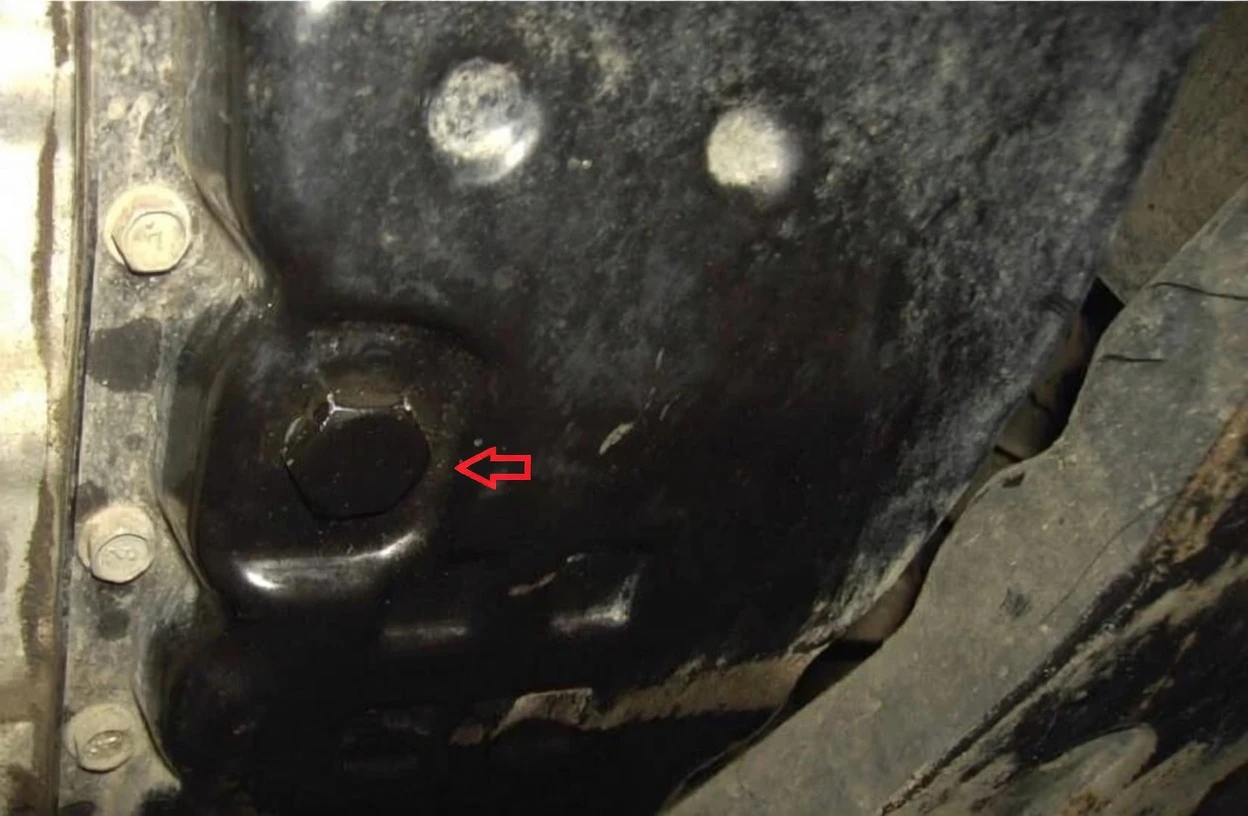
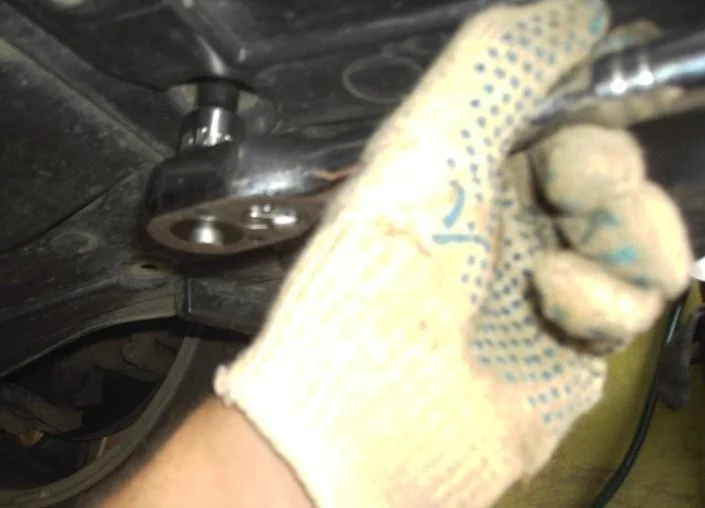
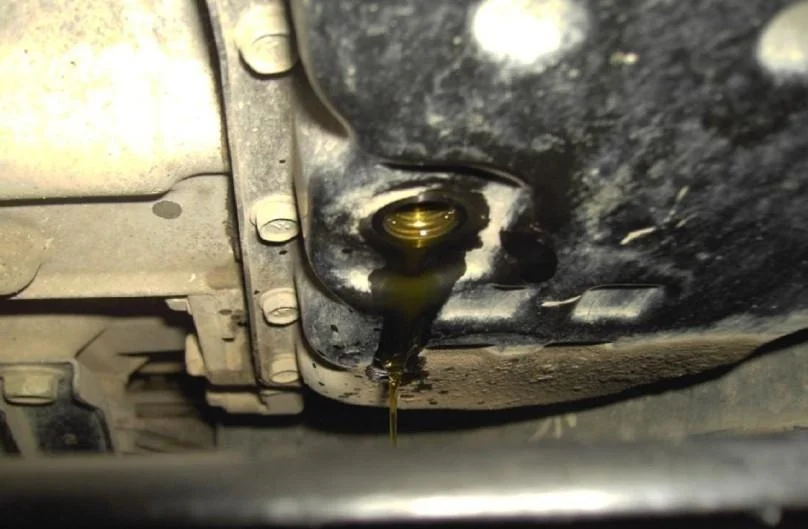
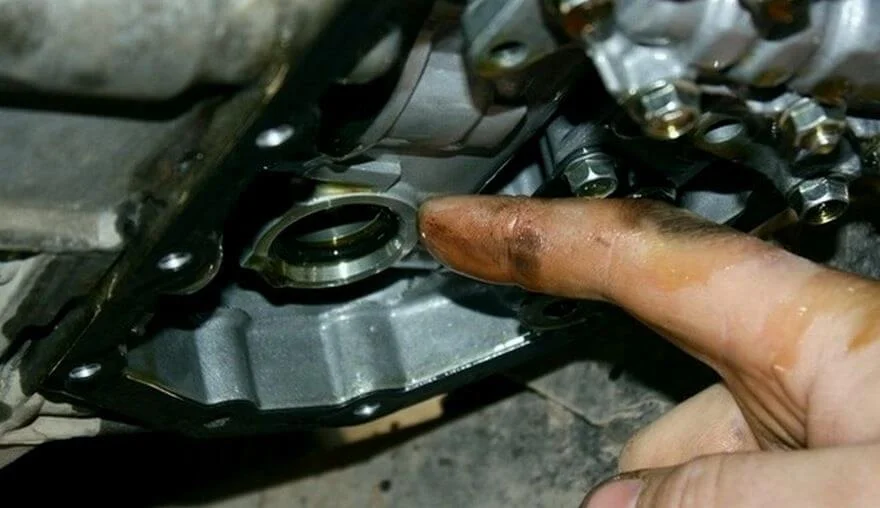
Next, place a container to catch the old oil under the CVT drain plug, located on the gearbox sump.
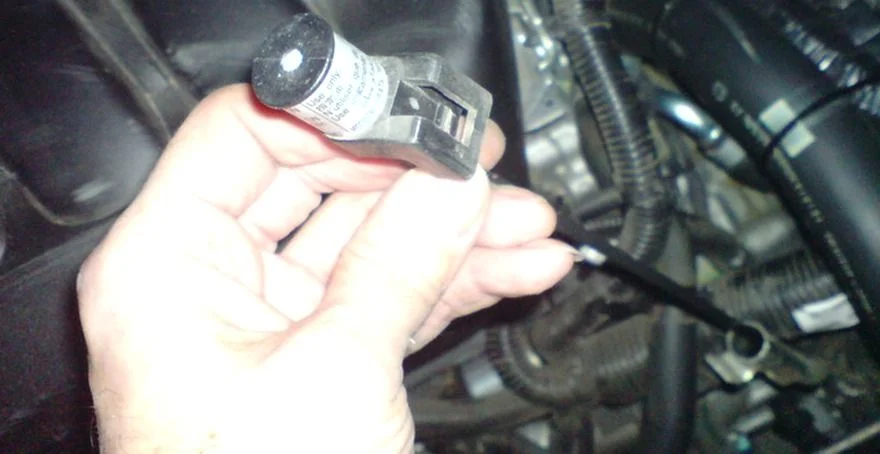
The Qashqai CVT sump drain plug is unscrewed with a 19mm spanner. By the way, when screwing it back in, it is recommended to tighten it with a torque wrench to 35 Nm. Since there is a copper sealing washer underneath and the threads are delicate, you could strip them, and then you'd have to run for a new bolt (no. 3137731X06).
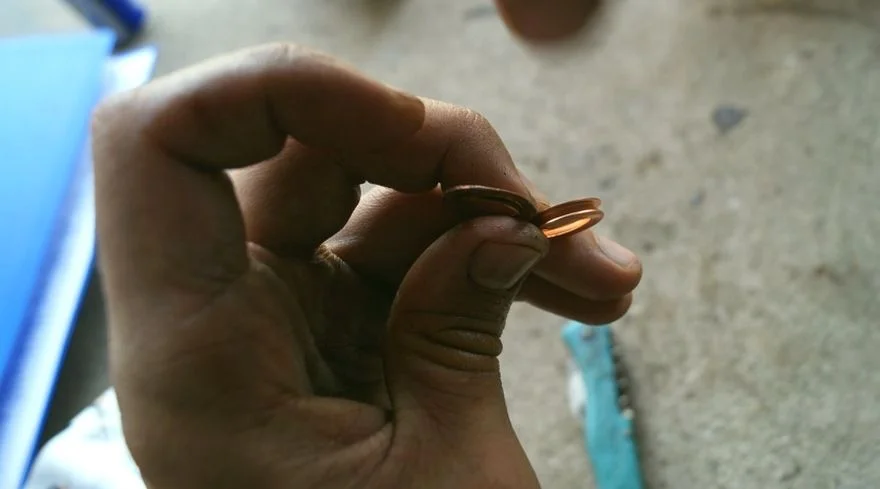
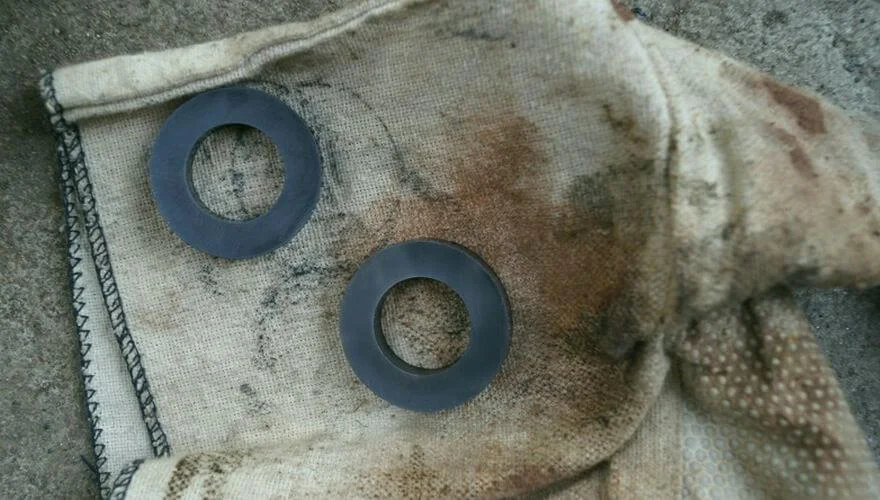
Old and new washers for the drain bolt. Must be replaced at every fluid change.
Remember, it is better to know how much oil has drained from the gearbox to make refilling easier. Draining oil from the box can take up to 20-25 minutes.
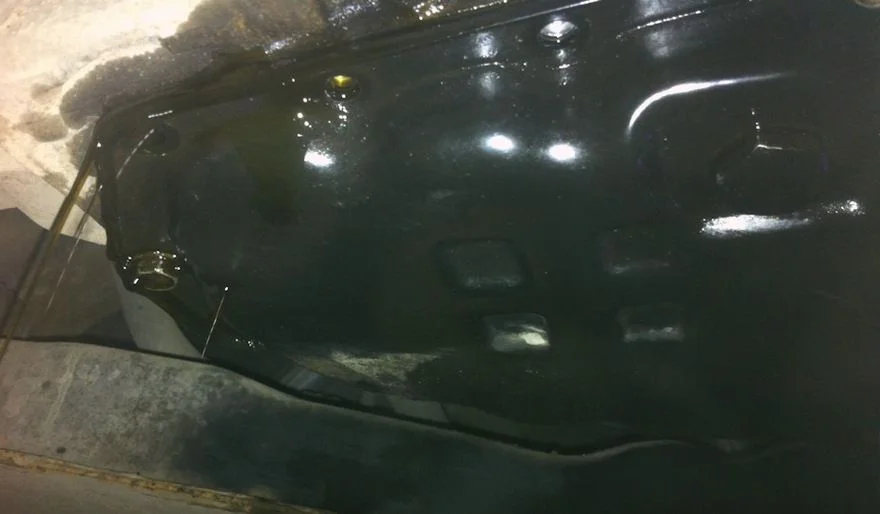
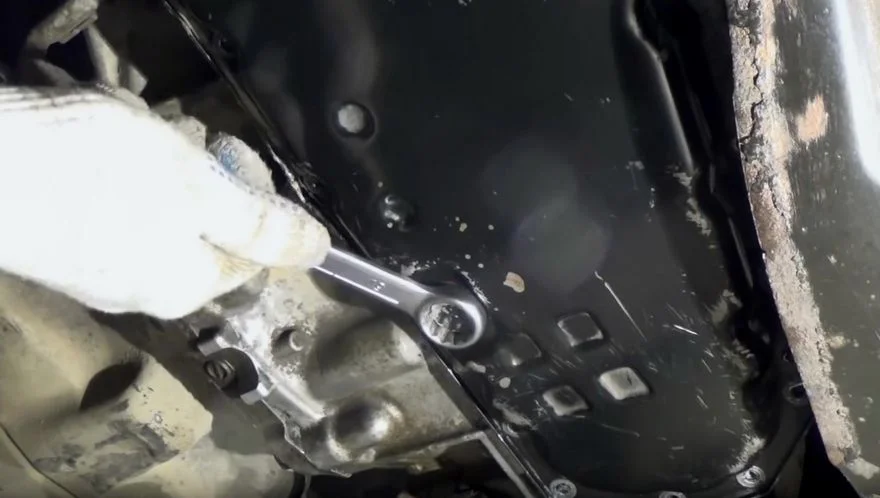
Once it stops dripping from the drain hole, you can unscrew the sump itself. Unscrew the securing bolts, all 18 of them, with a 10mm socket. Be careful when removing it, as there will still be oil inside (due to the design), so it's better to loosen them and leave a few bolts on one side so that the fluid doesn't gush out all at once.
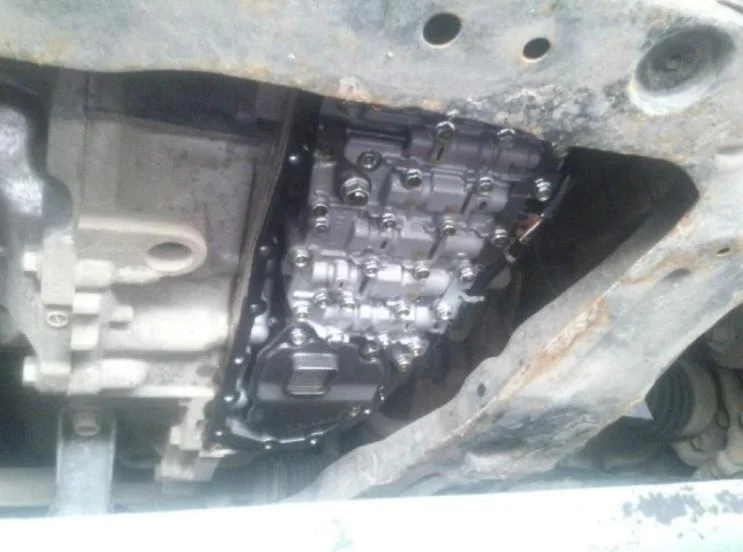
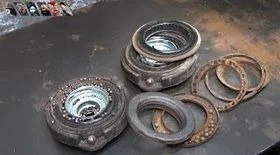
This is what the Qashqai CVT looks like with the sump removed. The view reveals the valve body and the coarse filter inside it, which must be cleaned of metal shavings. If it is heavily soiled, it is better to replace it entirely, as the CVT, more than any other gearbox, is VERY sensitive to swarf. Therefore, we will proceed to remove that mesh filter...
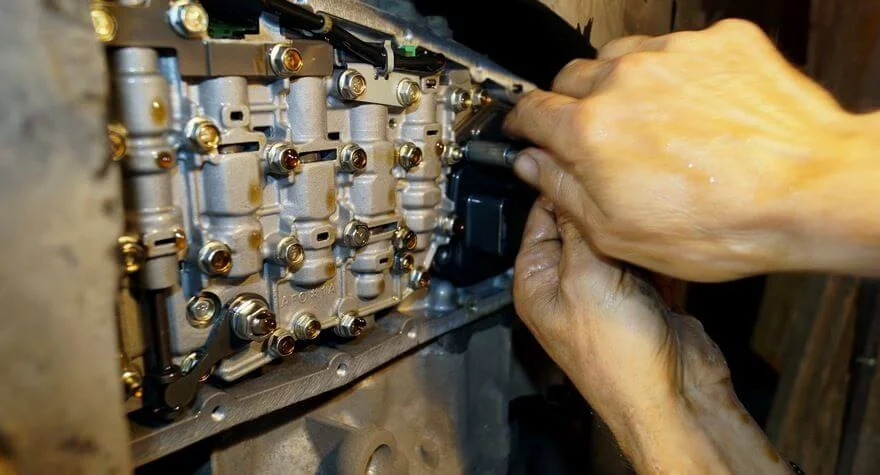
The filter is also unscrewed with a 10mm socket.
In this slide, you can see all the dirt and swarf that settled on the mesh and did not get into the valve body solenoids.
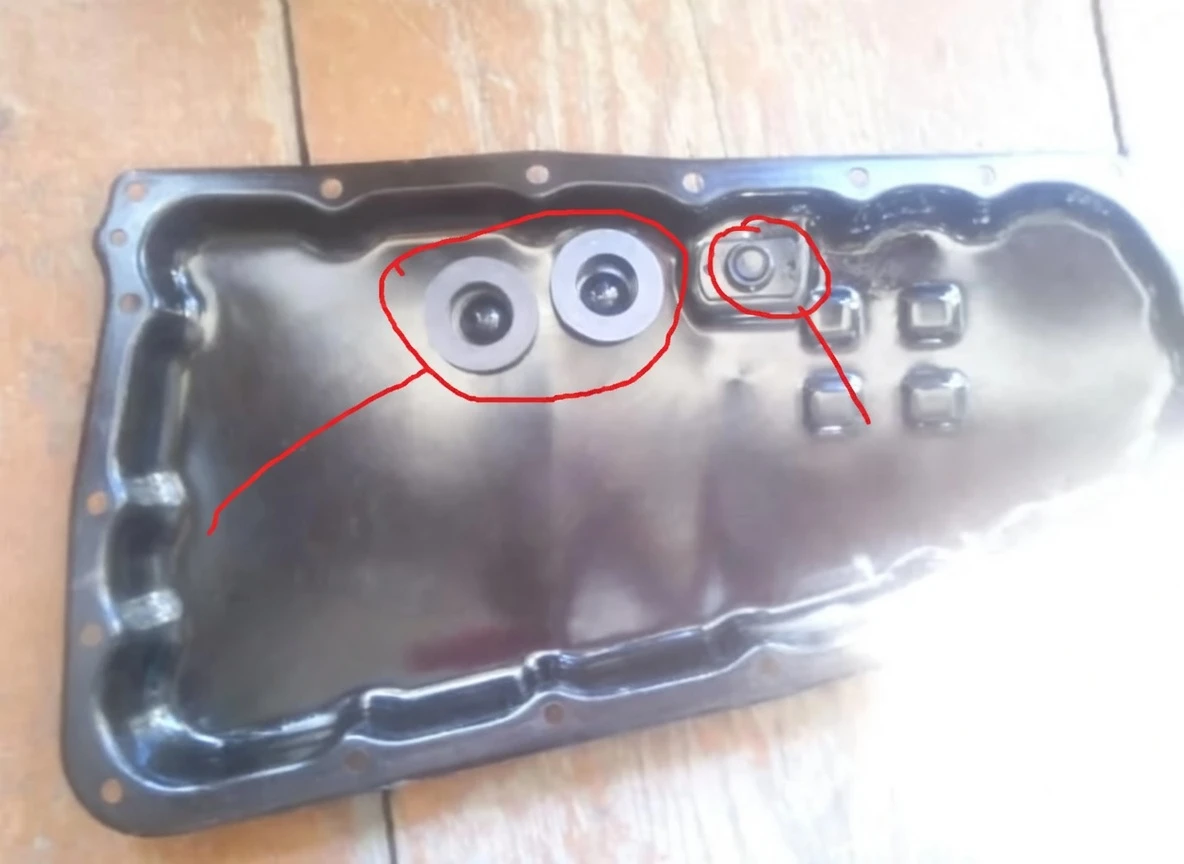
There are 2 magnets located on the sump. All deposits must be removed from them, and the sump wiped clean with a lint-free cloth so that no debris gets into the CVT. This is important!

This is what the magnets look like before cleaning off the swarf.
And this is after cleaning...
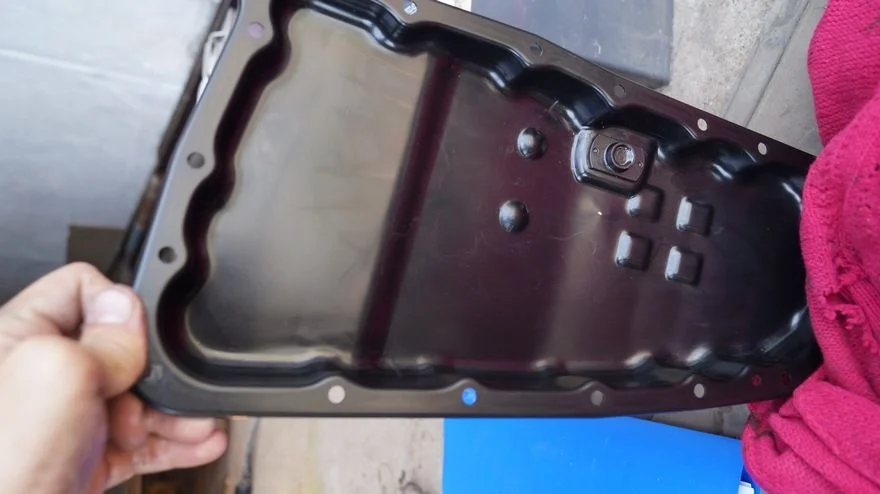
We clean the sump just as thoroughly.
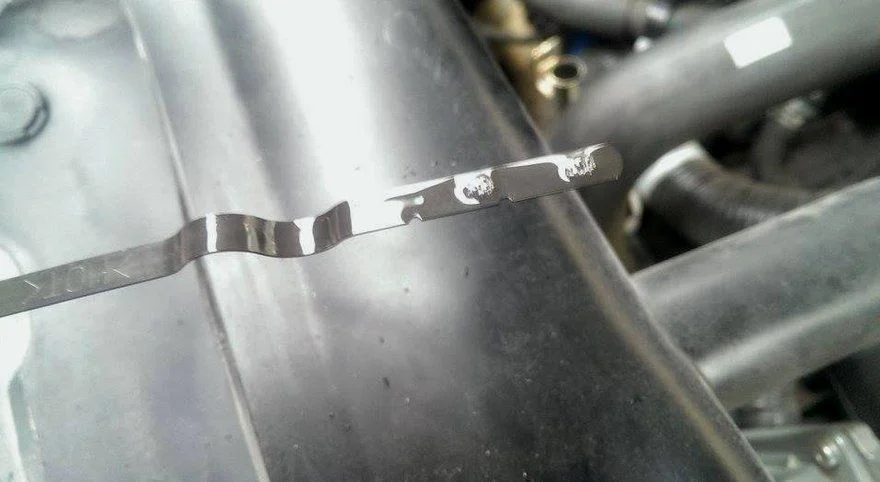
When reinstalling the old or new coarse filter, do not lose this O-ring; many forget about it, and then the filter does not sit tightly, letting dirt pass through. Next, after bolting the sump back on, we need to get to the fine filter...
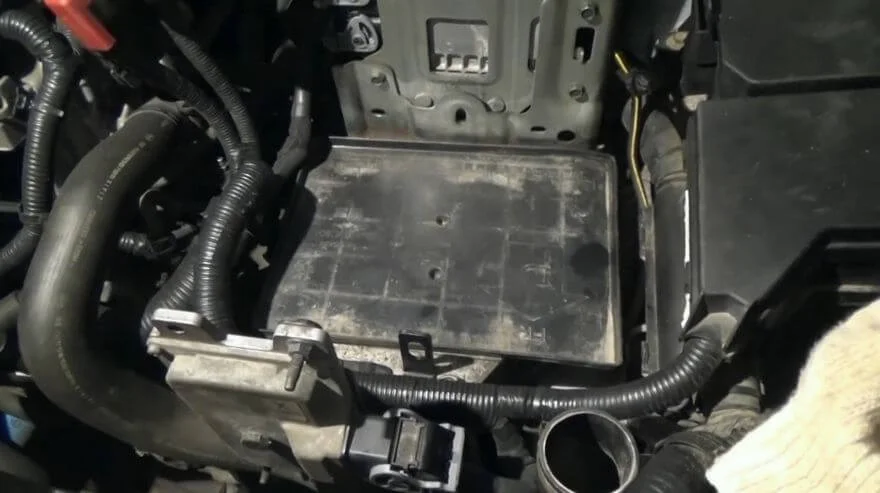
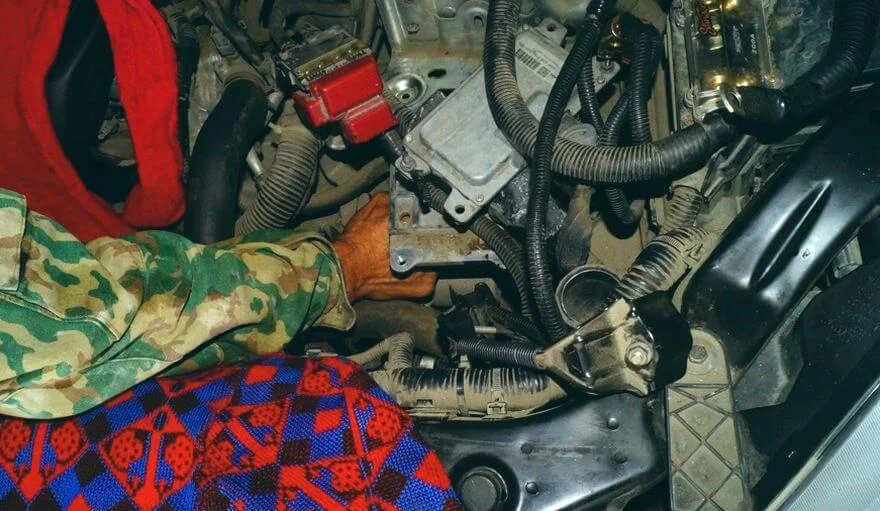
To get the filter out of the heat exchanger involves some tricky work; you will need to remove the air duct, the battery, and unscrew and set aside the ECU.
You are unlikely to be able to remove the battery tray, which will be in the way, but in principle, you can manage without doing so; you can reach it with your hand. If necessary, you can remove the wheel and bend back the wheel arch liner to unscrew it from below, but I don't think it will come to that.

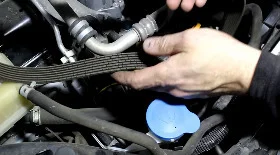
By the way, be careful not to mix up the hoses if you disconnect them... otherwise, instead of CVT fluid, you might start draining coolant.
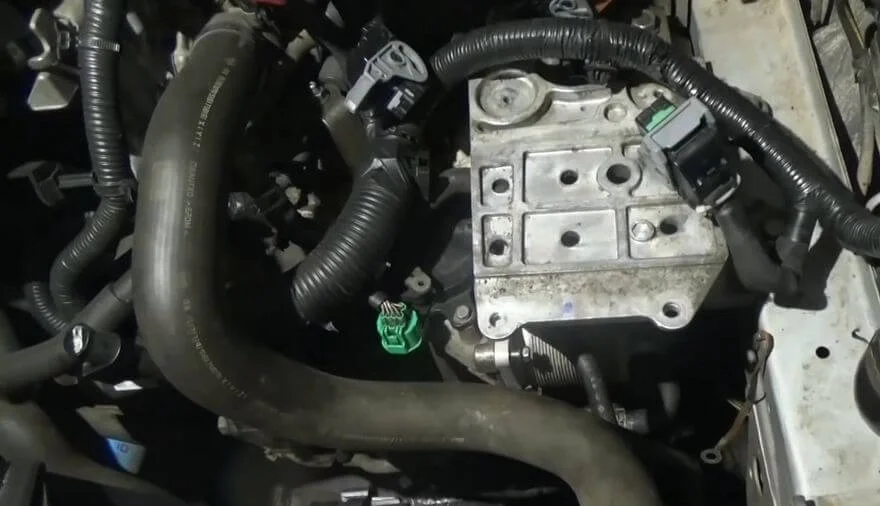
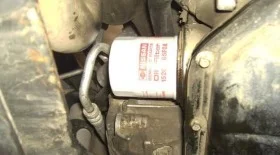
Unscrew the oil cooler to remove the fine filter. There are 4 bolts requiring a 10mm spanner.
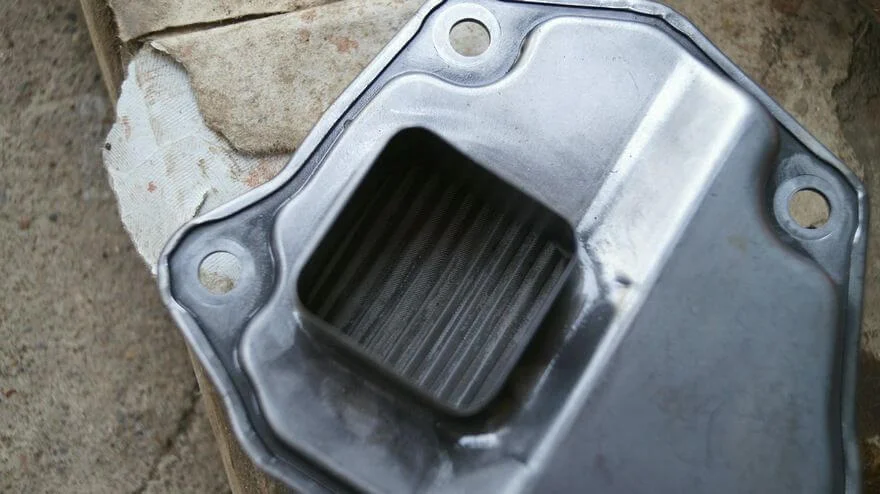
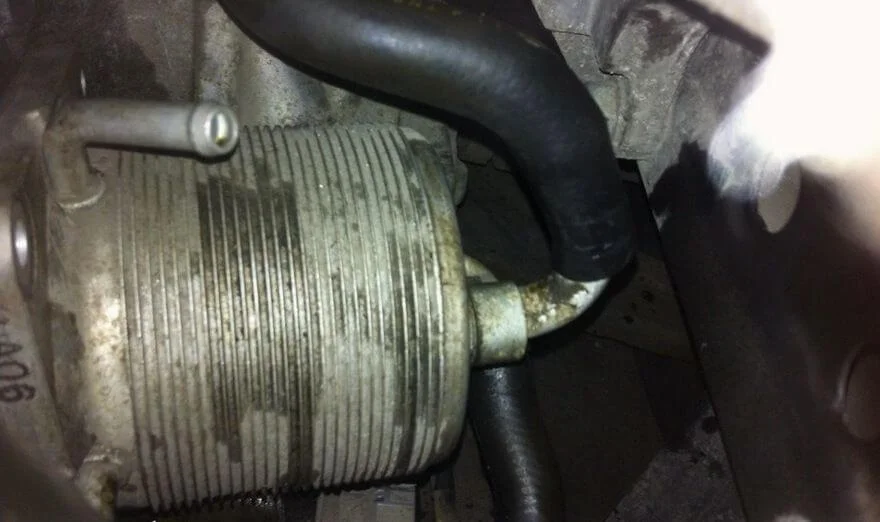
Finally, the filter can be removed from the heat exchanger (Mitsubishi cooler shown as an example):
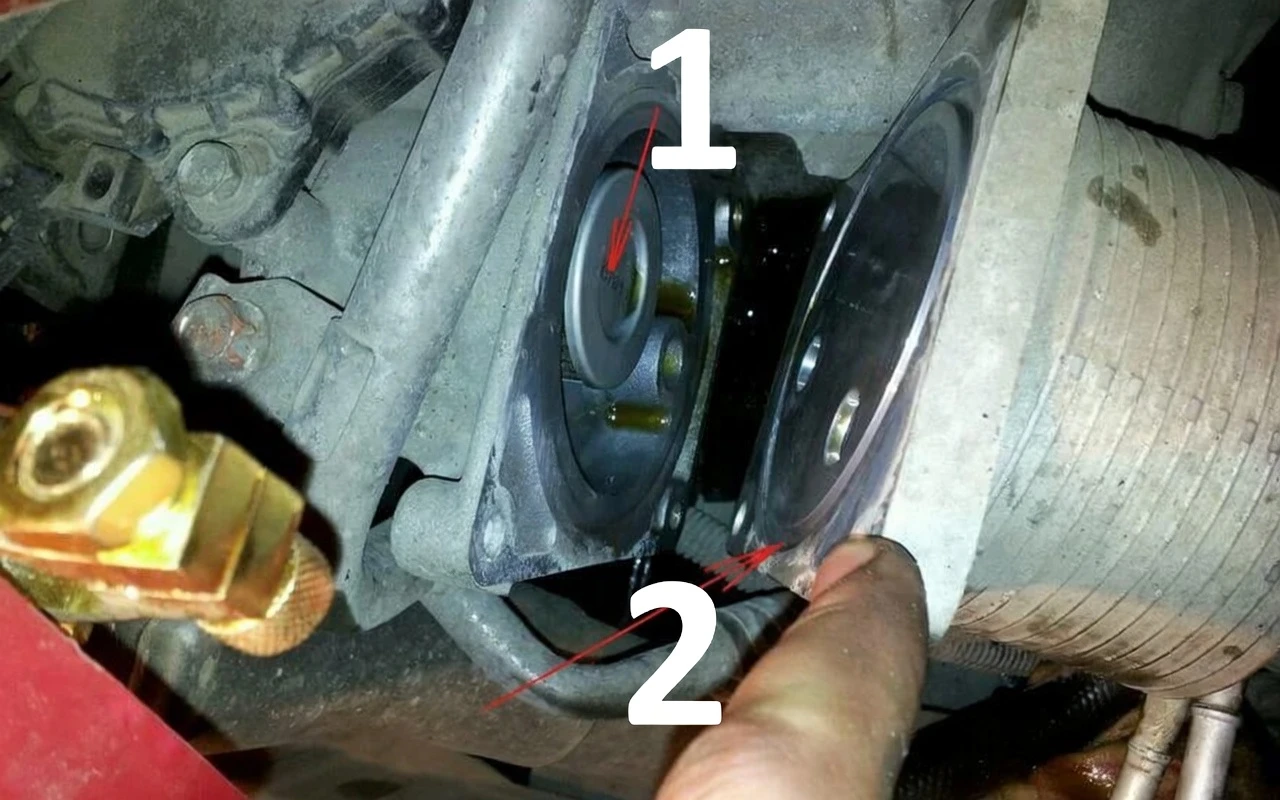
- 1 — External fine filter. Corresponds to the Mitsubishi 2824A006 part mentioned earlier.
- 2 — Groove for the O-ring 2920A096. It must be replaced with a new one when installing the filter.
Also, make sure there is a rubber seal on the filter cartridge itself. Often it stays inside the heat exchanger housing, which prevents the new filter from fitting properly.
Remove the old one and replace it with the new Qashqai CVT fine oil filter.
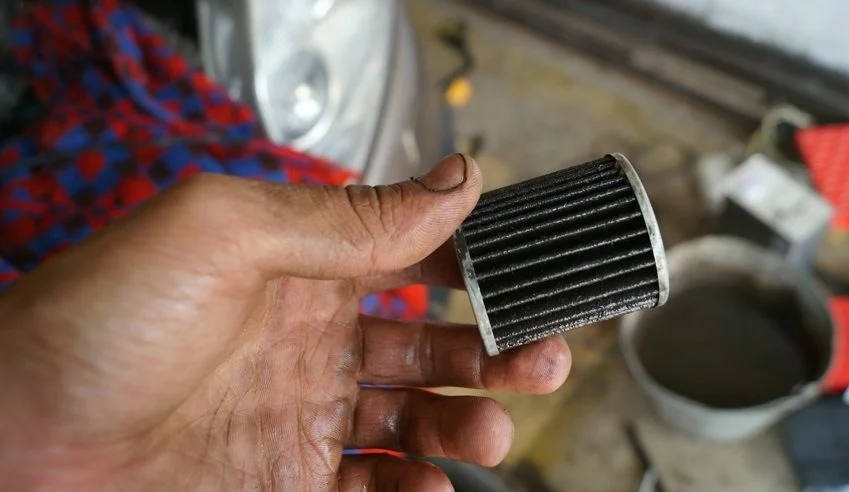
This is what the old fine filter looks like.
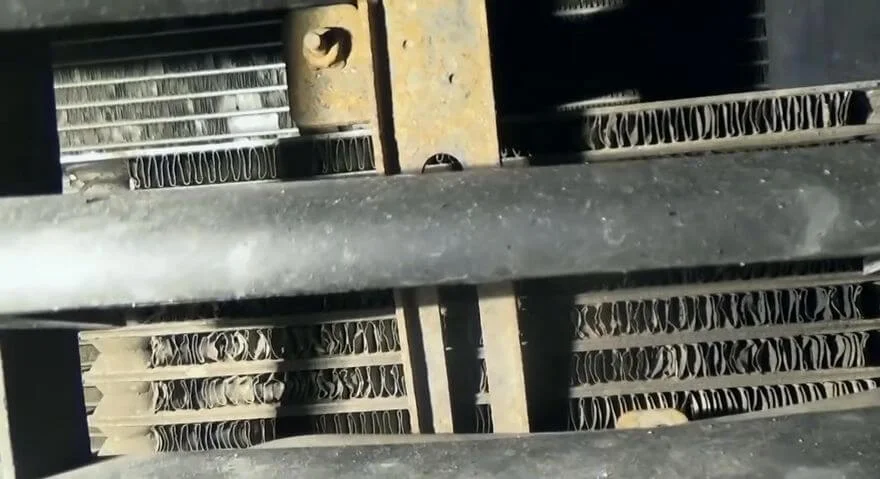
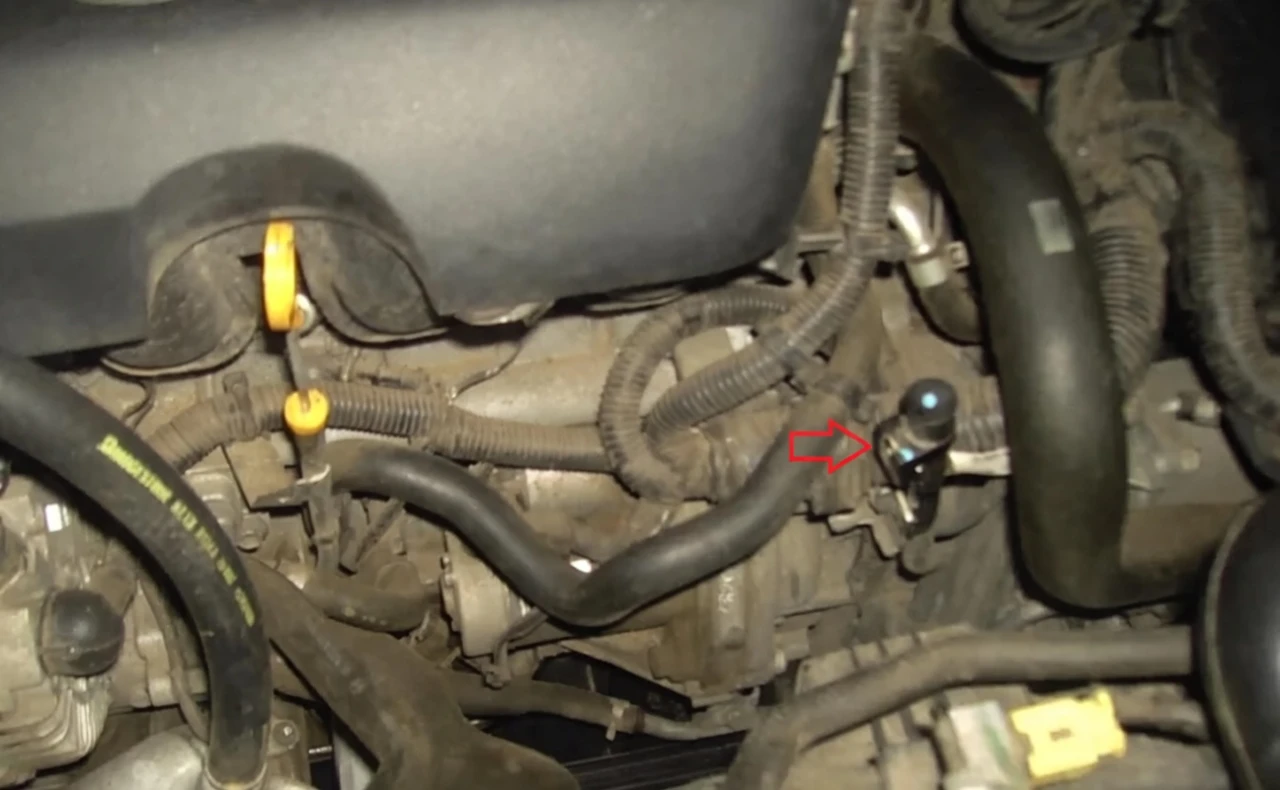
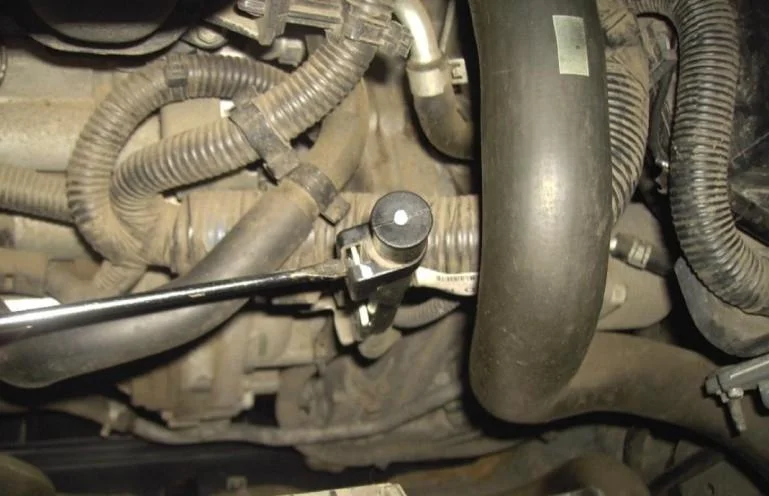
To drain the old CVT fluid as much as possible, it is recommended to drain it from the cooling radiator as well, located at the bottom, in front of the main engine cooling radiator.
To do this, remove the pipes from the radiator and drain a bit more fluid; in some cases, the radiator is even flushed.
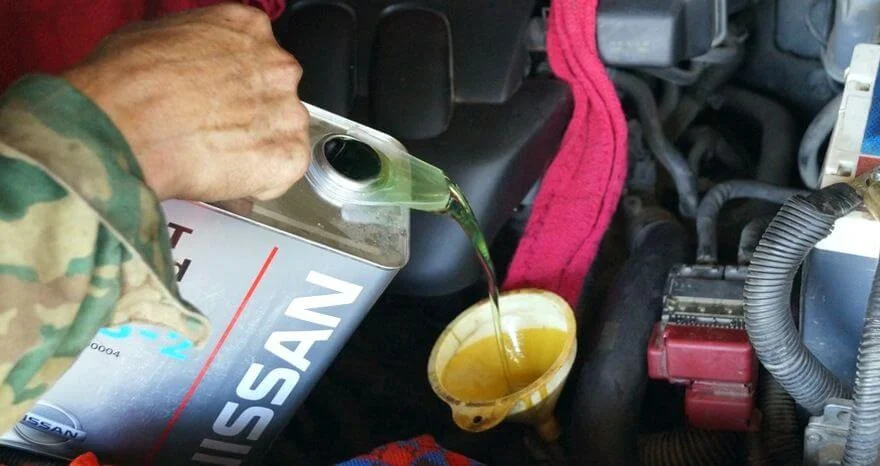
It remains to pour the new oil into the CVT, for which you need to know the amount drained; it usually comes to about 7 to 7.5 litres, depending on how thoroughly you drained it. After filling, you need to check the level via the dipstick. There are nuances here. The procedure is almost complete!
Insert the dipstick to check the level (rotate it to the side so it doesn't catch on the latch). Immediately after filling, the level might be slightly above the "HOT" mark...
...But if you cycle the gear lever through the gears (holding in each position for 10 seconds), it will drop to "COLD" (preferably the level should not be lower than the upper mark). However, since the level must be measured on a warmed-up engine, warm up the engine before the control measurement (note that the gearbox warms up slower). Checking is done at 70-80 degrees Celsius. As it warms up, the oil level will rise, and on a fully warmed-up CVT, it should be closer to the upper mark of the "HOT" range. If yours is not like that, you should top it up a little. But the main thing is NOT to overfill!

For the correct operation of the oil pressure pump, it is necessary to reset the fluid deterioration counter! Since its performance is set by the ECU and changes as the oil wears. Therefore, if you do not have your own NISSAN CONSULT III or Launch X431 Diagun scanner, you will still have to visit a service centre.
Was this guide useful?
Your feedback helps us improve our content.
Related Materials
Discussion (0)
No comments yet!