How to check for parasitic battery drain in a car?

Checking for current leakage (parasitic drain) is necessary if the battery goes flat quickly, even when the car is parked. Even owners of new cars are not immune to the engine failing to start one morning if they do not monitor the condition of the wiring and additional equipment.
Most often, the problem arises in used cars. Climate and road conditions lead to cracking of wire insulation and oxidation of contacts. Incorrectly installed stereos and alarm systems are also frequent culprits.
For the check, you will need a standard multimeter. The task is to identify, by process of elimination, the circuit or specific device that is draining the battery in a resting state (with the ignition off).
Leaks in the car's electrical network lead to rapid battery discharge, plate sulphation, and in extreme cases — short circuits and fire.
Normal current leakage range
In passenger cars, a current leakage of up to 40 mA can be considered normal. This figure applies to stock electronics (ECU, clock, factory alarm). When additional devices are fitted, the permissible current leakage increases. Most often, consumption is increased by aftermarket head units, amplifiers, and satellite alarm systems.
If you find that the readings are above the permissible norm (for example, more than 80-100 mA), it is necessary to find the specific circuit where the energy loss is occurring.
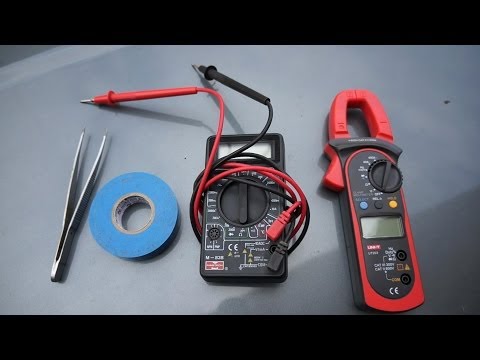
Tools for checking current leakage
Finding a parasitic drain does not require complex equipment. A multimeter capable of measuring DC current up to 10 A is sufficient. It is also convenient to use a current clamp with DC measurement capability.
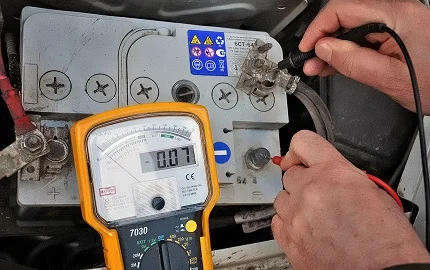
Current measurement mode on a multimeter
Before starting the search, be sure to switch off the ignition, remove the key from the lock, close all doors and the boot (or manually latch the locks with the doors open so the interior light goes out). If there is an alarm system, measurements are taken in 'armed' mode.
When using a multimeter, move the red probe to the '10ADC' or '10A' socket. Break the negative terminal circuit: remove the wire from the negative battery post, touch one probe to the battery terminal itself, and the other to the removed wire clamp. The current will flow through the device.
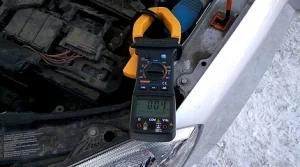
Checking leakage with a current clamp
Current clamps are easier to use, as they allow you to measure current without removing terminals or breaking the circuit. It is important to use a clamp that can measure DC current, and press the Zero button before measuring. Clamp around the main negative or positive wire and check the readings.
Causes of current leakage
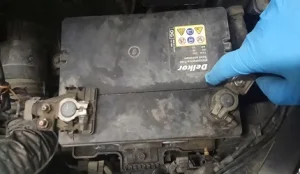
A dirty battery case contributes to self-discharge
There are several main reasons. One common one is a dirty battery. A mixture of dust, moisture, and electrolyte vapours on the battery lid becomes conductive. This leads to accelerated self-discharge of the battery. However, the most significant leaks (draining the battery overnight) are usually associated with incorrectly connected devices or wiring faults.
Main causes of current leakage in a car:
Contact oxidation is a common problem
- incorrect connection of the stereo (power is supplied constantly, not via the ignition switch);
- errors when installing an alarm or dashcam;
- oxidation of contacts creating parasitic resistance;
- frayed wire insulation touching the bodywork ('earthing');
- stuck relays (e.g., heated windows or seats);
- faulty door or boot switches (boot light stays on when the lid is closed);
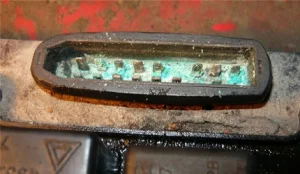
- alternator fault (diode bridge failure).
How to locate the leak
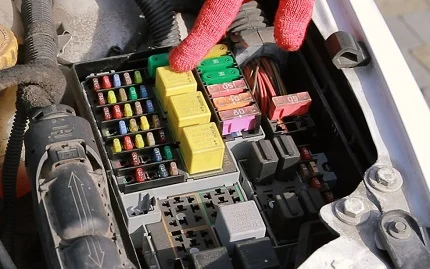
Finding the problematic circuit by removing fuses
The most reliable method is the process of elimination via the fuse box.
- Switch off the engine, turn off all devices. Open the bonnet and latch the bonnet switch (so the alarm thinks it is closed).
- Set the multimeter to current measurement mode (10A).
- Remove the negative terminal from the battery.
- Connect one multimeter probe to the negative battery post, and the other to the removed clamp.
- Wait a few minutes for the electronics to enter 'sleep mode'.
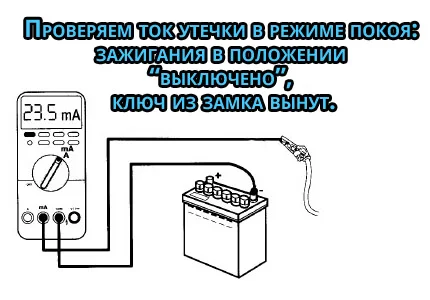
- Watch the readings. If the current is above normal (e.g., more than 0.05 A), start pulling fuses and relays from the mounting block one by one.
When you pull the fuse of the problematic circuit, the multimeter readings will drop sharply to normal. This means the culprit 'sits' on this specific line. It remains to check the consumers powered via this fuse.
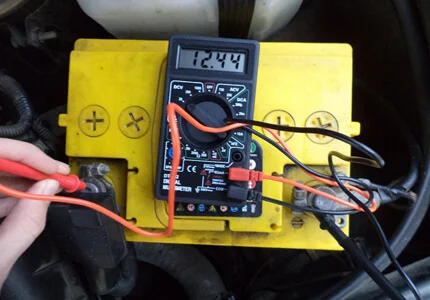
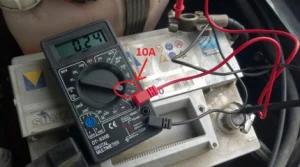
Measuring current in the negative terminal break
Multimeter connection diagram
The video below demonstrates the process of finding a leak using a multimeter and a current clamp.
Finding current leakage. Example
Checking the battery for self-discharge (dirt on the casing)
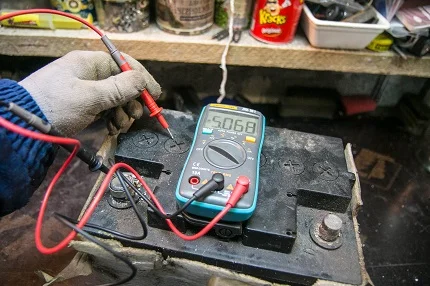
Checking voltage on the battery casing
Dirt on the battery casing can conduct current between the terminals, increasing self-discharge.
To check this, switch the multimeter to voltage measurement mode (20V). Press one probe to the 'positive' terminal, and swipe the other along the dirty surface of the battery top cover towards the negative side. If the device shows voltage (even a small amount), it means leakage current is flowing through the dirt. The currents here are small (usually milliamperes), but they constantly drain the battery.
The solution is simple: clean the battery case with a cloth soaked in a baking soda solution (it neutralises the electrolyte), and then wipe dry.
How to check the alternator for current leakage
If removing fuses did not help, the cause may be in the alternator (often one of the rectifier diodes blows). In this case, current drains through the alternator even when the engine is off.
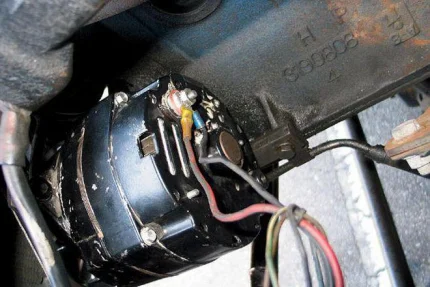
Disconnecting the alternator power cable for testing
For diagnostics:
- Connect the multimeter in the negative battery terminal break (as described above) and note the high leakage current.
- Disconnect the thick power wire (usually red, secured by a nut) from the alternator terminal. Be careful, this wire comes directly from the battery; do not short it to the bodywork! It is better to disconnect the battery power beforehand.
- If the leakage current on the multimeter drops to normal after disconnecting the alternator — the alternator diode bridge is at fault. It needs to be repaired or replaced.
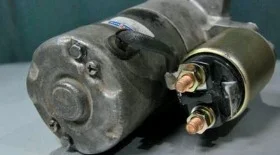
Current leakage at the starter motor
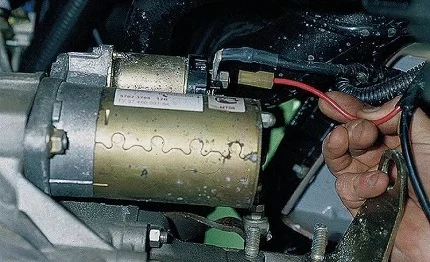
Checking the starter for leakage by disconnecting the power cable
The starter motor is rarely the cause of discharge, but it cannot be ruled out. Leakage can occur due to sticking contacts in the solenoid or a short circuit within the windings.
The check is carried out similarly to the alternator: with the multimeter connected (in ammeter mode), unscrew the power cable from the starter solenoid. If the leakage current readings return to normal — the problem is in the starter.

Checking the starter for current leakage
Thus, by sequentially disconnecting consumers and power units, you are guaranteed to find the culprit behind the discharged battery.
Was this article useful?
Your feedback helps us improve our content.
Related Materials


Discussion (0)
No comments yet!