Nissan Qashqai Engine Oil Change
It is difficult to find a definitive answer to the question "How often should I change the oil in a Qashqai engine?". The maintenance schedule for this model recommends a replacement interval every 15,000 km, but under heavy driving conditions, this should be done twice as often — every 7,000–8,000 km. Nevertheless, most drivers use their own judgement when deciding on this matter.
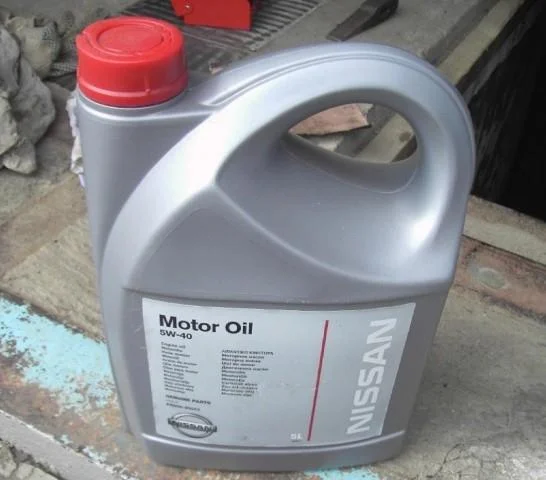
It is recommended to fill with NISSAN 5W40 synthetic motor oil, part number KE900-90042. It is typically sold in 5-litre canisters.
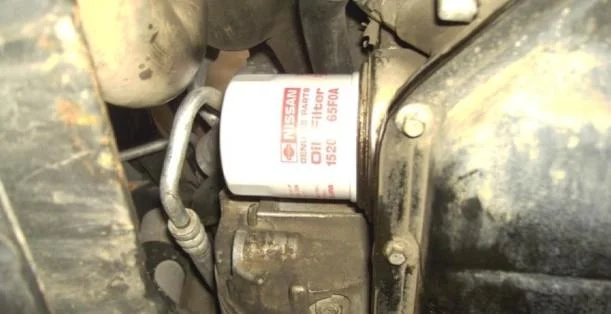
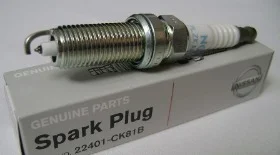
Additionally, the oil is always changed together with the oil filter. The Nissan oil filter part number is 15208-9F600 or 15208-65F0A.
The drain plug washer must also be replaced; it can be found in the catalogue under article number 11026-01M02.
This photo guide on changing engine oil yourself will be useful for anyone wishing to service their car independently.
To change the oil, you will need:
First — NISSAN Motor Oil 5W-40, one 5-litre canister.
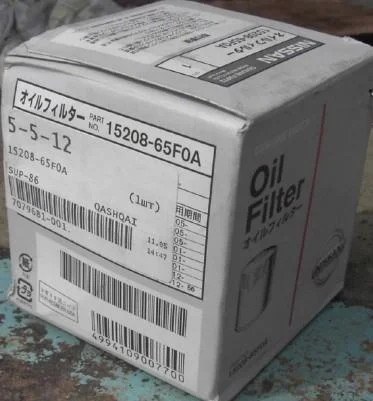
Second — NISSAN Oil Filter, original code 15208-9F6OO (manufactured in the UK) or 15208-65F0A (manufactured in Japan).

Third — Drain plug washer (NISSAN Plate Lock-Kit), original code 11026-01M02.
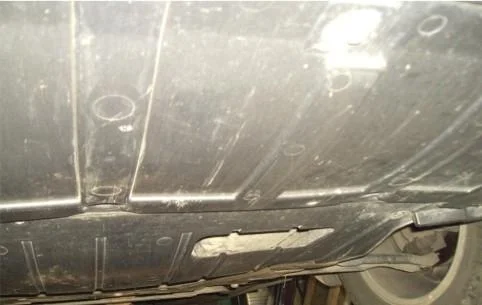
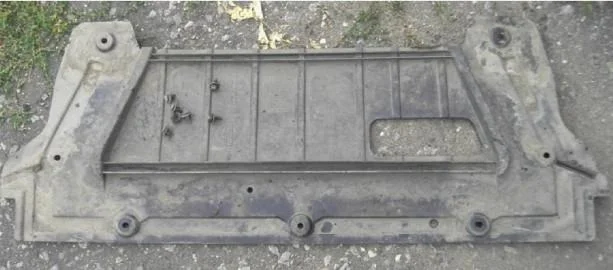
To begin, you must remove the sump guard or gearbox protection according to the manufacturer's instructions, or remove the rear part of the factory undertray. Dismantling is best performed over an inspection pit, on a ramp, or using a vehicle lift.
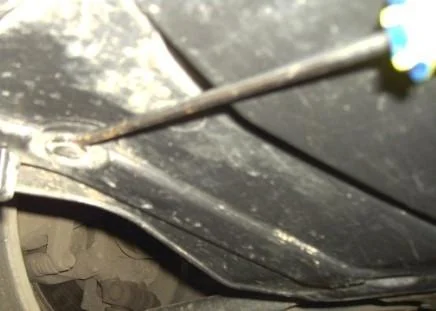
Unscrew the two 10mm bolts on the sides attaching it to the front of the subframe, remove the 4 clips from the sides and 1 clip from the front of the subframe.
It is most convenient to proceed in this order. To remove the clips, pry the central part of the clip and pull it down by approximately 8 mm. You can then easily remove the clip from the hole.
The bolts are best unscrewed using a socket, as they are recessed into the shield. However, you can manage without one and use a standard open-ended spanner.
Having gained access to the engine compartment, proceed to the oil change procedure itself.
Perform the oil change on a fully warmed-up engine. To do this, start the engine and wait until the temperature reaches operating level or the cooling fan switches on.
In a hot state, the oil becomes thinner, which allows the maximum volume to drain in a shorter period of time.
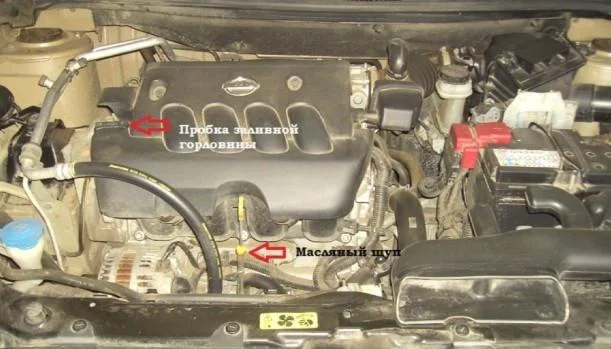
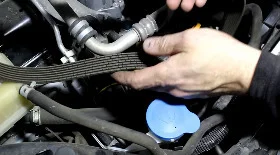
Unscrew the filler cap on the engine from inside the bonnet.
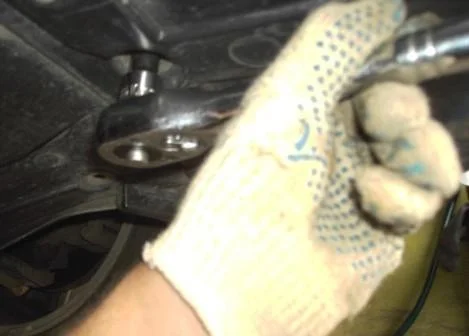
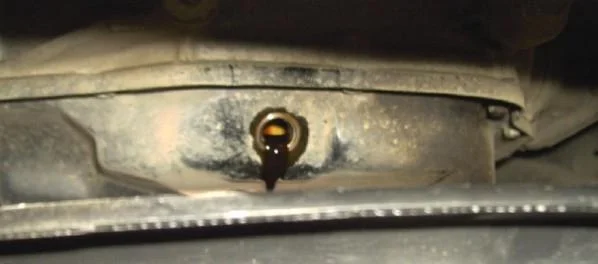
Next, place a container under the engine sump drain plug and unscrew it completely. The used hot oil will flow out with significant pressure. You need to remember this when positioning the drain pan.
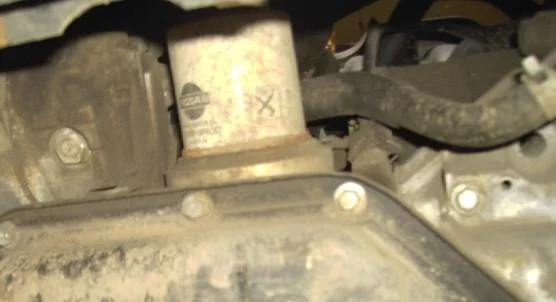
After the oil has completely drained from the sump, unscrew the oil filter. There is good access to it from the inspection pit at the front of the engine.
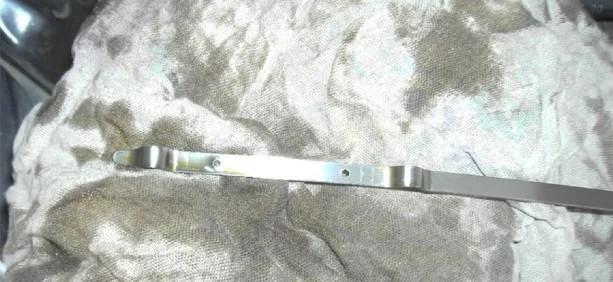
If you cannot unscrew the oil filter by hand, you can use a removal tool for small-sized oil filters or try to unscrew it by wrapping an old belt around it.
As soon as the filter moves, place the drain pan under the filter, as it will contain a small amount of oil which is sure to leak out.
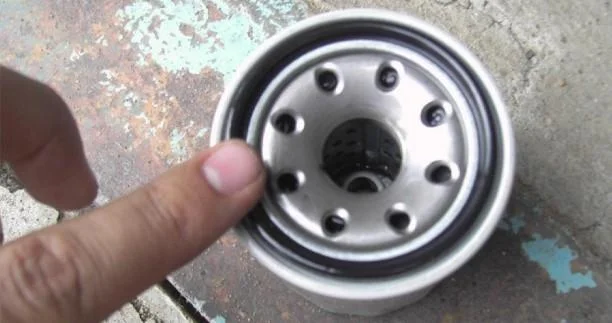
Install the new filter after removing the old one, having prepared it before installation.
Pour fresh oil into the filter, filling it about halfway, and soak the filter elements with it by rotating the filter.
In addition, smear the filter's rubber sealing ring with the same oil.
Once the filter's rubber seal makes contact, tighten it by half a turn and no more than three-quarters of a turn. This rule is usually printed on the oil filter housing. There is no point in tightening it more; it will simply be much more difficult to unscrew at the next change.

Replace the sealing ring on the drain plug and screw the plug back into place.
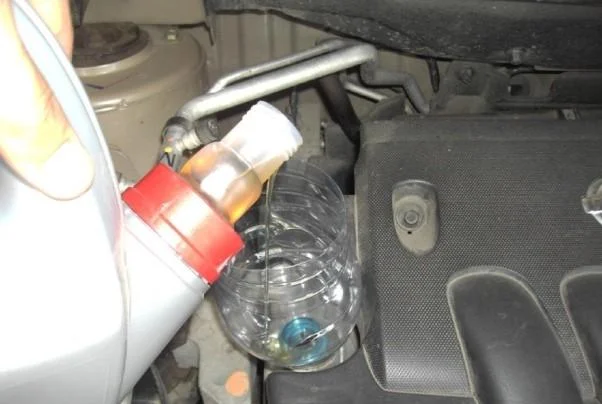
After this, you can pour new engine oil through the filler neck. The main principle is not to overfill. Therefore, once 4 litres have been poured in, check the level on the dipstick every 100 ml.
The level should be between the two marks on the dipstick. When the level is correct, remove the funnel, screw on the oil filler cap, and return the dipstick to its place.
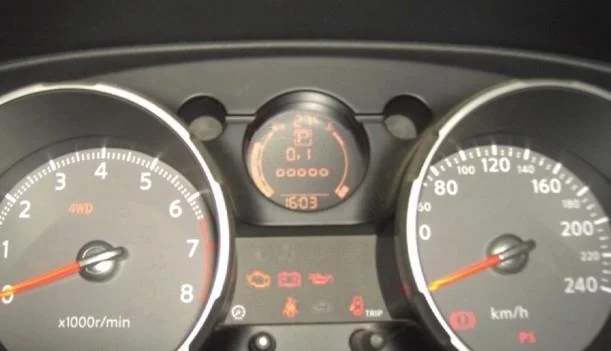
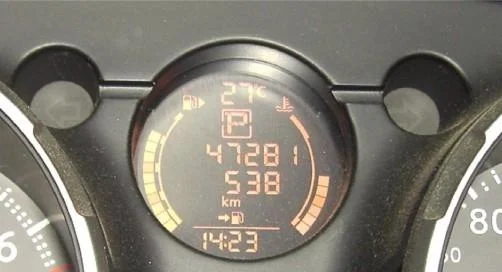
After this, check the oil level via the on-board computer. To do this, switch on the ignition, and when the message "Oil Good" appears, press the "i" button on the steering wheel or "TRIP" on the dashboard.
The level should show 4-5 bars out of 5.
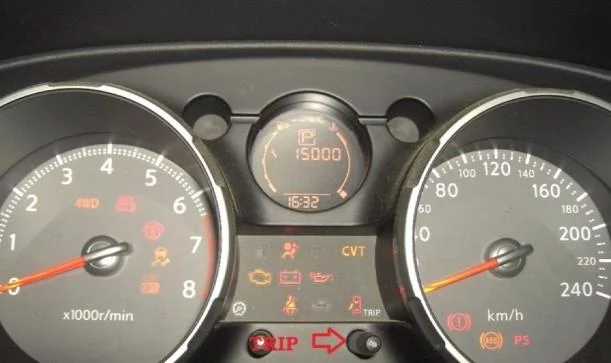
Finally, you need to reset the service interval, which is displayed on the on-board computer when the ignition is switched on.
On the facelift version, it is reset via the corresponding menu by turning the TRIP button.
On the pre-facelift model, proceed as follows:
- With the ignition off, press and hold the TRIP button on the dashboard;
- Switch on the ignition while continuing to hold TRIP;
- When the service interval value with the spanner symbol starts flashing, release TRIP and press it once more. The service interval value will reset to 15,000 km;
- To change the service interval value, rotate the TRIP button in either direction depending on the desired value.
The procedure is now complete.
Was this guide useful?
Your feedback helps us improve our content.


Discussion (0)
No comments yet!