Replacing the Timing Belt and Injection Pump Belt on Audi A6 2.5 TDI V6
This article describes the process of replacing the timing belt and the injection pump belt. The vehicle in question is an Audi A6 2.5 TDI V6 (2001) with an automatic transmission (engine code AKE). The sequence of work is suitable for replacing the timing and injection pump belts on AKN, AFB, AYM, AKE, BCZ, BAU, BDH, BDG, and BFC engines. There may be differences when working with cars of different years of manufacture, but most often the discrepancies concern only body parts.
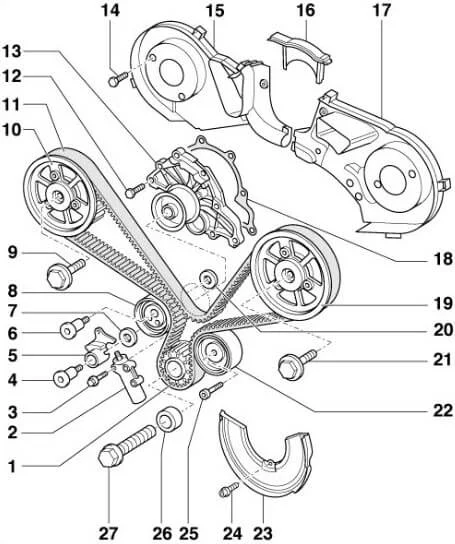
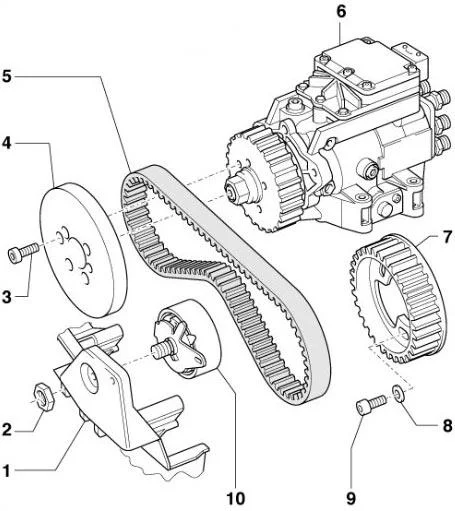
| Kit for Audi A6 Timing and Injection Pump Belt Replacement | ||
|---|---|---|
| Manufacturer | Name | Part Number |
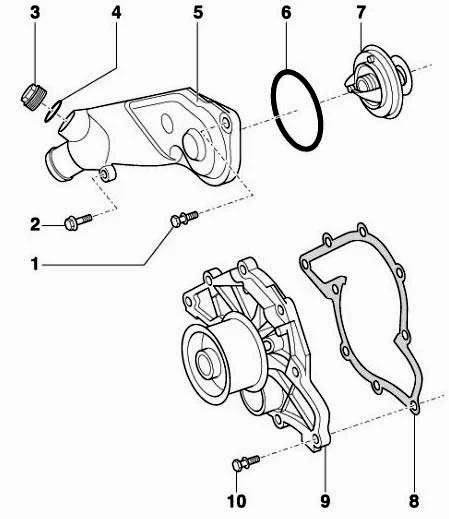
| Wahler | Thermostat | 427487D |
| Elring | Shaft seal (2 pcs.) | 325155 |
| INA | Tensioner pulley | 531030710 |
| INA | Tensioner pulley | 532016010 |
| Ruville | Idler pulley | 55701 |
| DAYCO | Poly-V belt | 4PK1238 |
| Gates | Poly-V belt | 6PK2403 |

List of tools:
- Counter-hold tool No. 3036;
- Locking tool No. T40011;
- Two-arm puller No. T40001;
- Locking bolt No. 3242;
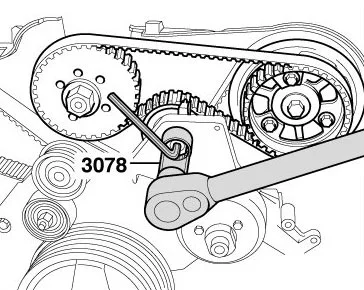
- 22 mm socket No. 3078;
- Camshaft locking tool No. 3458;
- Diesel Injection Pump locking pin No. 3359.
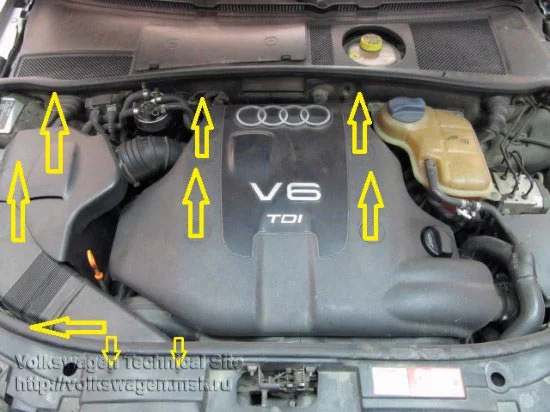
Main Work Sequence
First, remove the upper and lower engine covers, as well as the air filter duct. Disconnect the hoses coming from the intercooler radiator. Then, unscrew the front engine mount fastening from the intercooler pipe.
Unscrew the AC condenser mounting bolts and move it aside without disconnecting it from the lines. Unscrew the automatic transmission oil line mounting bolts and move the tubes towards the bulkhead. Disconnect the cooling system hoses and drain the coolant into a pre-prepared container. Disconnect the electrical connectors from the headlights and detach the bonnet latch cable.
Unscrew the front panel bolts and remove it together with the radiator. It is not necessary to put the radiator into the service position (sliding it forward) — for ease of work, it is better to remove the assembly entirely to free up maximum space. That is why it is recommended to spend 15 minutes draining the antifreeze and dismantling the radiator assembly with the headlights.

Proceed to work on the right side of the engine. Remove the air intake duct leading to the air filter.
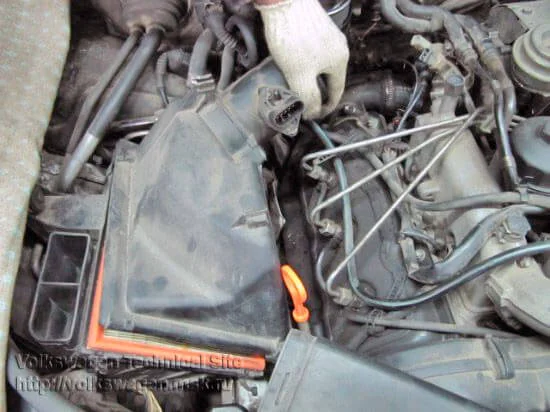
Disconnect the MAF sensor connector and remove the air filter cover.
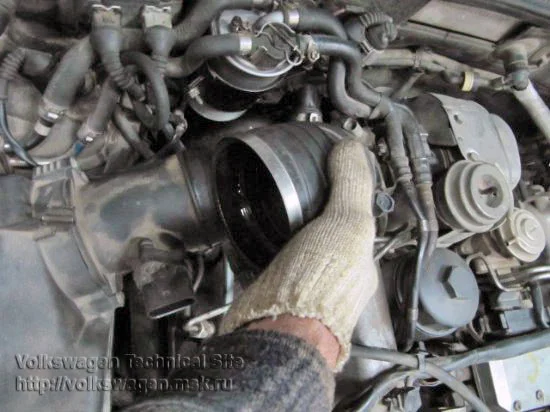
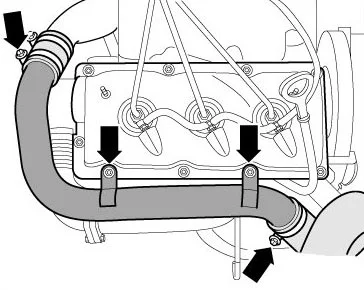
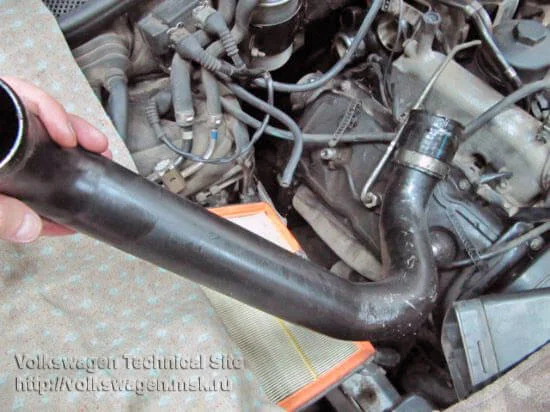
Remove the air duct between the intercooler and the turbocharger.
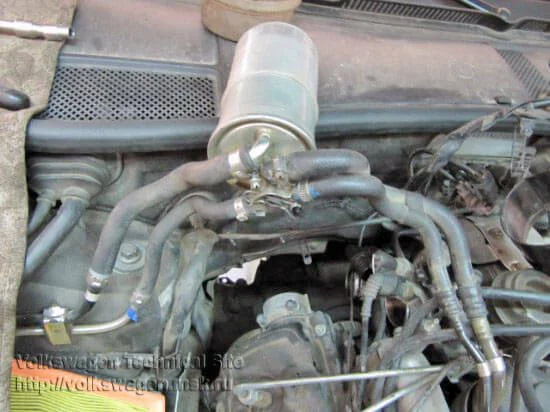
Remove the fuel filter without disconnecting the hoses and sensor mounting blocks — simply move them aside. This is necessary to access the camshaft plug of the right cylinder head.
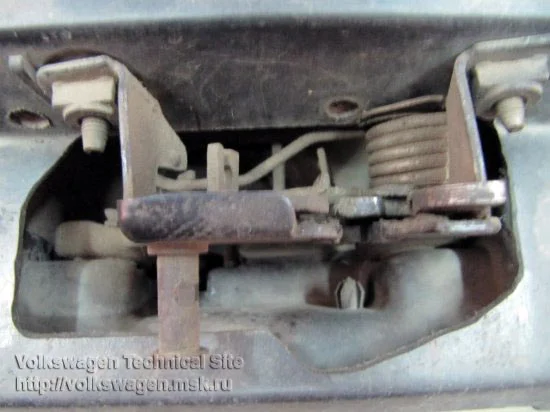
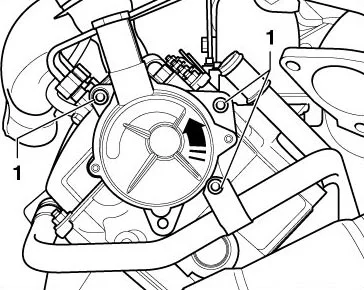
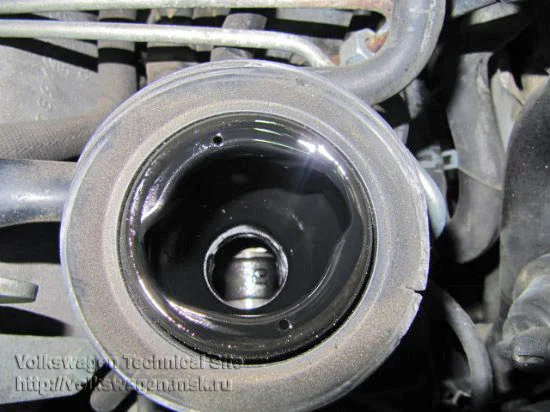
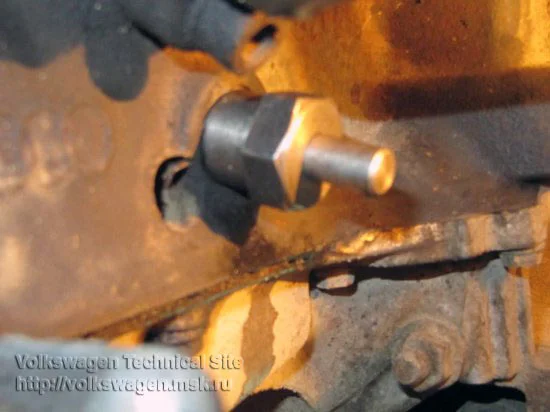
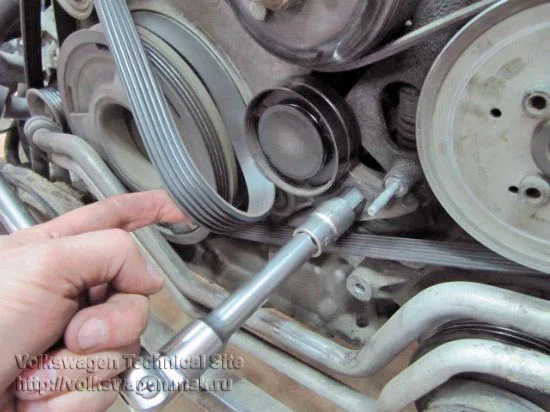
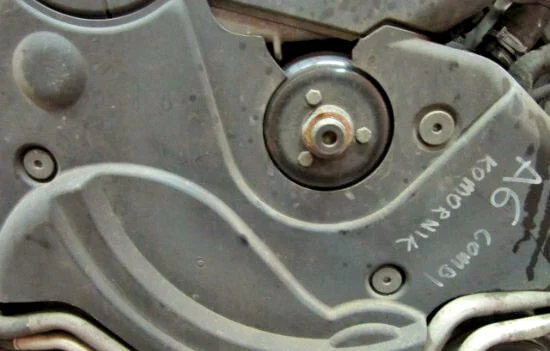
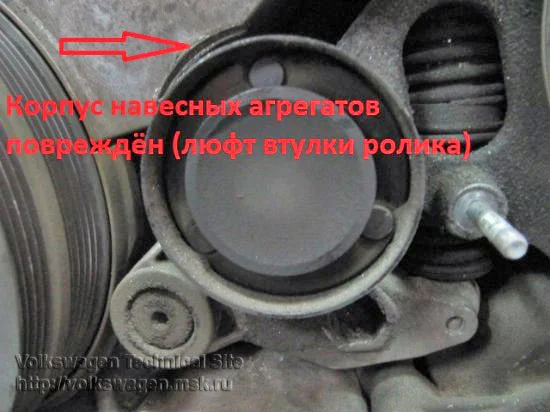
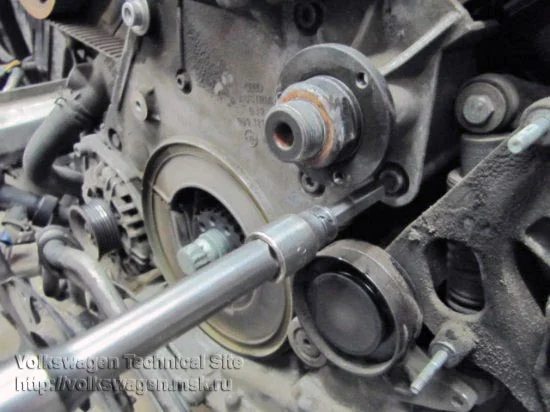
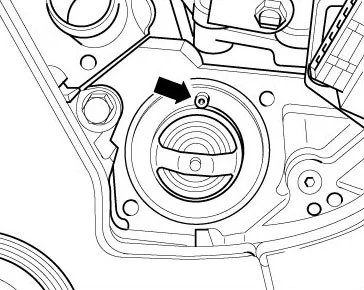
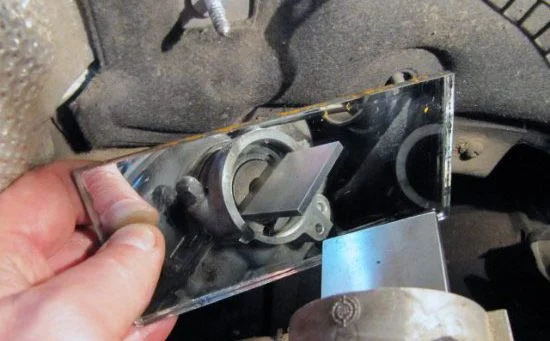
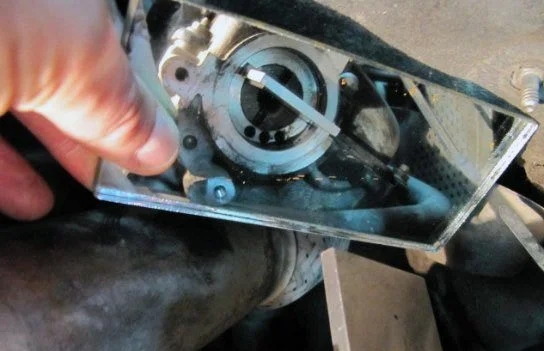
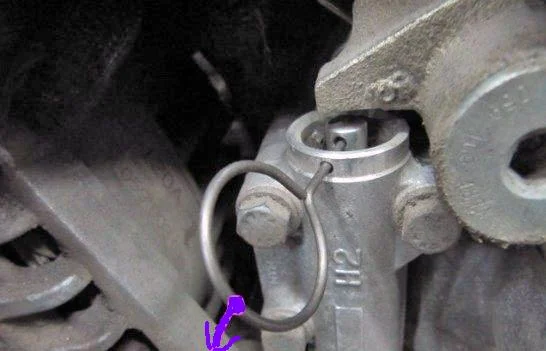
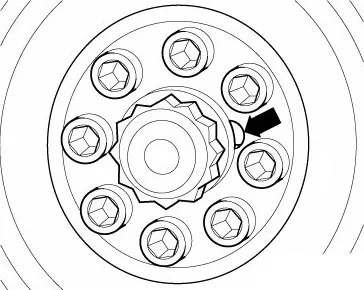
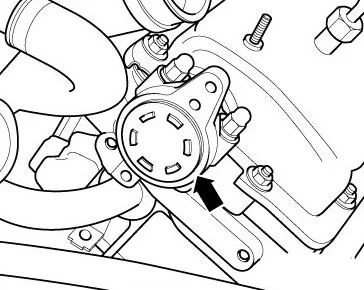
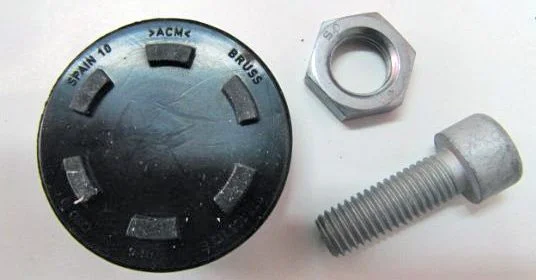
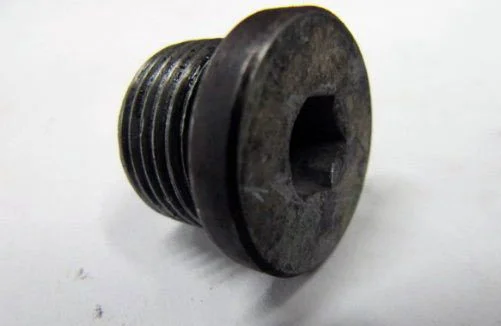
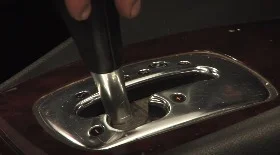
Remove the plug at the rear of the right camshaft.

The plug will be destroyed during removal. Remove it carefully, trying not to damage the sealing edge of the seat (indicated by the arrow).
If you do not have a new plug at hand, you can flatten the old one and install it by applying high-quality sealant on both sides.
Proceed to the left side. Remove the vacuum pump and the expansion tank.
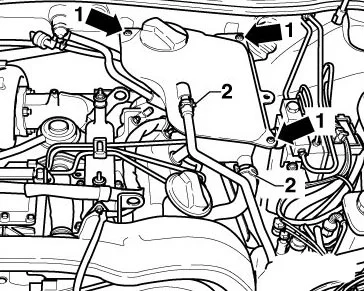
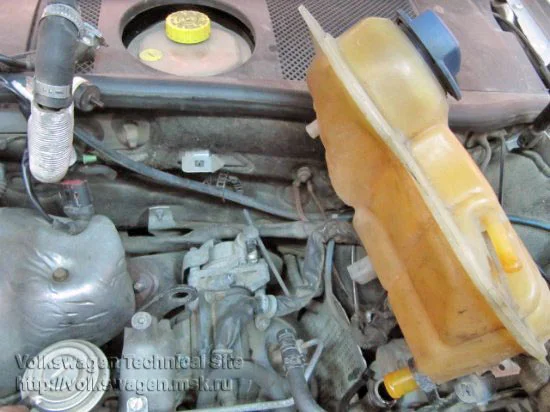
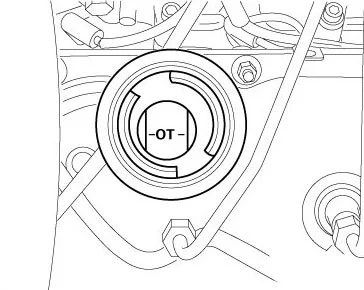
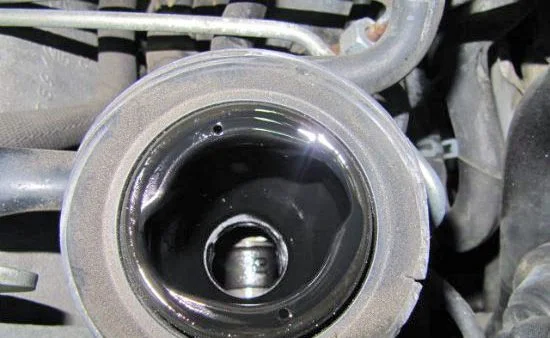
Set the piston of the third cylinder to TDC. First, check if the "OT" mark on the camshaft aligns with the centre of the oil filler neck.
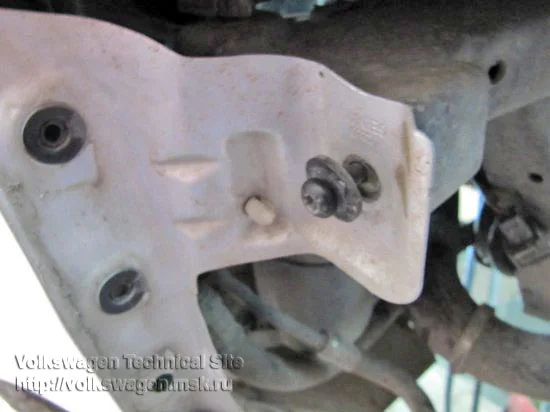
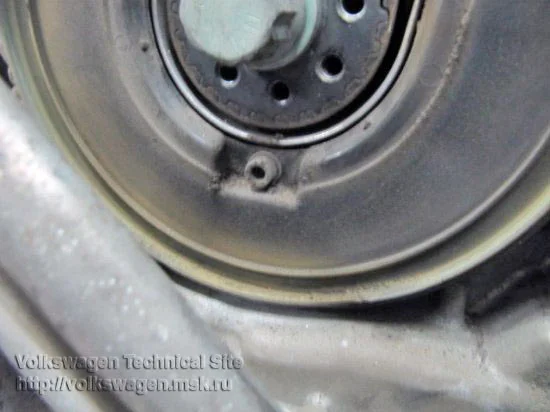
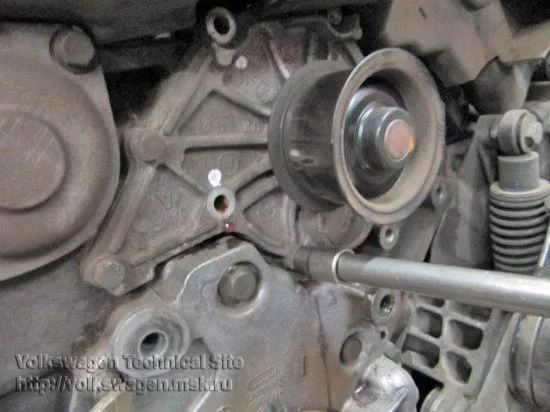
Remove another plug on the engine block and install the crankshaft locking bolt.
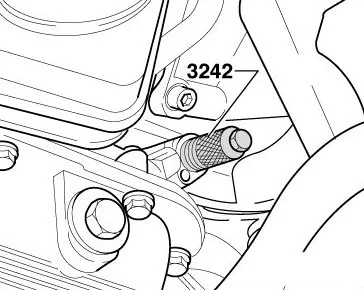
Check if the plug hole aligns with the "TDC" hole on the crankshaft web.
Replacing the Injection Pump Belt
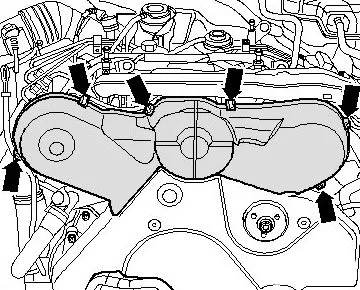
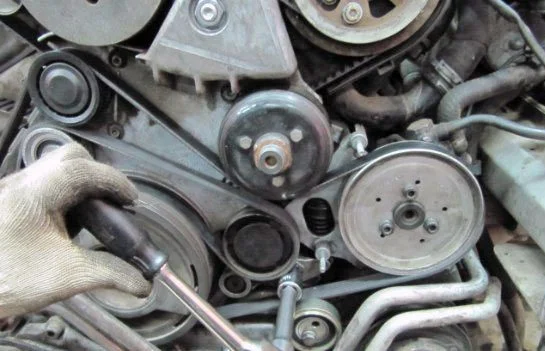
Before removing the injection pump belt, dismantle: the upper timing belt cover, the viscous fan clutch, and the fan.

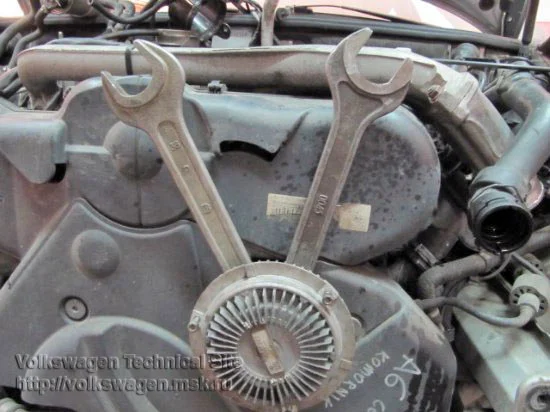
Also, remove the poly-V belts for the auxiliary units and the AC compressor.

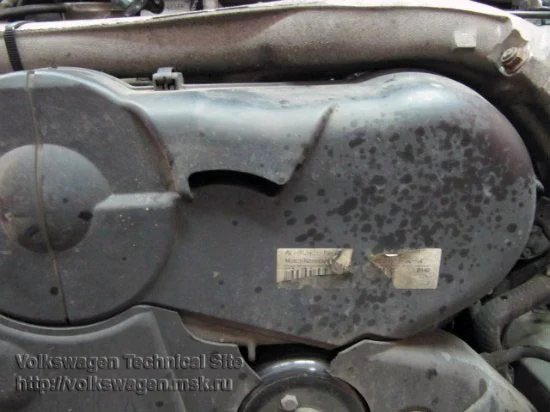
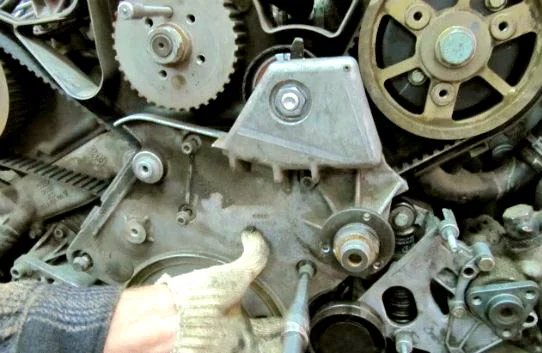
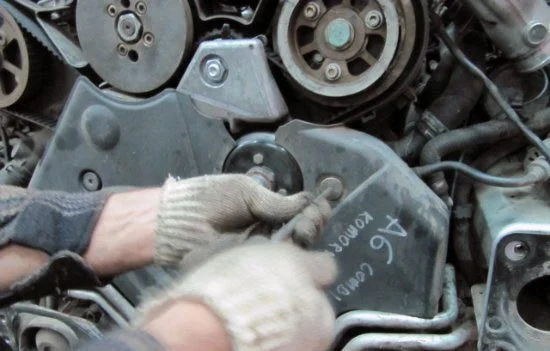
Remove the auxiliary belt cover.
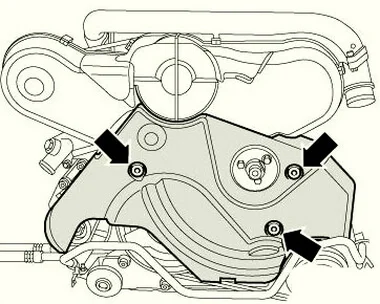
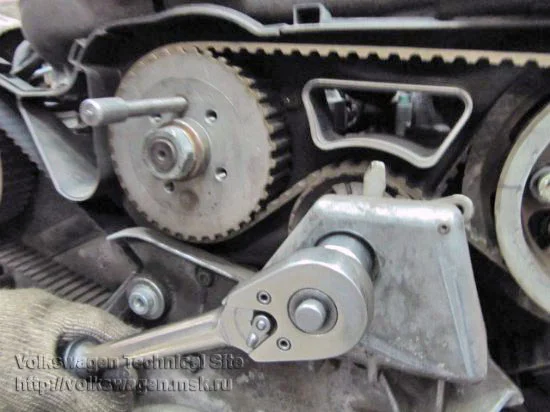
Removing the injection pump belt.
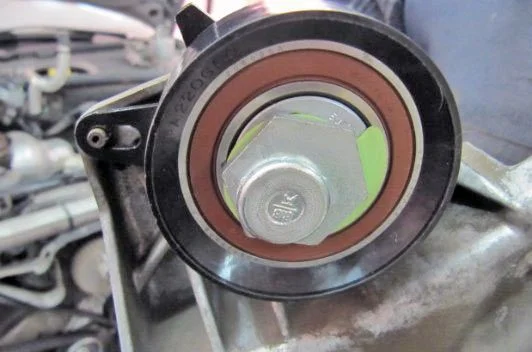
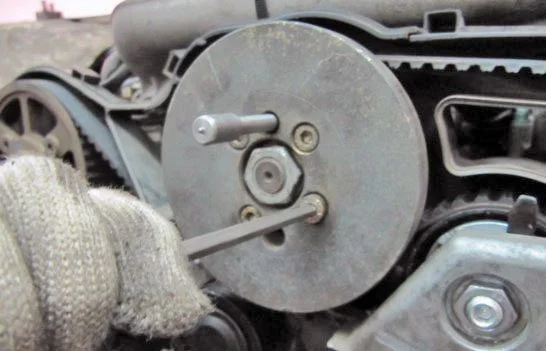
First, remove the injection pump drive damper.
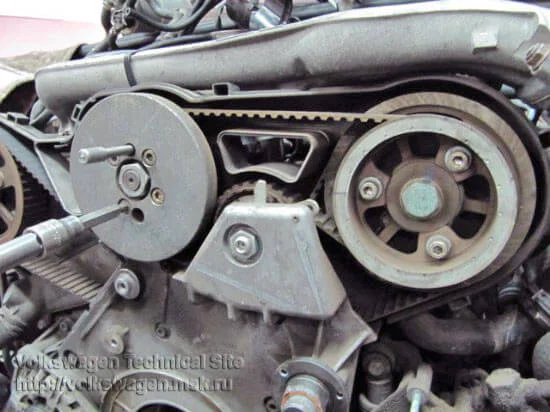
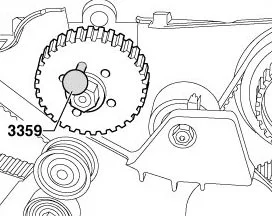
Note: the central nut of the damper hub does not need to be loosened. Insert locking pin No. 3359 into the toothed pulley of the injection pump drive.
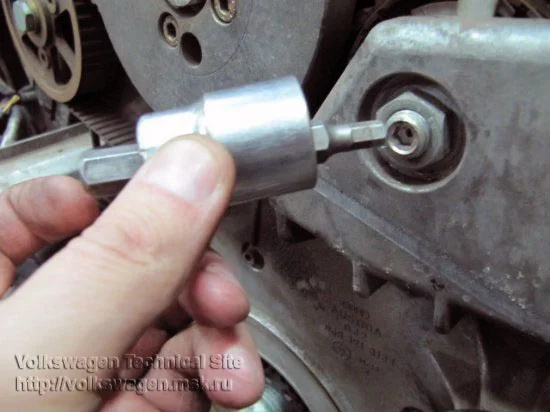
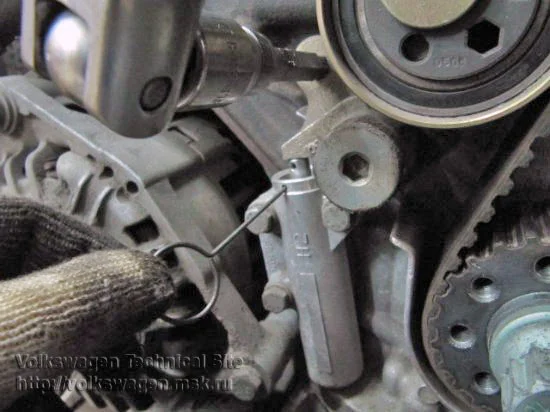
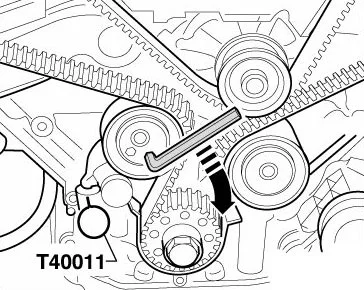
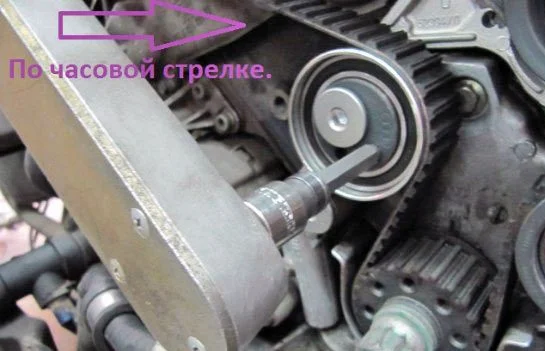
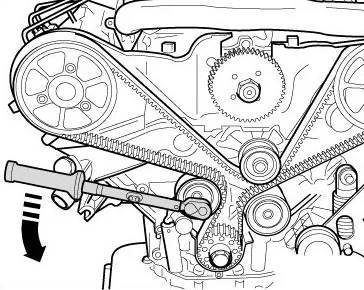
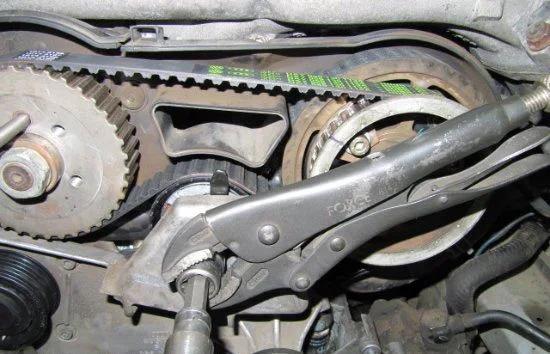
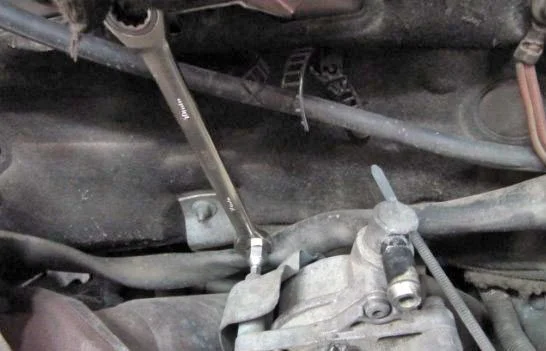
Using wrench No. 3078, loosen the nut of the injection pump belt tensioner.
Using a hex key, move the tensioner away from the belt in a clockwise direction, then slightly tighten the tensioner nut.
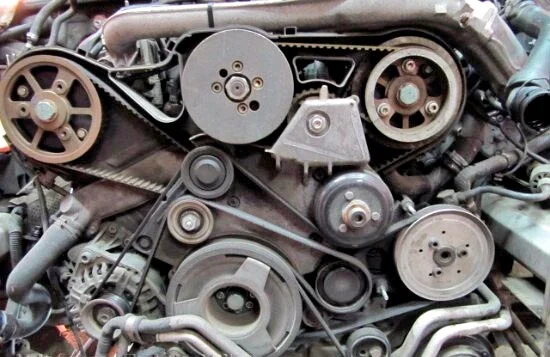
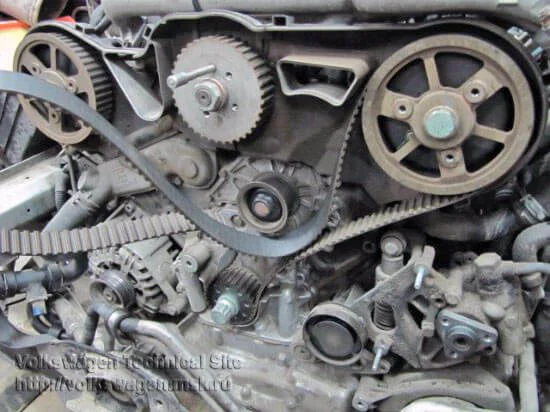
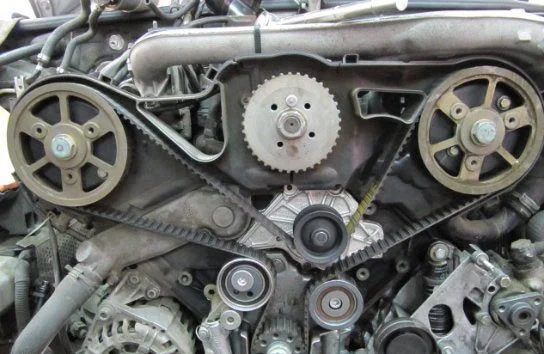
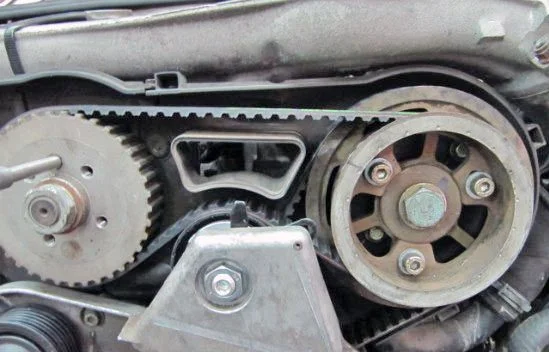
Timing Belt Removal Procedure
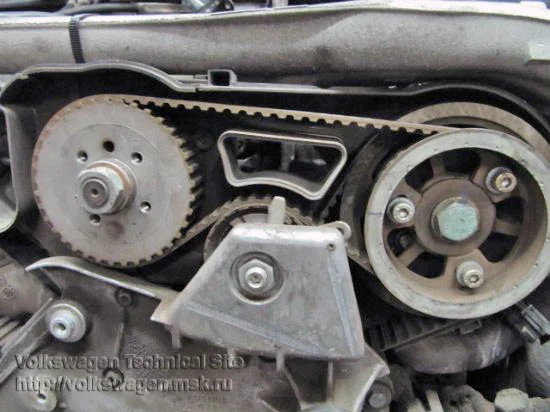
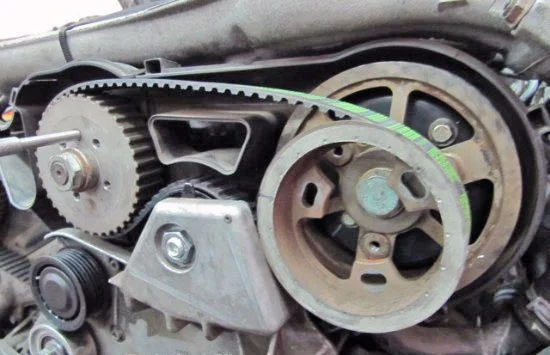
After removing the injection pump belt, proceed to dismantle the timing belt. First, unscrew the bolts of the left camshaft pulley.
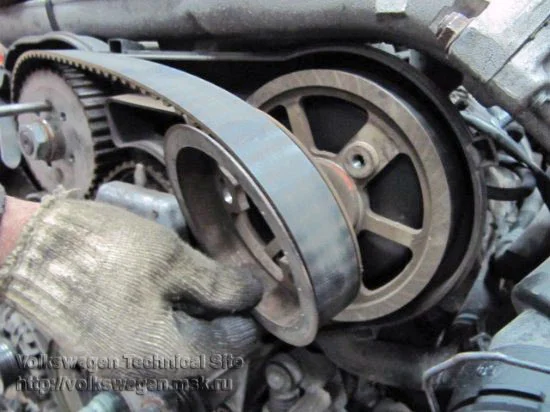
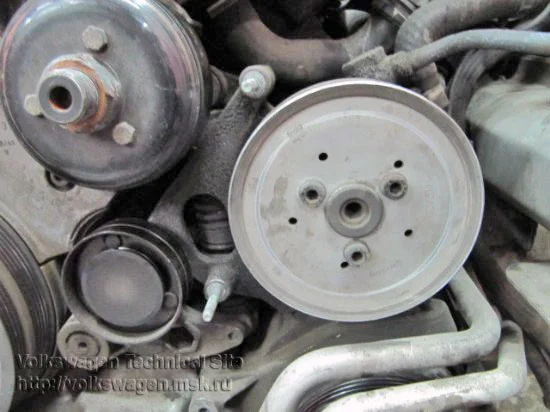
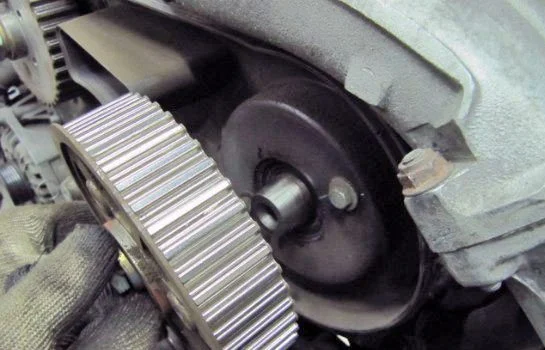
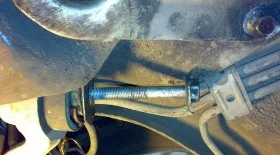
Dismantle the outer injection pump drive pulley together with the belt. Carefully inspect the tensioner bushing; ensure its integrity. A serviceable bushing rotates freely in the housing, and there should be absolutely no play.
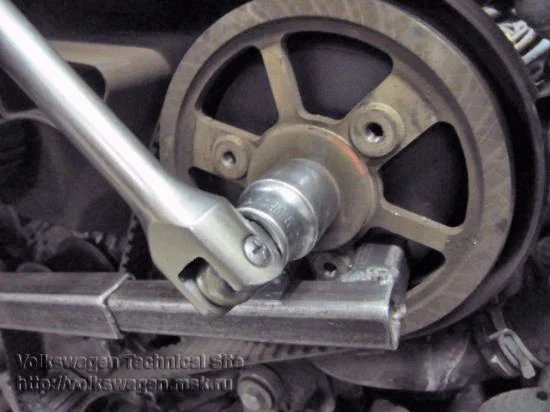
Teflon and rubber seals must be undamaged. Next, unscrew the crankshaft pulley bolts.

Remove the crankshaft pulley (do not unscrew the central crankshaft bolt). Remove the power steering and fan pulleys, as well as the lower timing belt cover.
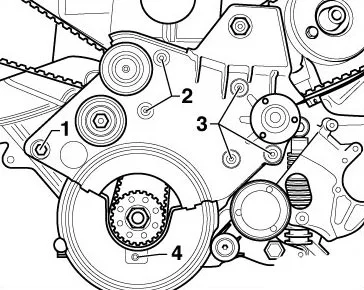
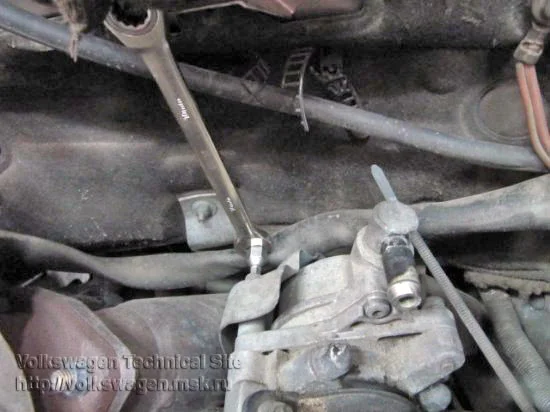
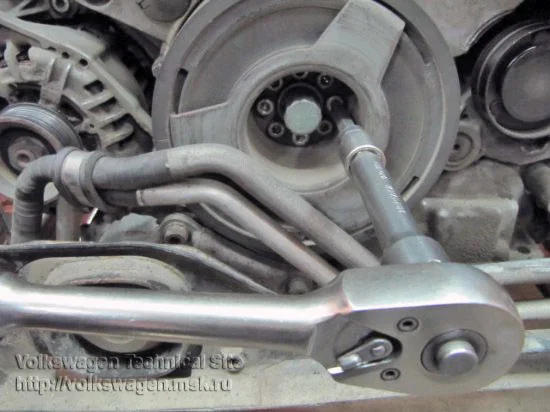
Holding the camshaft with tool No. 3036, loosen the bolts on the pulleys of both shafts.
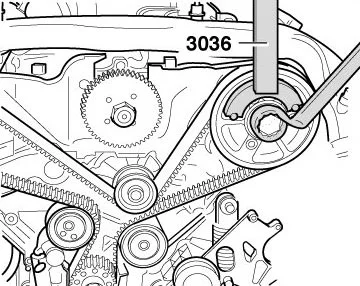
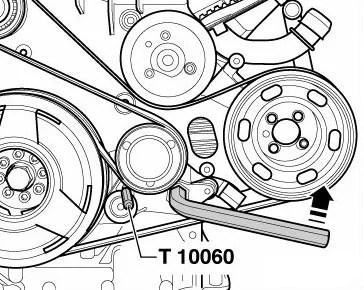
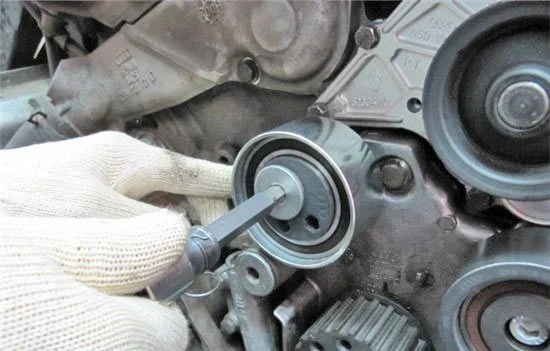
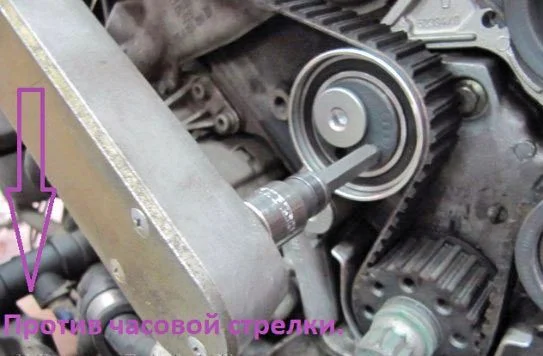
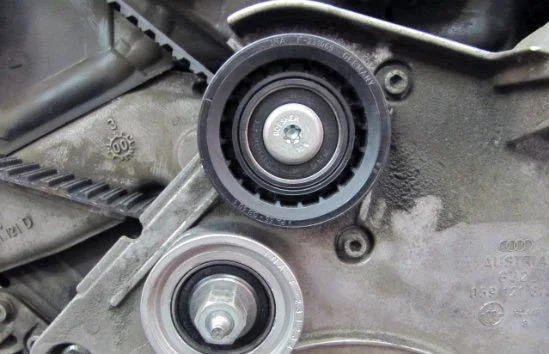
Using an 8 mm hex key, slowly turn the tensioner pulley clockwise until the holes in the tensioner housing and the rod align.
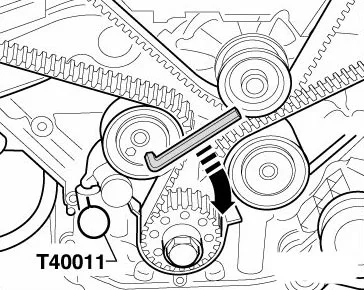
Do not apply excessive force to avoid damaging the tensioner. Lock the rod with a 2 mm diameter pin. Remove the idler and tensioner pulleys, and then the timing belt itself.
After removing the belts, check the condition of the water pump and thermostat.
Clean all parts from dirt and proceed with reassembly.
Installing the New Water Pump
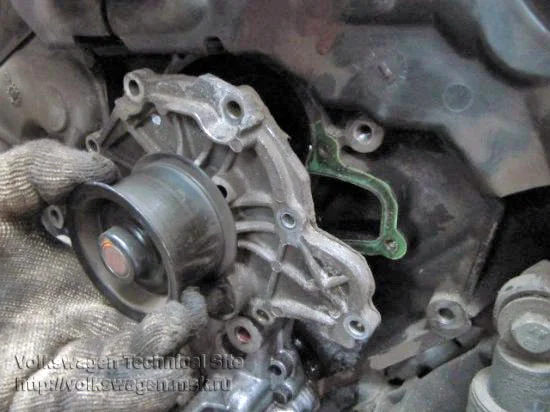
Before installation, it is advisable to apply sealant to the water pump gasket.
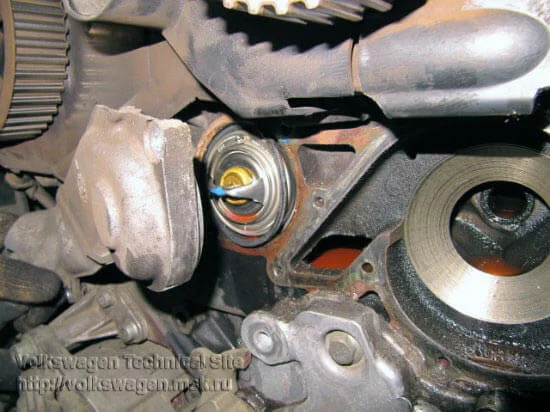
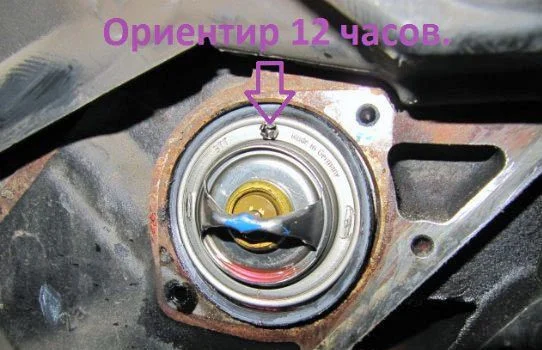
Then install the thermostat. It is also recommended to coat the thermostat housing and gasket with sealant.
During installation, ensure that the thermostat valve is oriented at the 12 o'clock position.
Proceed to install the timing belt. Ensure that the "OT" mark is located in the centre of the oil filler neck.
Check the correct installation of crankshaft locking bolt No. 3242.
Check the correct installation of camshaft locking plates No. 3458.
To make setting the marks easier, use counter-hold tool No. 3036 to rotate the camshafts. Once the marks are aligned, lock them with puller No. T40001. Do not forget to remove the left pulley from the camshaft.

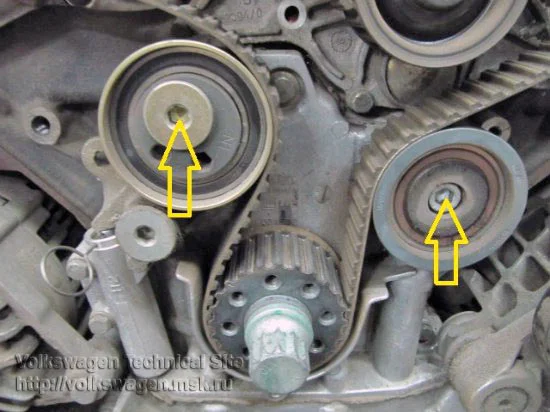
Check the rotation of the right camshaft toothed pulley on the tapered fit. If necessary, tighten the bolt by hand. Install the timing belt tensioner and idler pulleys.

Fit the timing belt in the following sequence:
- Crankshaft;
- Right camshaft;
- Tensioner pulley;
- Idler pulley;
- Water pump.
Fit the left run of the belt onto the left camshaft pulley and install them together onto the shaft. Then tighten the central bolt of the left camshaft by hand. Ensure that the pulley rotates freely on the tapered fit and there is no misalignment.
Using an 8 mm hex key, slightly turn the tensioner pulley clockwise.
Remove the locking pin from the tensioner rod.
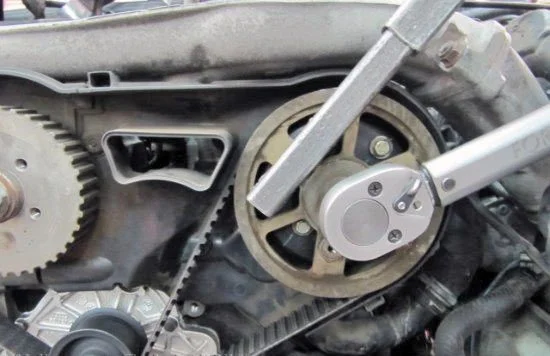
Instead of the hex key, fit a torque wrench. Turn the tensioner pulley anti-clockwise with a torque of 15 Nm. After this, remove the wrench.
Holding the camshaft with tool No. 3036, tighten the bolts to a torque of 75–80 Nm.

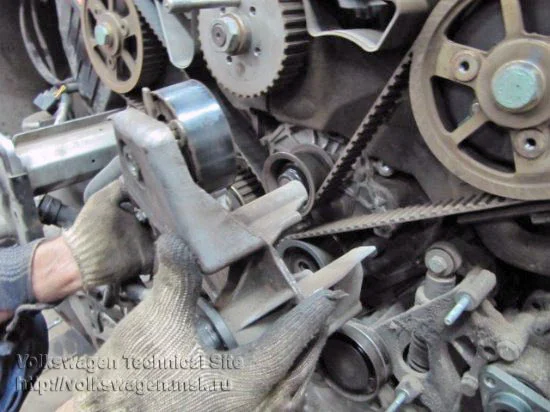
Proceed with assembly: install the mounting plate for the auxiliary units and fan. Before doing so, secure the new injection pump belt tensioner pulley in its seat, tightening the fastening nut by hand.
Install the lower timing belt cover, the power steering and fan pulleys.
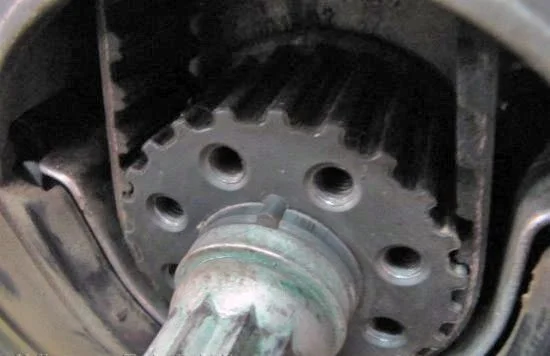
Before installing the crankshaft pulley, align the protrusions and recesses on the crankshaft toothed wheel. Tighten the bolts of the toothed crankshaft pulley to 22 Nm.
Installing the injection pump drive belt:
Check the correctness of the timing marks. Install all pulleys on the mounting plate.
Using a 6 mm hex key, move the injection pump tensioner pulley clockwise to the lower position, and tighten the nut by hand.
Fit the injection pump drive belt — it must be put on together with the left gear onto the camshaft and pump pulleys. Ensure that the bolts are located in the centre of the oval holes (rotate the gear if necessary). Tighten the mounting bolts by hand, checking for the absence of free rotation of the toothed pulley and any misalignment.
Using wrench No. 3078, loosen the nut of the injection pump belt tensioner.


Using a hex key, turn the tensioner anti-clockwise until the indicator aligns with the reference mark. Tighten the tensioner nut (37 Nm) and the toothed pulley bolts (22 Nm).
Remove the locking tools and slowly rotate the crankshaft two turns clockwise. Insert locking bolt No. 3242 into the crankshaft again. Check if the plates and the injection pump locking pin can be installed freely. Check the alignment of the reference mark with the indicator again. If they do not match, adjust the injection pump belt tension again.
Install the vacuum pump of the left camshaft, the plug of the right camshaft end, and the engine block plug.
Install the injection pump drive damper.
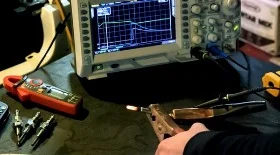
Tighten the damper mounting bolts to 22 Nm. If you plan to adjust the injection timing and perform a dynamic check using diagnostic equipment, do not install the upper timing belt covers yet. Otherwise, install the covers.
Assemble the front end (radiator, headlights) and connect all electrical equipment.

Start the engine and let it run to bleed the air from the cooling system.
Source: http://vwts.ru/forum/index.php?showtopic=163339&st=0
Was this article useful?
Your feedback helps us improve our content.
Related Materials


Discussion (0)
No comments yet!