How to Clean Fuel Injectors Yourself
Injectors in petrol and diesel engines eventually get clogged with resin deposits and impurities from fuel. Professional cleaning products are available on the market, but car owners often use proven "home mechanic" methods. Let's look at four methods: from simple to risky, including a safety analysis.
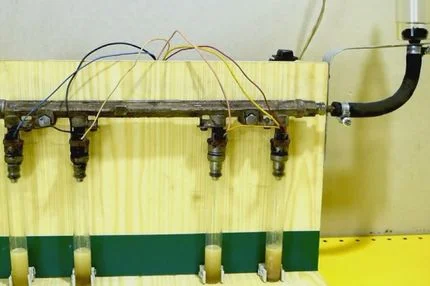
Method 1 — Using Carburettor Cleaner
This is the most accessible way to clean removed petrol injectors. The essence of the method: apply cleaner under pressure while simultaneously opening the injector valve with an electrical impulse. You will need:
- two wires, about a metre long;
- a button (microswitch) to break the circuit (mandatory!);
- a 9V battery (PP3) or a 12V power supply;
- plastic cable ties, electrical tape;
- a 2–5 ml syringe (selected to fit the injector diameter) or a piece of hose;
- a can of carburettor cleaner;
- safety goggles and gloves.
The process:
Cleaning injectors with carb cleaner: video
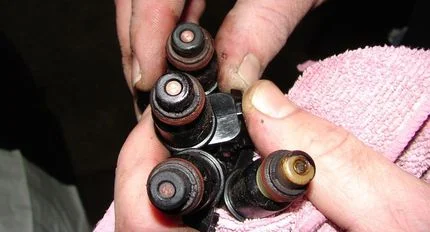
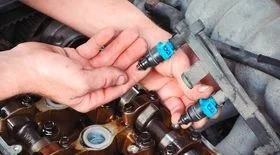
- Remove the injector and clean the outside with a rag. Remove the rubber O-rings so the chemicals don't corrode them.
- Assemble the electrical circuit: wires from the battery to the injector, install the button on one of the wires.
- Prepare an adapter: the syringe body or hose must fit tightly onto the injector on one side and the spray can tube on the other. Secure the connections with cable ties.
- Attach the assembly to the can and insert the injector.
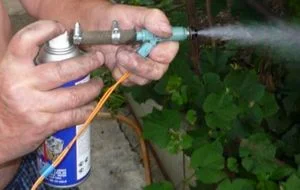
- Press the can nozzle to create fluid pressure.
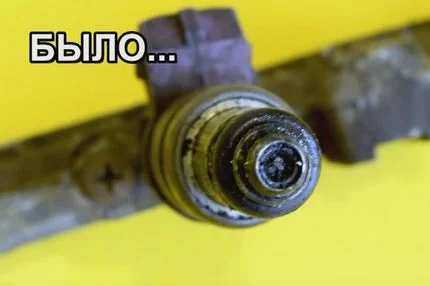
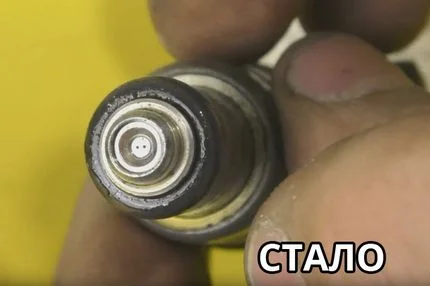
- Open the injector with short presses on the button (pulses). You should see the spray pattern.
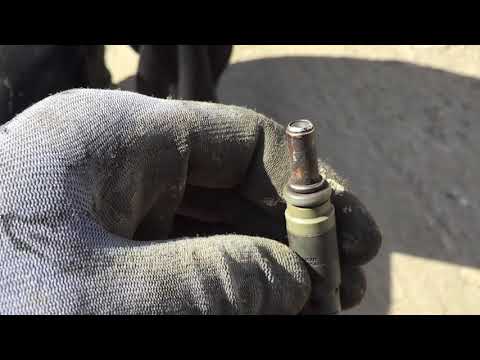
Do not keep the injector open constantly — this can overheat the coil, and cleaning efficiency will decrease (dirt is dislodged precisely at the moment of opening/closing). Repeat the procedure until the spray pattern becomes even, without solid jets.
Method 2 — Using a Cleaning Cylinder
This method allows you to clean injectors without removing them from the engine. You will need a special solvent (Wynn’s or similar brands) and a homemade rig. Tools required:
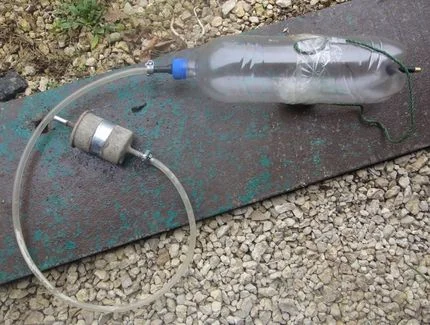
Cylinder with attached filter
- a clean 1.5–2 litre plastic bottle from a fizzy drink (they are stronger);
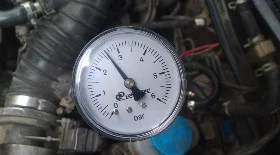
- a compressor with a pressure gauge;
- one litre of cleaning fluid;
- two tubeless tyre valves;
- fuel hose (petrol-resistant) and hose clips;
- a fuel filter (a simple one, to clean the fluid being supplied).
The process:
- Install the tyre valves into the bottom and cap of the bottle (in the bottom for the compressor, in the cap without the valve core for fluid output).

Assembled system
- Connect the hose to the cap and install the filter.
- Warm up the engine to operating temperature, then turn it off and release the pressure in the fuel system (by removing the fuel pump fuse and turning the engine over with the starter for a couple of seconds).
- Disconnect the standard fuel pump or loop the "return" line (depending on the car model). Connect the hose from the bottle to the fuel rail.
- Pour the solvent into the bottle, screw it shut, and hang it from the bonnet. Connect the compressor to the bottom of the bottle and create a pressure of 2–2.5 bar.
Start the engine on the solvent. Let it run for 15 minutes at idle, then turn it off for 15 minutes (to let the deposits soak). Start it again and burn off the remaining fluid, periodically revving the engine. After the procedure, restore the standard fuel system, fill up with regular petrol, and be sure to change the engine oil and spark plugs, as aggressive chemicals will have entered the sump.
Method 3 — Adding Acetone
Adding pure acetone to the tank is an "old-school" method. Acetone is indeed a strong solvent capable of cleaning light deposits and bonding with water in the tank.
However, this method requires caution. Acetone is aggressive towards rubber and plastic. With regular use, it can dissolve O-rings in the fuel system, leading to leaks. Regarding the effect on engine operation: acetone has a high octane rating (about 108), but in small concentrations (0.5–1%), it cannot critically change the fuel characteristics.
Proportions: usually, no more than 30–50 ml of acetone is added per 10 litres of petrol. Exceeding the dosage (more than 150 ml) is not recommended due to the risk of damaging rubber hoses and membranes in the fuel system. This method should be used only as a preventive measure, not as a repair for clogged injectors.
Method 4 — Using Dimexide (Warning)
A popular method on the internet involves washing with the pharmaceutical preparation Dimexide (Dimethyl sulfoxide). It dissolves carbon deposits very powerfully but has critical features that make its use in the scheme described above (with a plastic bottle) dangerous and technically impossible.
1. Crystallisation. The preparation freezes at temperatures below +19°C. When cleaning with cold Dimexide, it will instantly clog the injectors with crystals.
2. Aggression towards paint. Dimexide instantly strips paint. If it gets into a painted oil sump or onto painted elements of the rail, the paint will clog the oil pickup pipe, leading to engine failure and the need for a complete rebuild.
Cleaning rig
If you still decide to use Dimexide, be aware: a plastic bottle is not suitable for this, as the fluid needs to be constantly heated to 60–80°C. The rig described in Method 2 will cause the fluid to cool down during delivery and block the system.
The procedure with Dimexide requires:
- Removing the injectors (cleaning on the engine is dangerous for the oil system!).
- Assembling a test bench with a metal container and fluid heating.
- Using only PTFE tubes (it will eat through rubber).
- Thorough rinsing of the injectors with ordinary solvent or petrol immediately after using Dimexide.
For DIY conditions without special equipment, we do not recommend using Dimexide for beginners. It is safer to use the method with carb cleaner or specialised cleaning fluids (Wynn's, etc.).
Before reinstalling the injectors, be sure to replace the O-rings. Old rings have lost their elasticity and may leak air or fuel. To make installation easier, lubricate them with silicone grease.
Conclusion
DIY injector cleaning is effective for light to medium contamination. The safest and most controlled method is removing the injectors and flushing them with carb cleaner while visually checking the spray pattern. Flushing the entire system via a bottle saves time but requires a mandatory oil change after the procedure. Do not experiment with dubious chemicals (like Dimexide) without a full understanding of their physical properties.
Was this article useful?
Your feedback helps us improve our content.


Discussion (0)
No comments yet!