Audi 100 C4 Heater Matrix Replacement
This photo guide covers the heater matrix replacement for the Audi 100/C4 without climate control.
With the right tools, replacing the matrix yourself is entirely feasible.
You will need:
- a set of screwdrivers (including one long one);
- 8 mm and 10 mm sockets;
- 8 mm and 10 mm open-ended spanners;
- a 13 mm ring spanner or thin-walled socket;
- self-adhesive foam sealing strip;
- sealant (automotive or silicone);
- about one litre of coolant/antifreeze for topping up.
You will also need the heat exchanger itself. You can buy the original VAG 443 819 030 radiator or aftermarket alternatives: Nissens 70230, SWAG 30911090, AVA AI 6052, Behr-Hella 8FH 351 311-62.
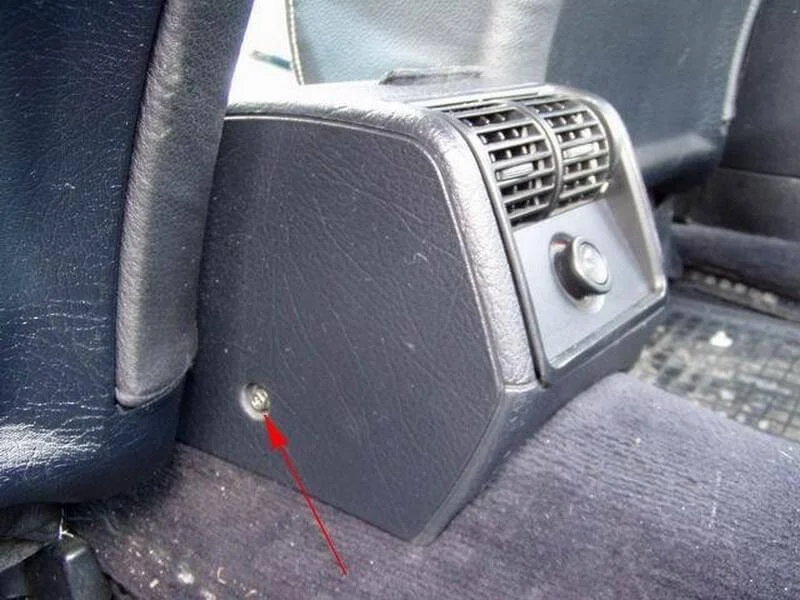
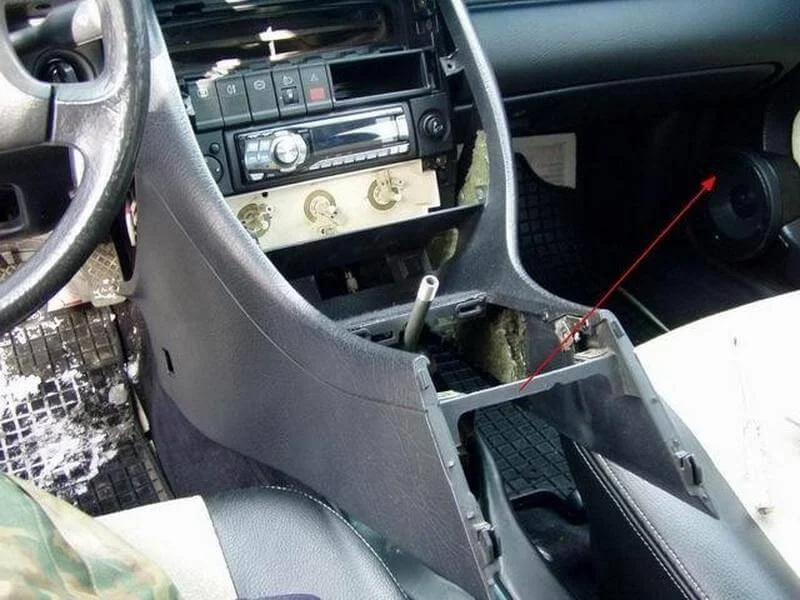
Slide the front seats all the way forward. Then, use an 8 mm socket to unscrew the console mounting bolts on both sides.
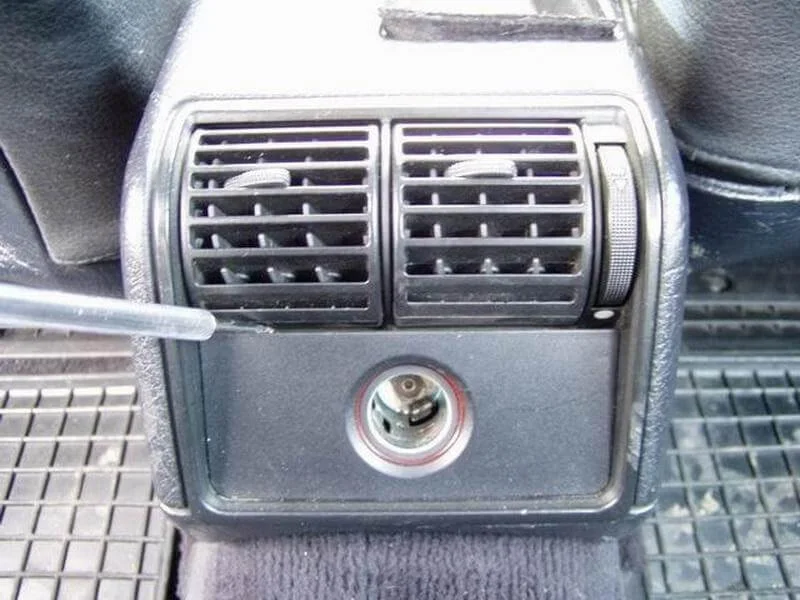
Pry off the plastic cigarette lighter trim and remove it.
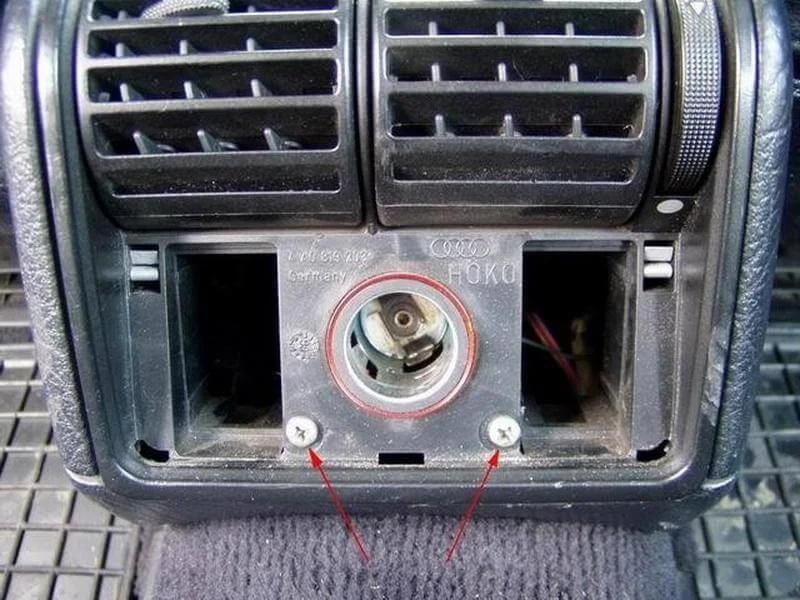
Unscrew the two screws securing the air vents.
Unscrew another screw on the other side.
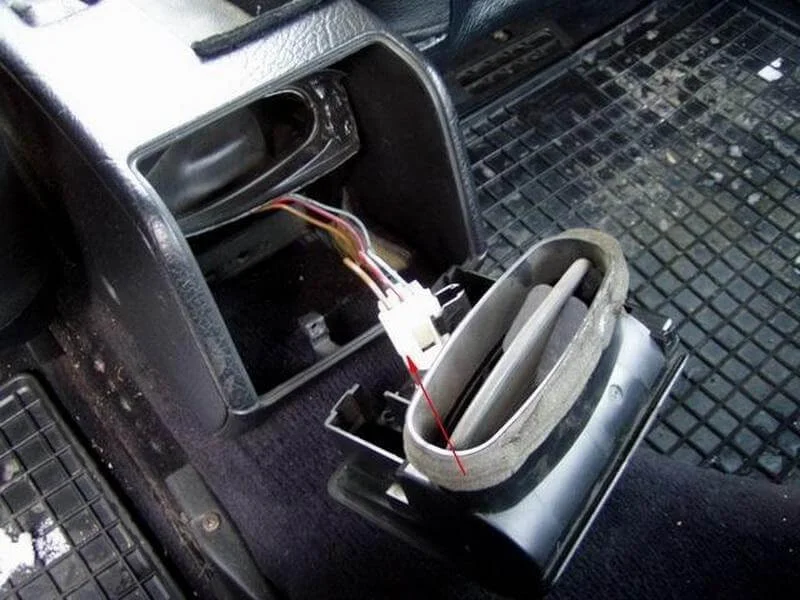
Remove the vents after disconnecting the cigarette lighter connector.
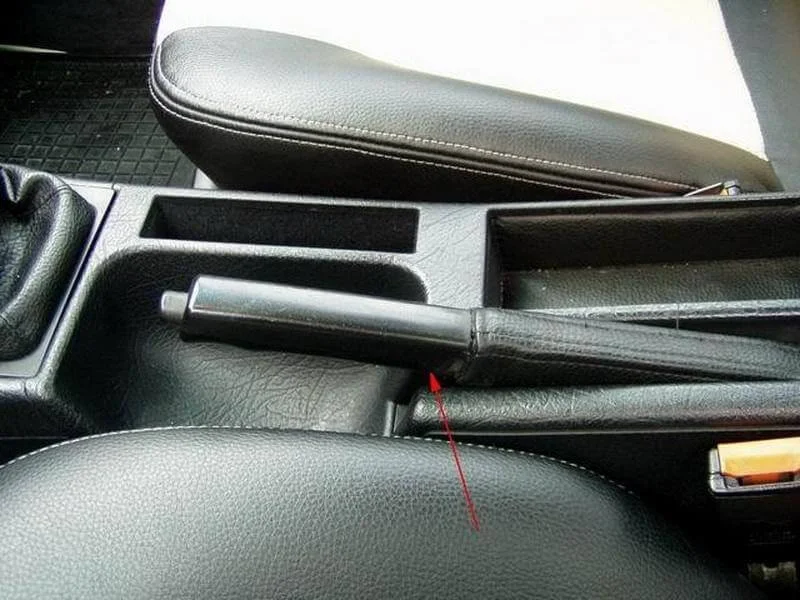
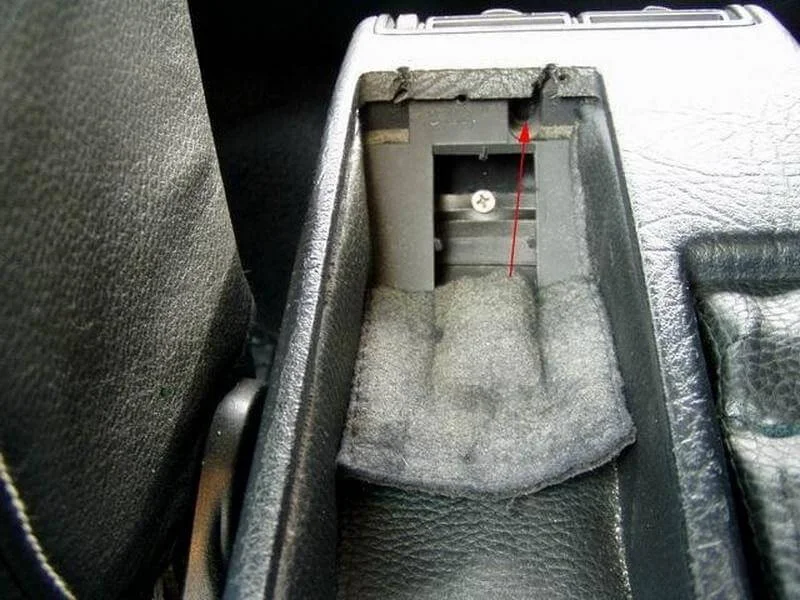
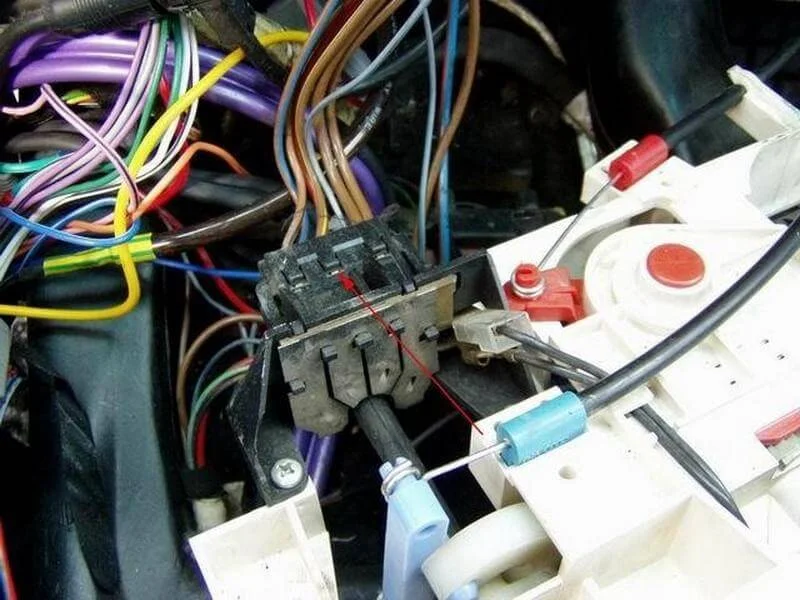
Use a screwdriver to release the handbrake handle retaining clip.
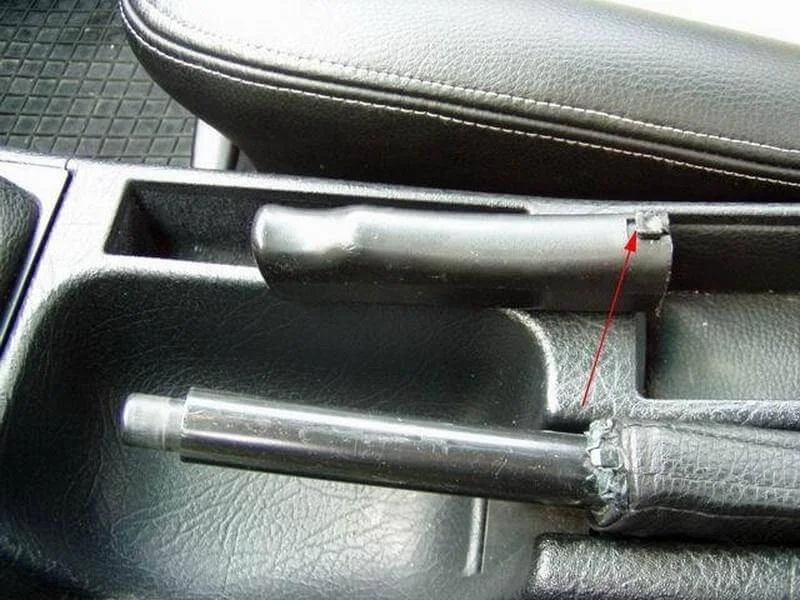
Remove the handle.
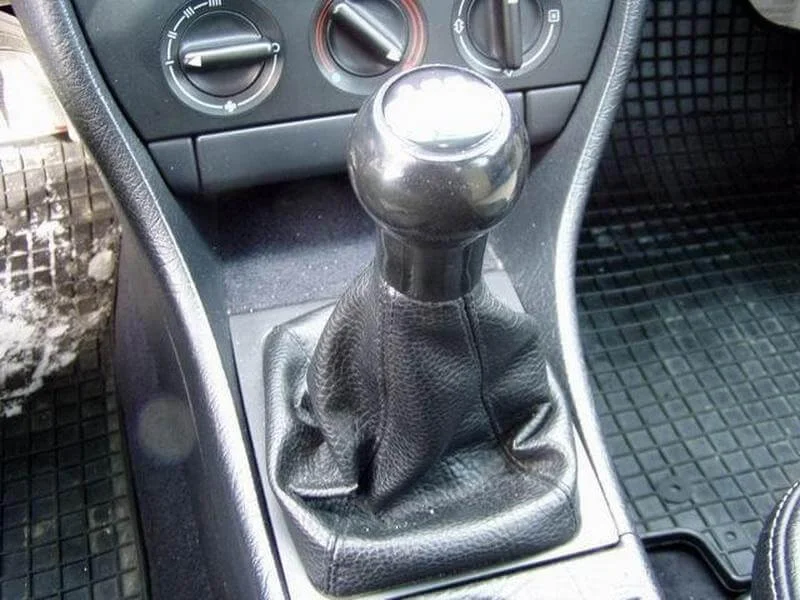
Unscrew the gear stick knob (counter-clockwise).
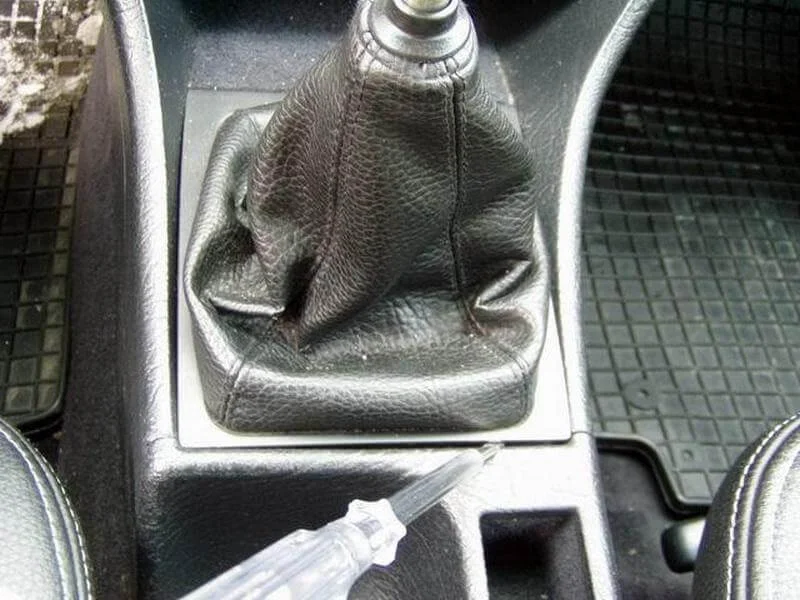
Pry up and remove the gaiter.
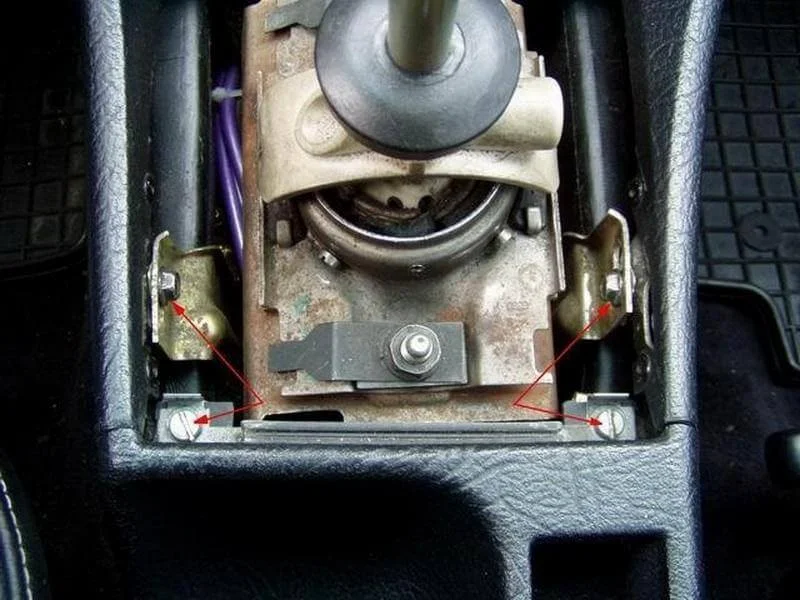
Unscrew the console mounting screws.
Engage the handbrake, shift into 3rd gear, and remove the console by pulling it upwards and forwards.
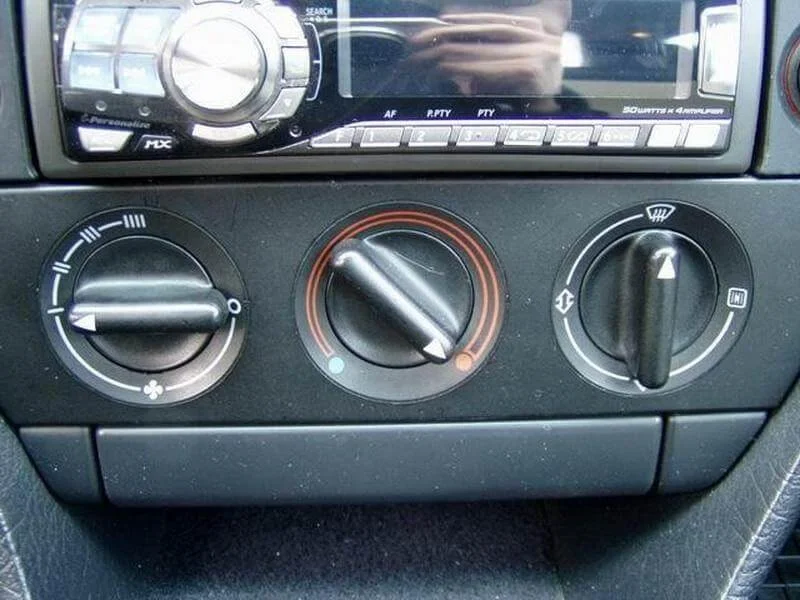
Pull the heater control knobs towards you to remove them.
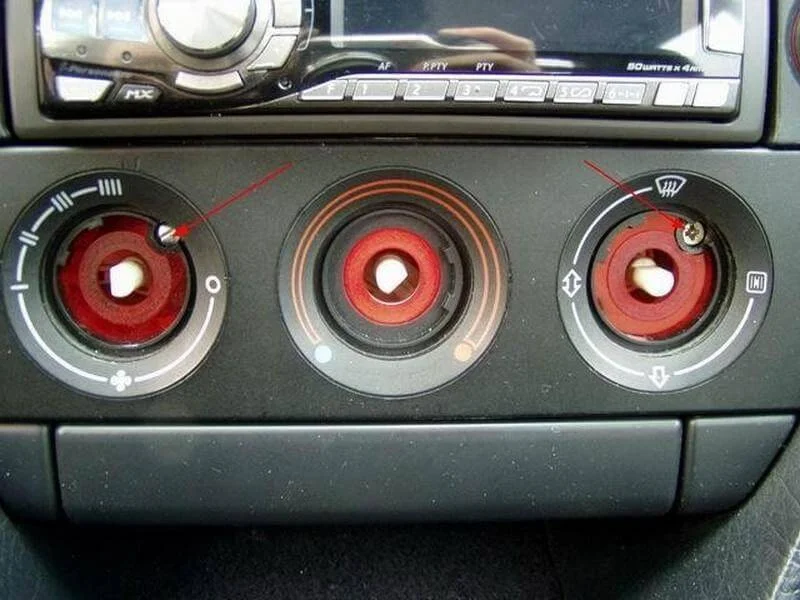
Unscrew the screws under the knobs, indicated by the arrows.
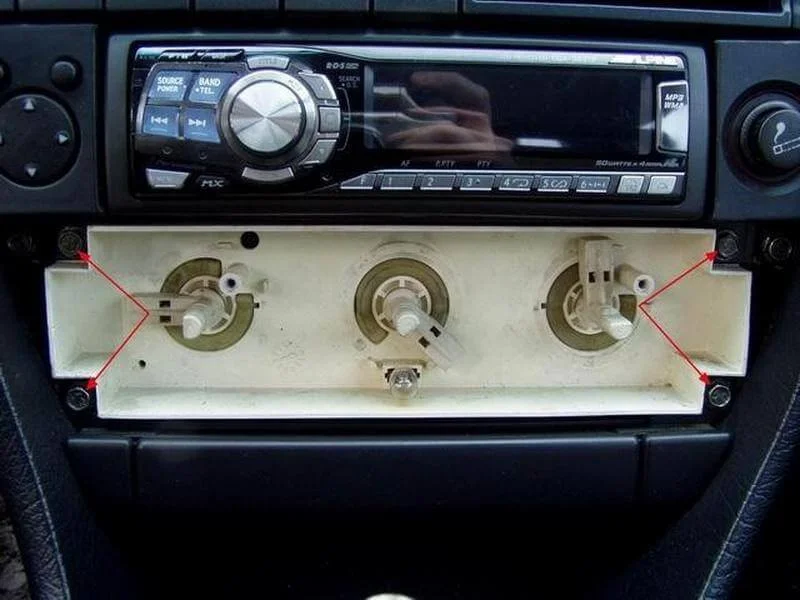
Using an 8 mm socket, remove the 4 bolts.
Remove the ashtray. Don't forget to remove the bulb holder from the housing.

To remove the central vents, gently pry them with a screwdriver and pull them towards you.
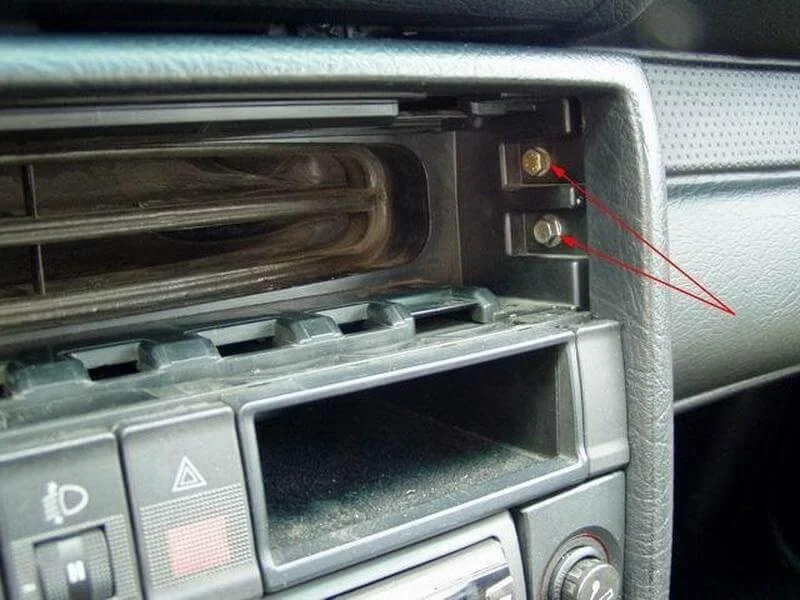
Unscrew the lower bolts completely; simply loosening the upper ones is sufficient.
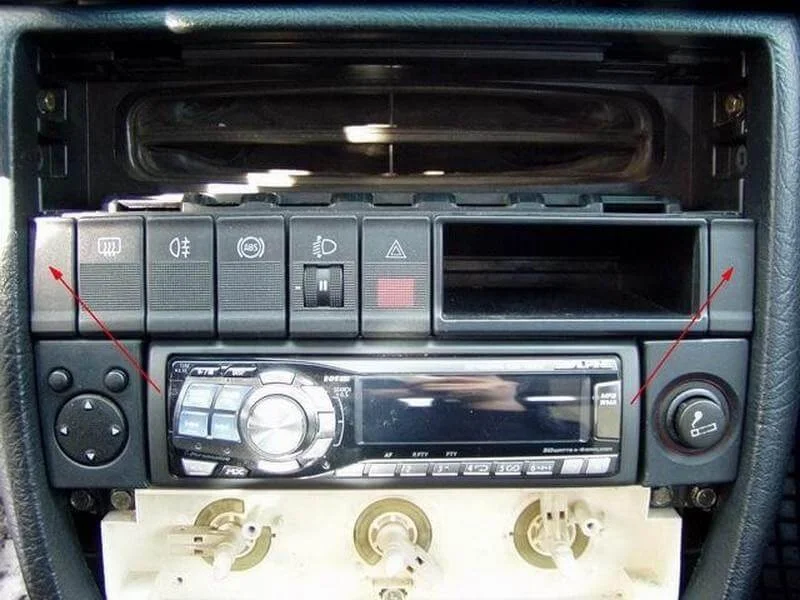
Remove the blanking plates by pulling them towards you.
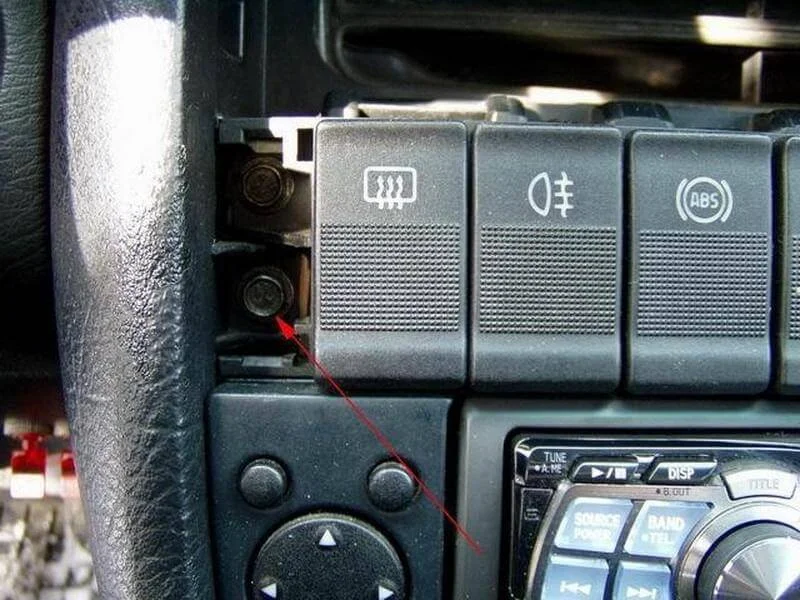
Unscrew the lower bolts.
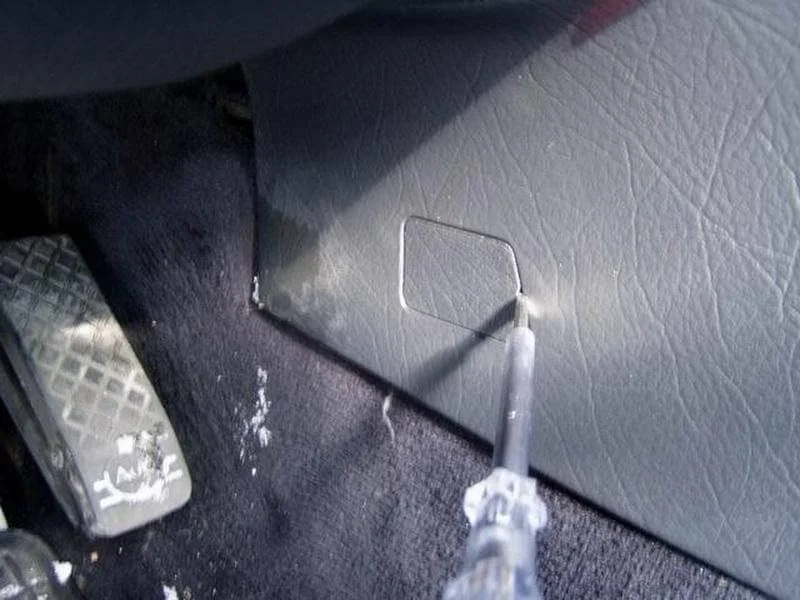
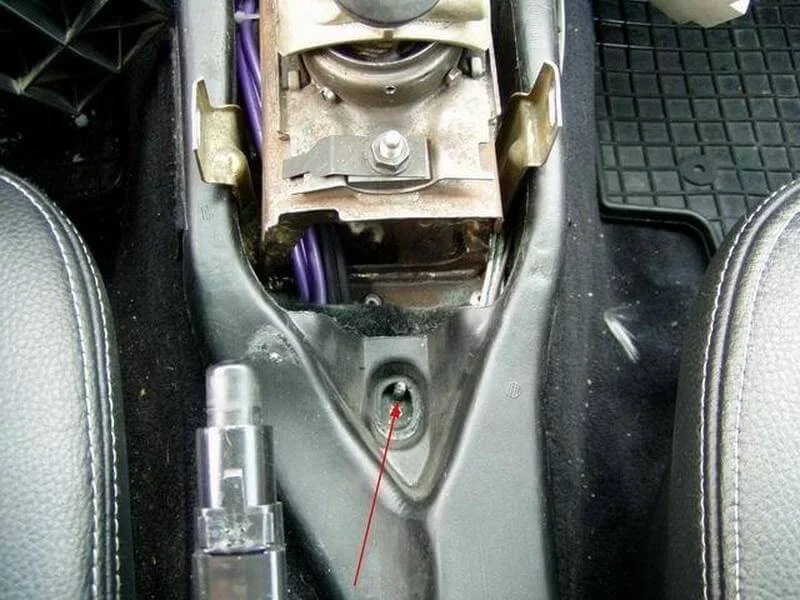
On the driver's side console, pry off the cap with a screwdriver.
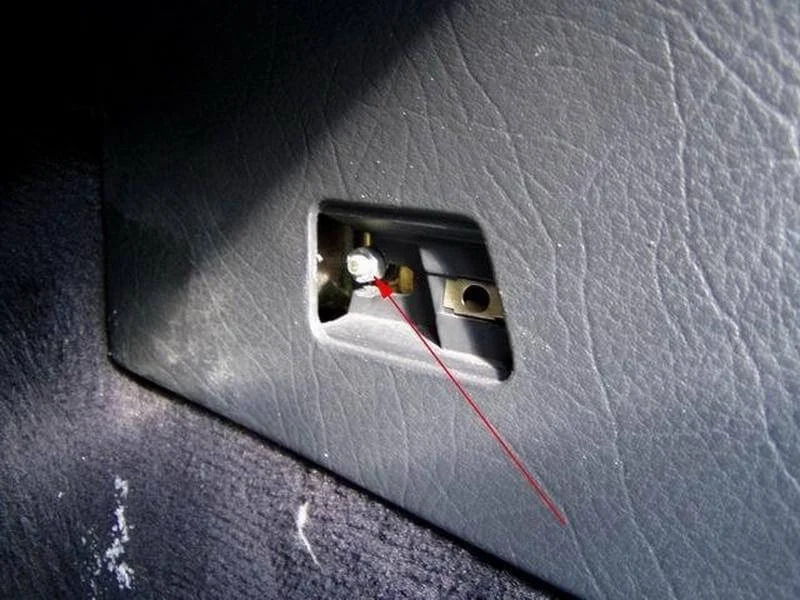
Unscrew the nut using an 8 mm socket.
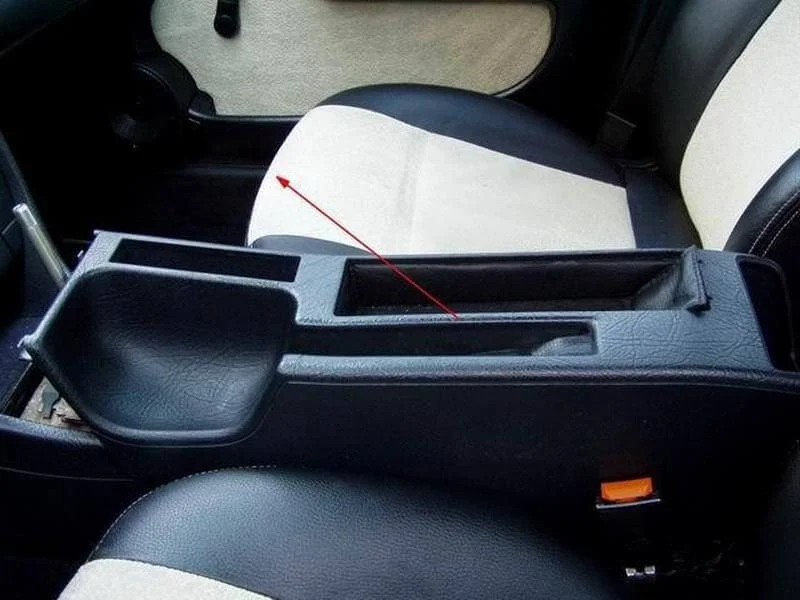
Remove the centre console by pulling it towards you and upwards.

Similarly, remove the central unit by pulling it towards you.

Move the central unit to the side.
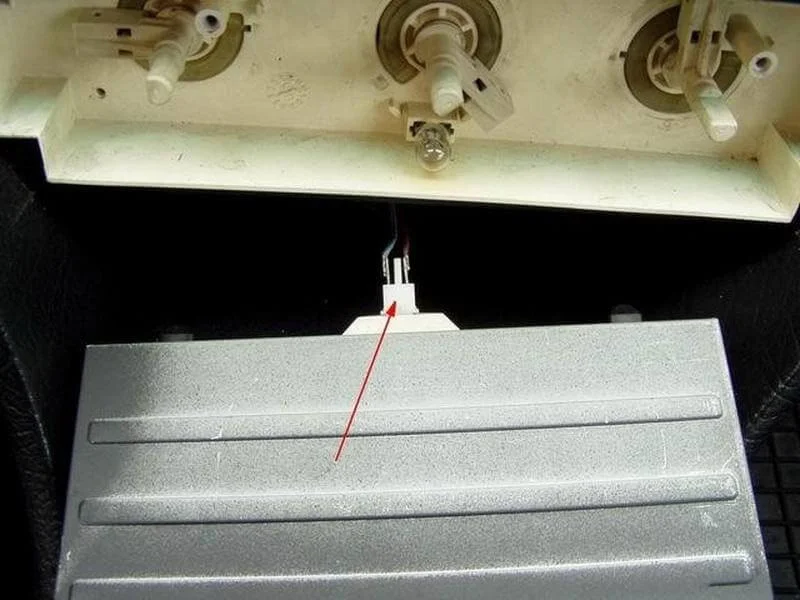
Disconnect the connector from the heater control unit.
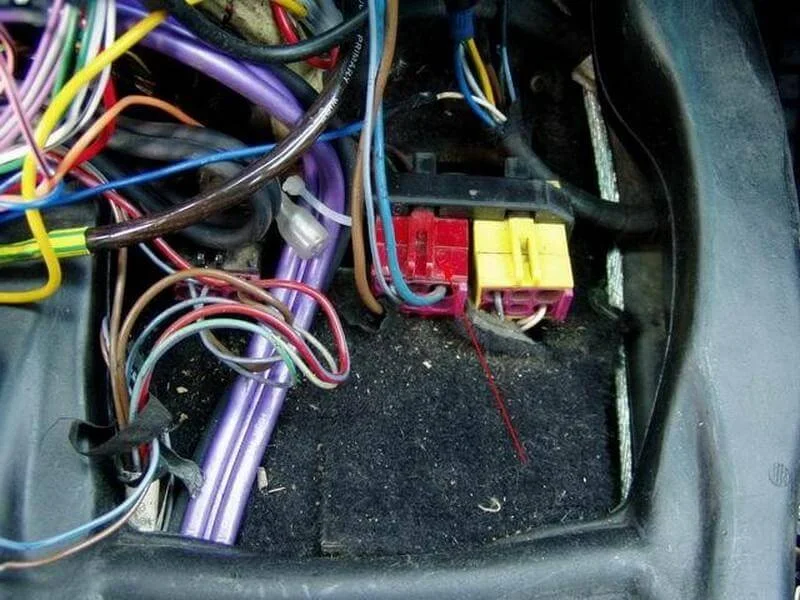
Disconnect the connector on the transmission tunnel.
Unscrew the air duct mounting between the seats.
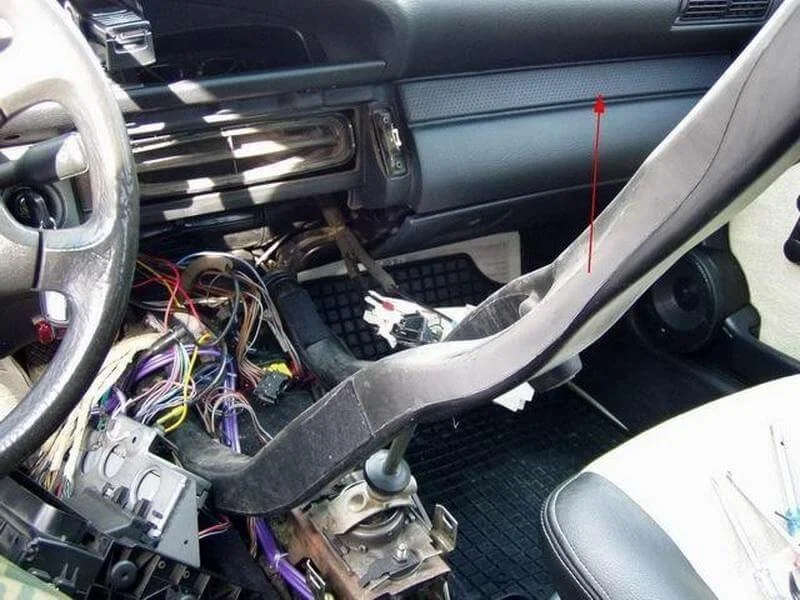
Remove the air duct by pulling it upwards.
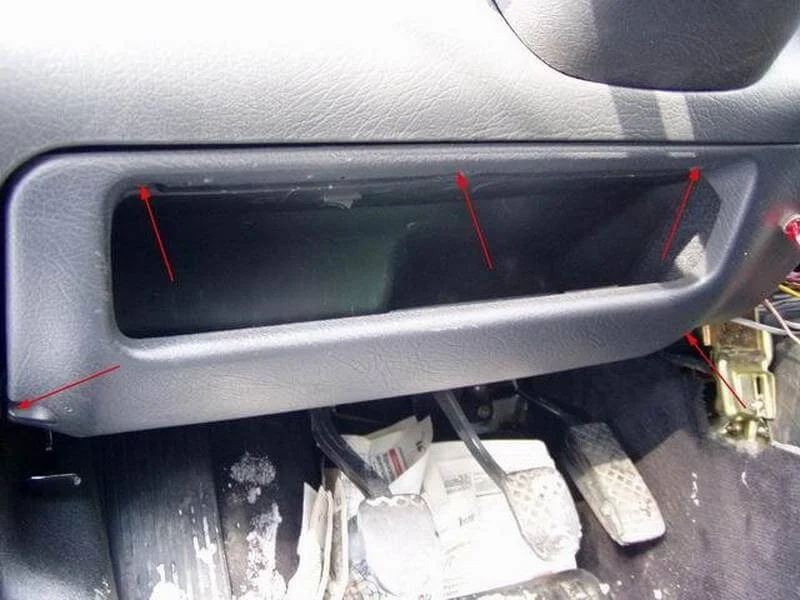
Open the glovebox, use a screwdriver to pry off the 2 retaining rings on each side, and remove it.
Unscrew the 5 bolts securing the shelf under the steering column and remove it.
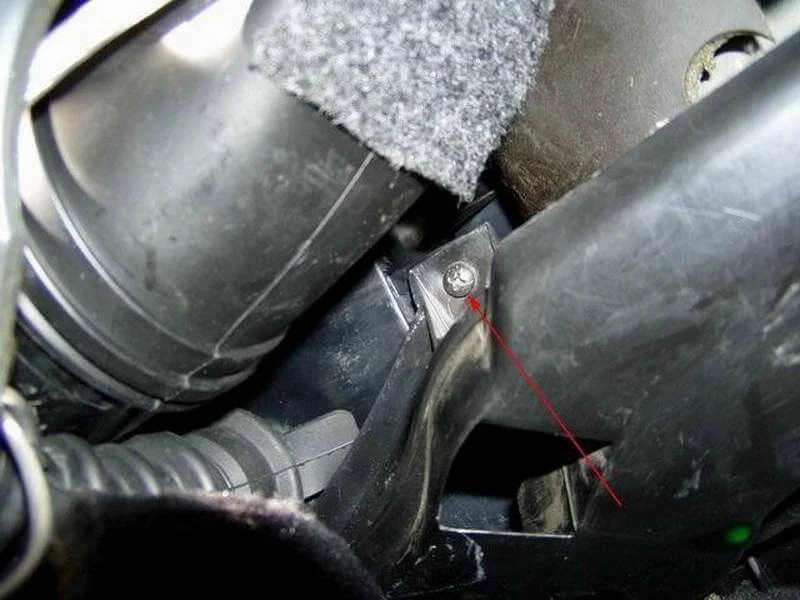
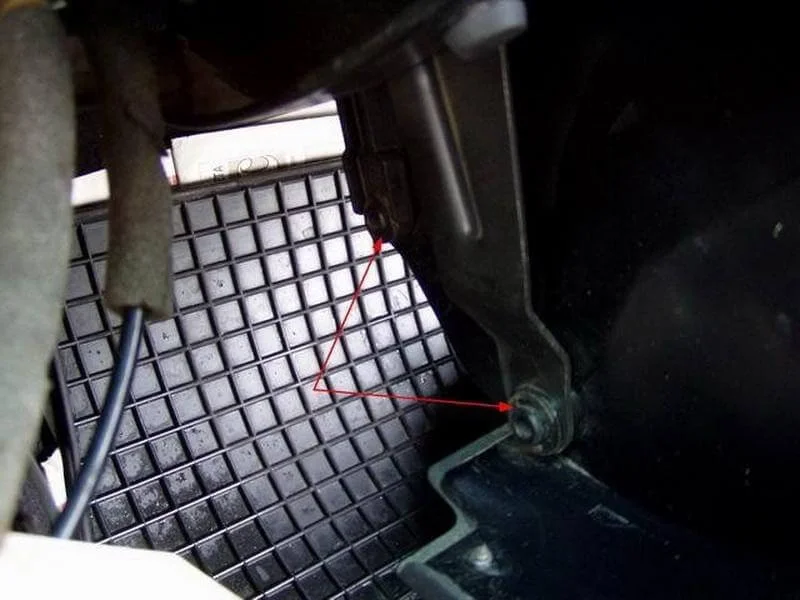
Unscrew the screw securing the air duct on the passenger side and remove the part.
Do the same on the driver's side.
Disconnect the L-shaped heater ducts.
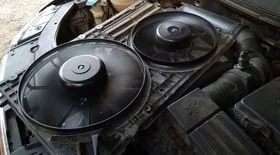
Move to the engine bay. Open the bonnet and remove the plastic cover.
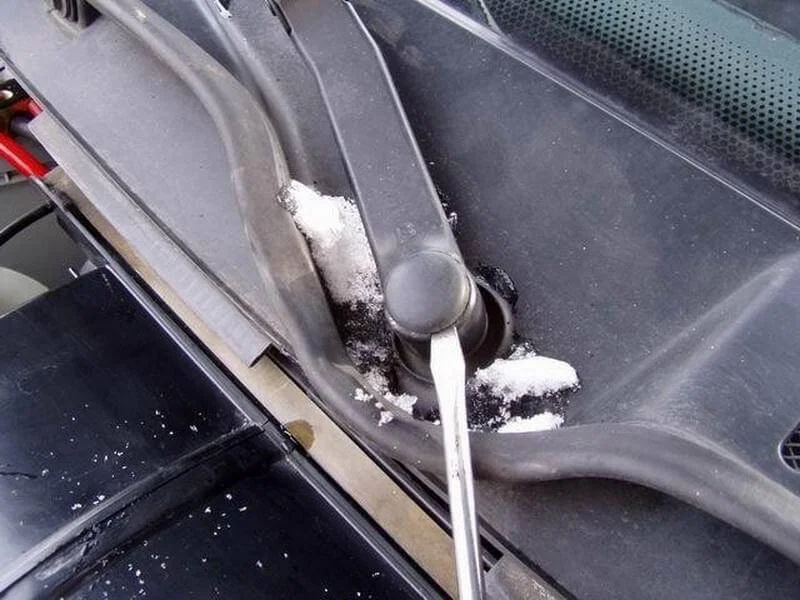
Pry off and remove the wiper arm nut covers.
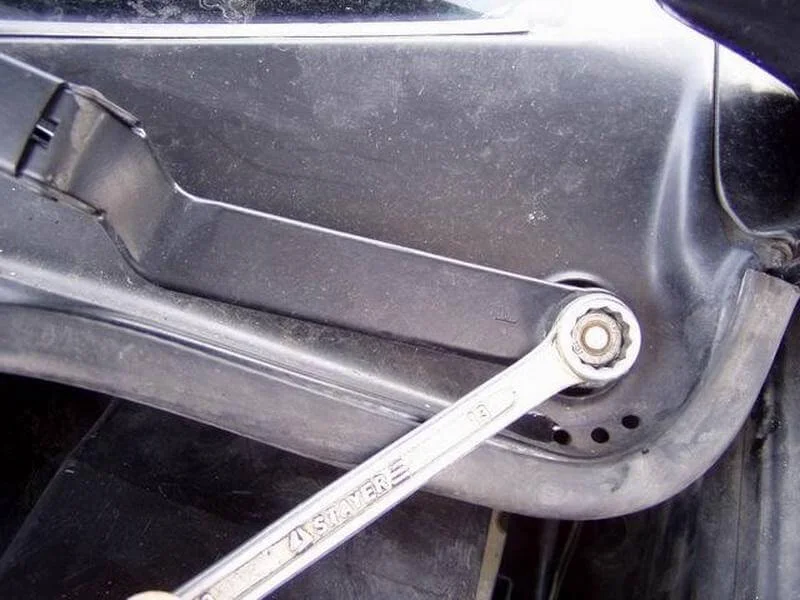
Using a 13 mm ring spanner or socket, unscrew the wiper arm nuts and remove the arms.
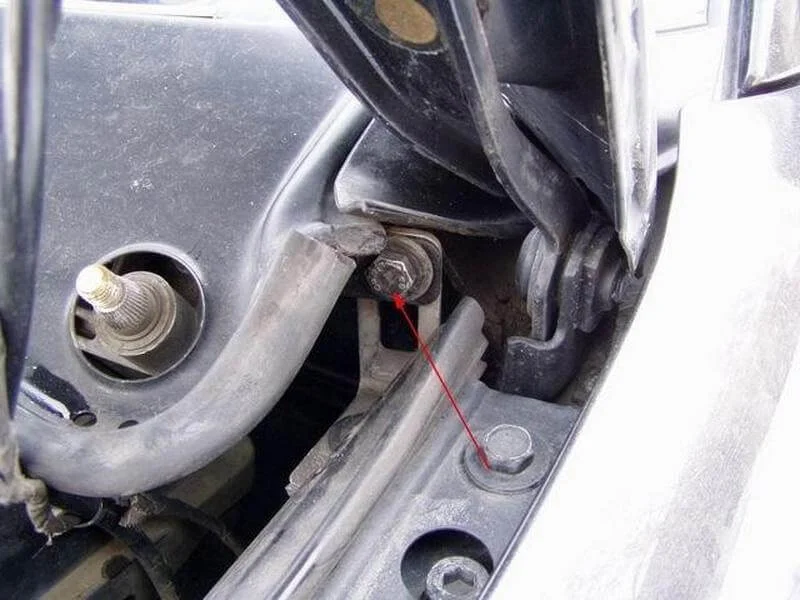
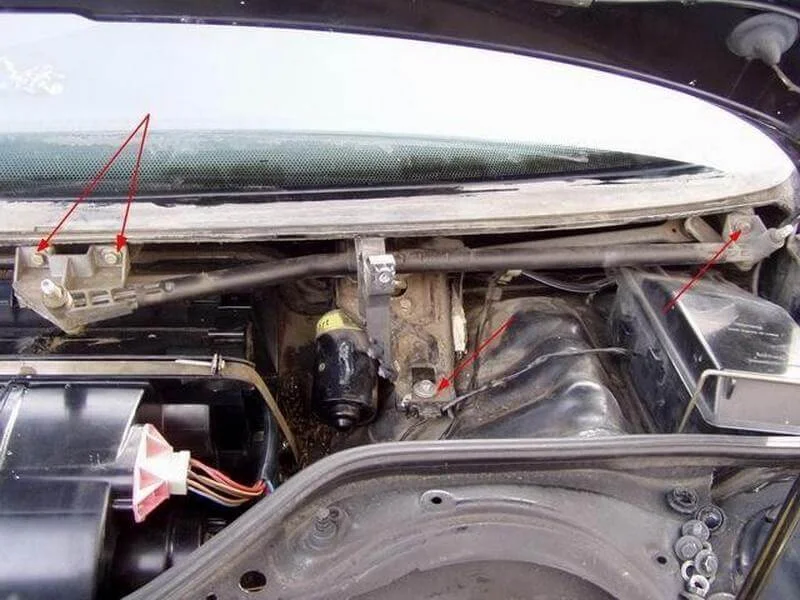
Using a 10 mm socket, unscrew the 4 bolts securing the plastic cowl/trim. One is located here.
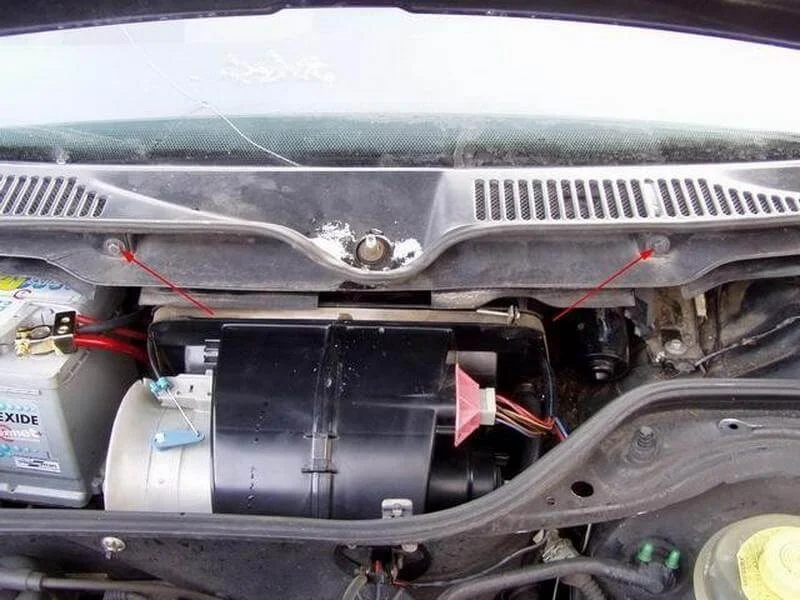
Two bolts here.

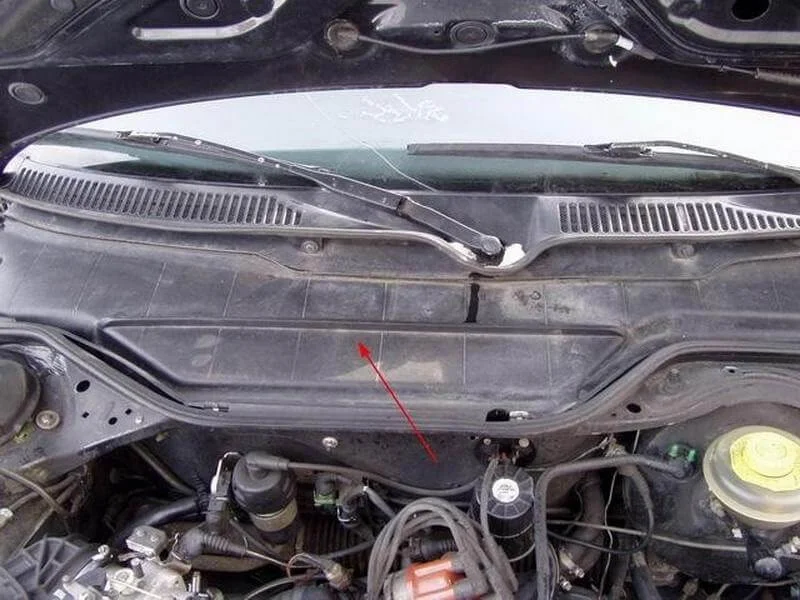
And one bolt here. Remove the plastic cowl.
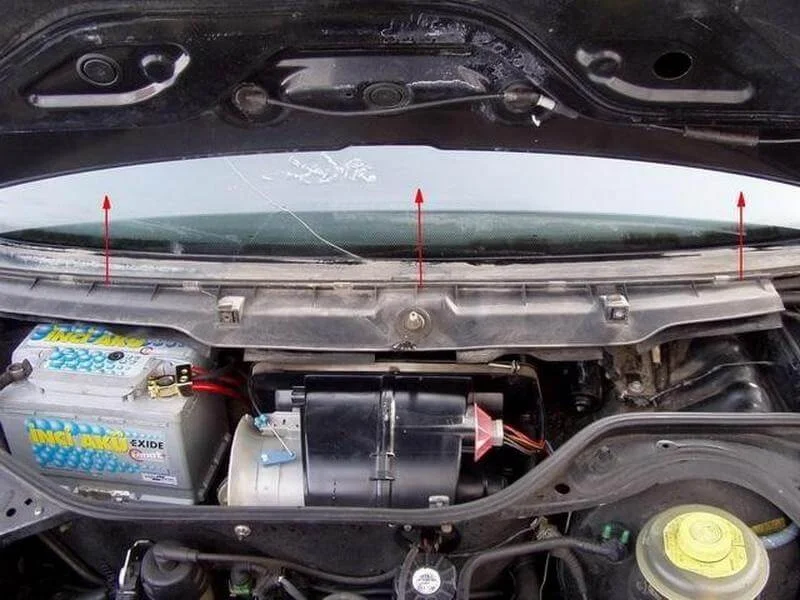
Pull another trim piece upwards to remove it.
Using a 10 mm socket, remove the 4 screws securing the wiper linkage.
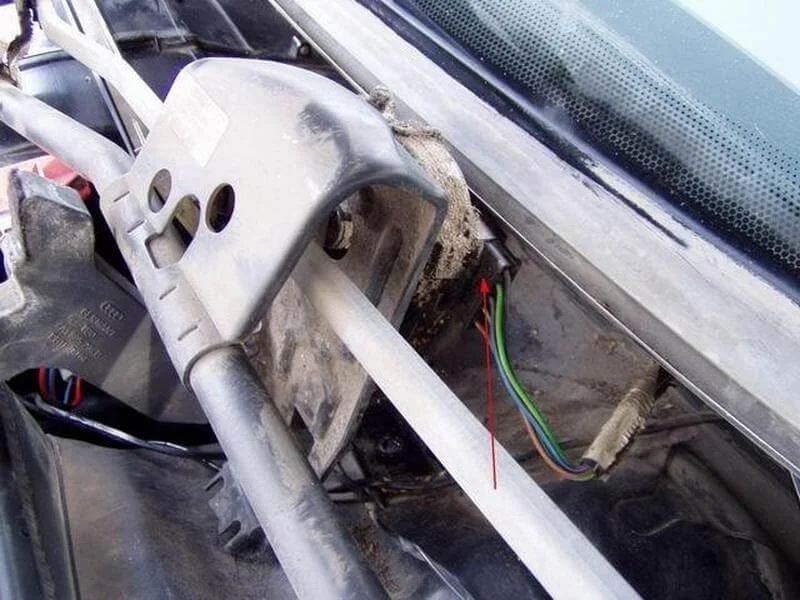
Remove the wiper mechanism, having first disconnected the electrical connector.
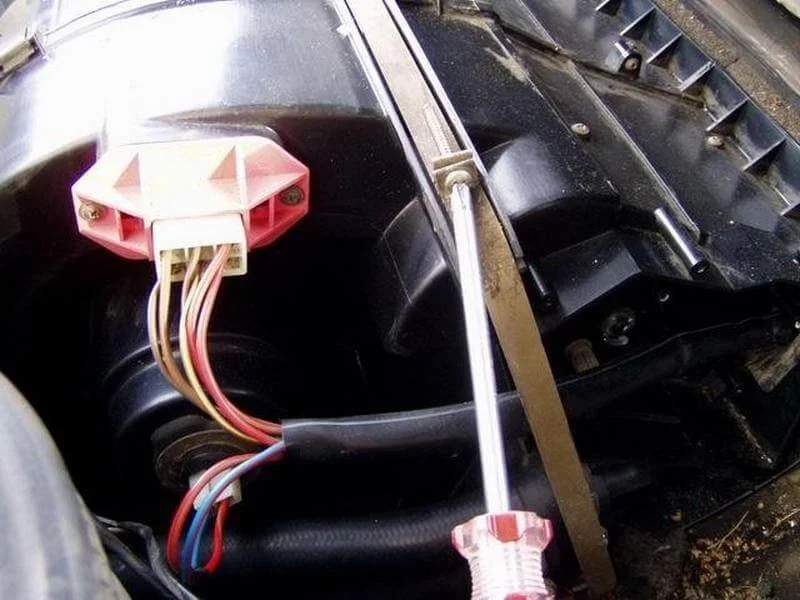
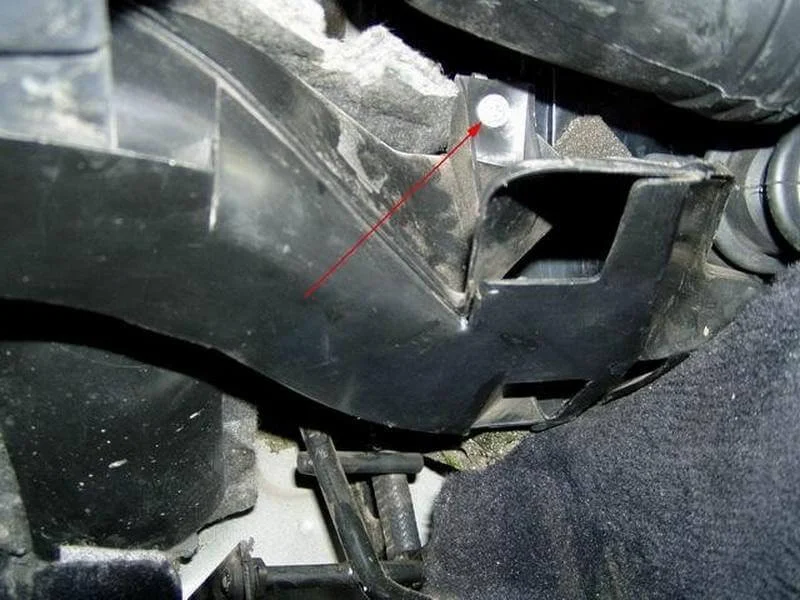
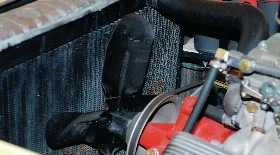
Unscrew the heater unit securing band with a screwdriver.
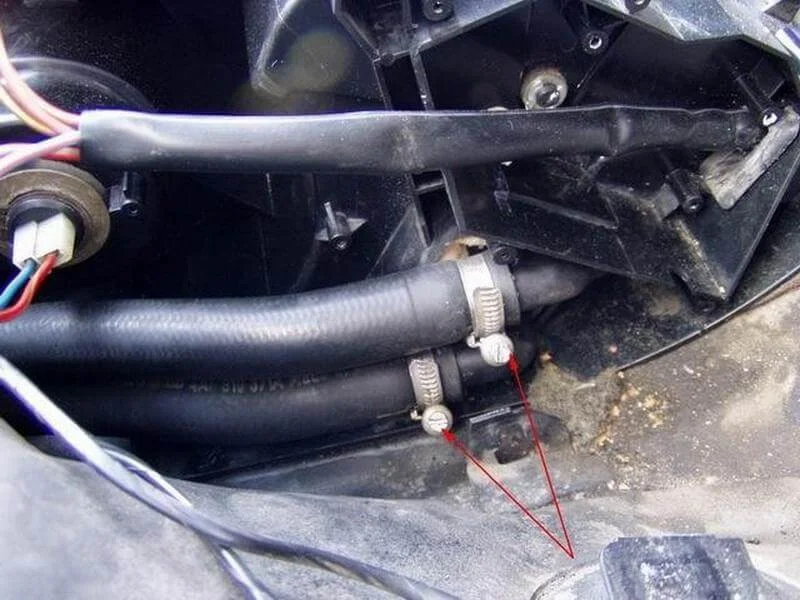
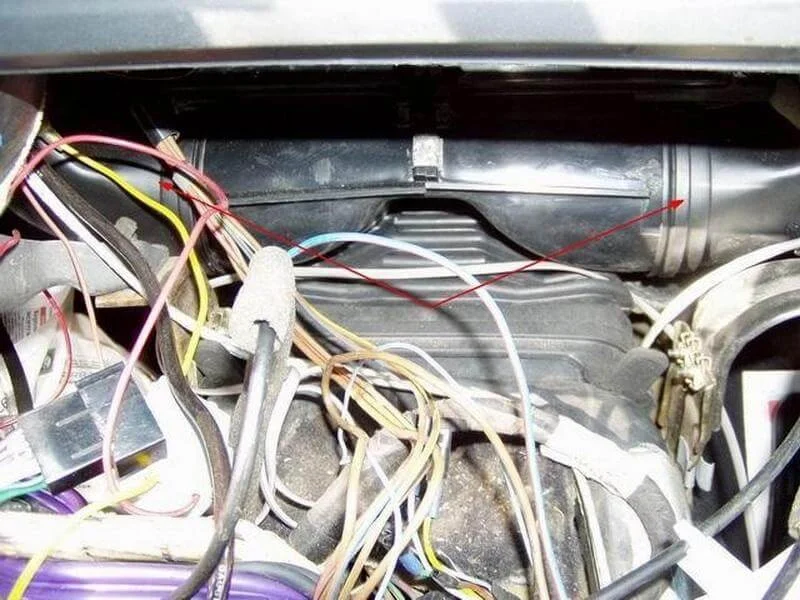
Loosen the clamps on the radiator hoses and disconnect them. It is not necessary to drain all the coolant beforehand; less than a litre will flow out of the heater.
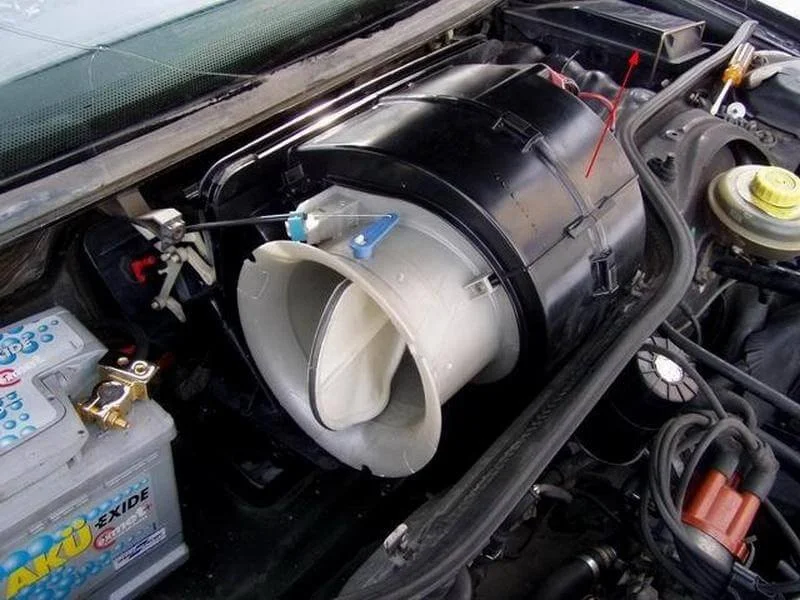
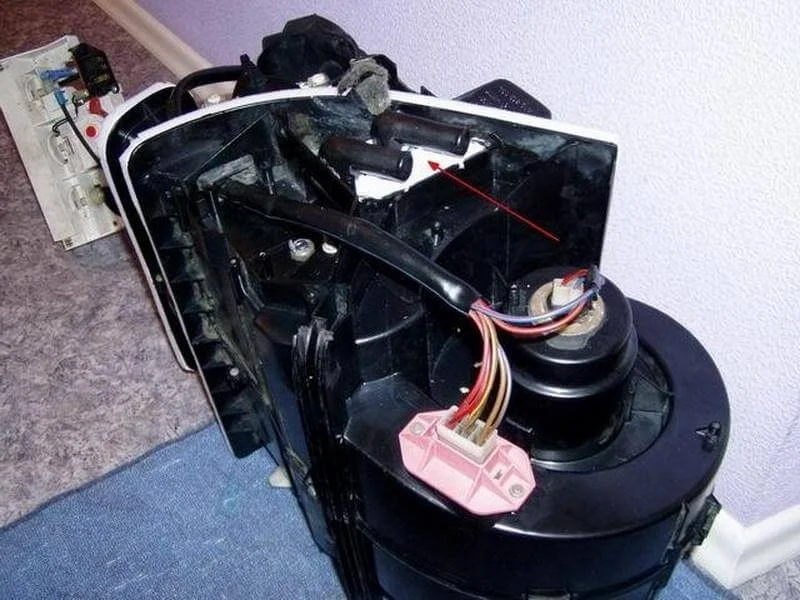
Pull the heater unit housing upwards to remove it from the body. If the unit is being removed for the first time, the factory seal may hold the housing quite tightly.
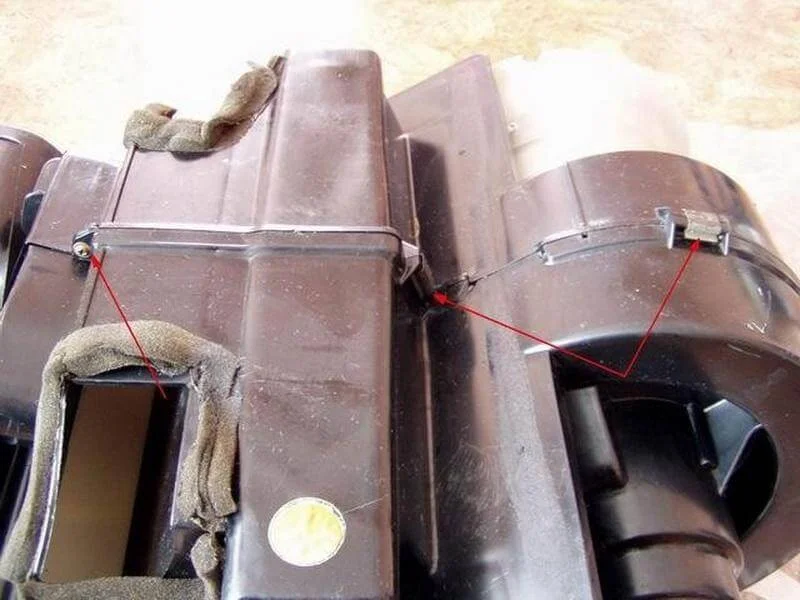
Release the clips and unscrew the screws around the perimeter of the heater housing.
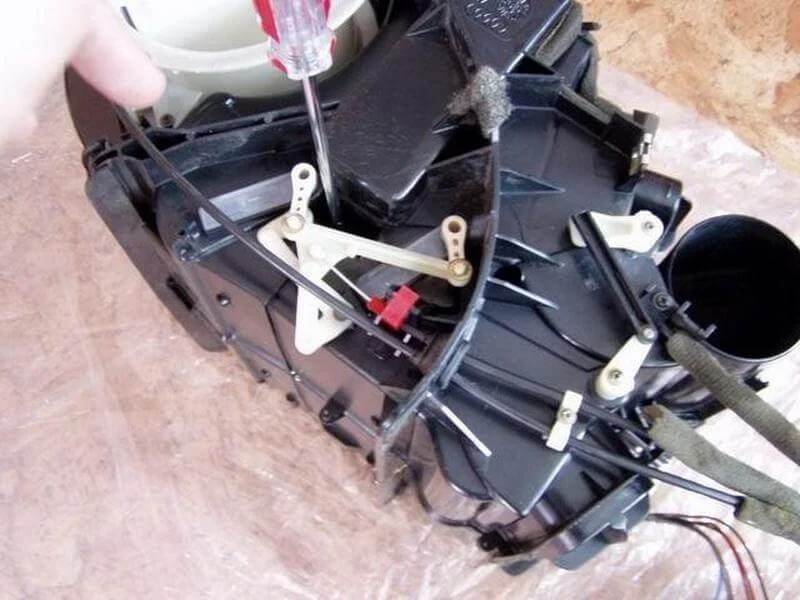
This screw can only be removed with a long screwdriver.
Just like this one.
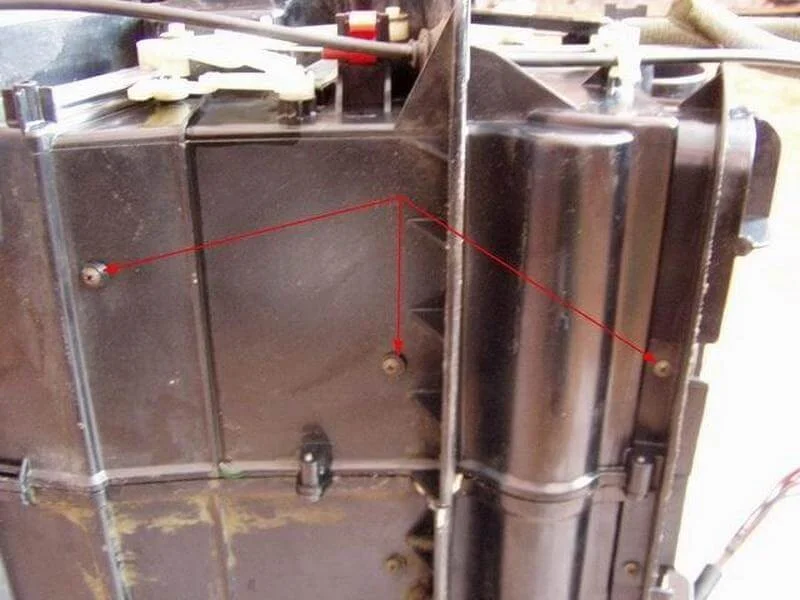
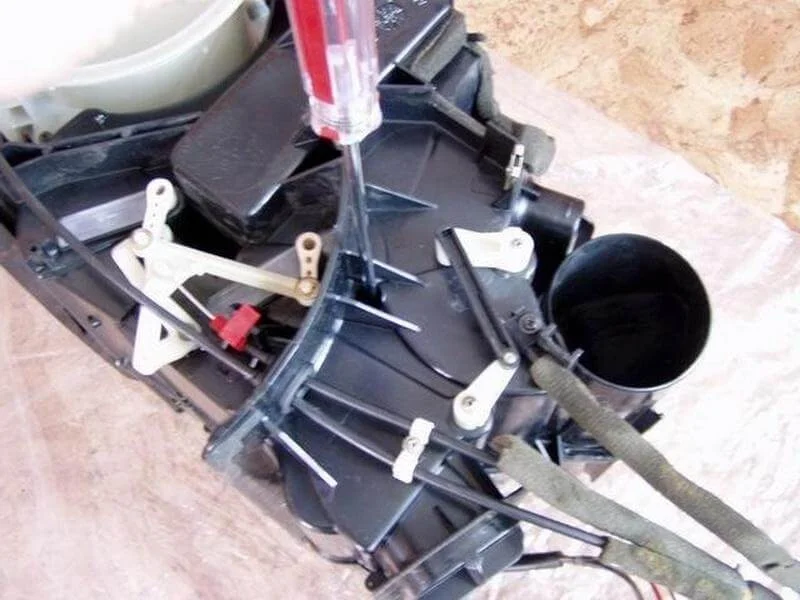
Unscrew the 6 screws from the bottom of the heater unit.
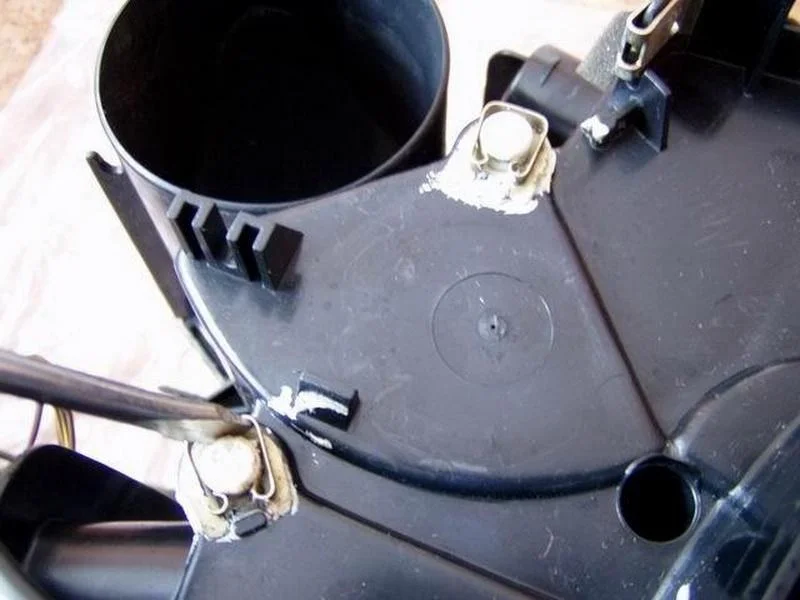
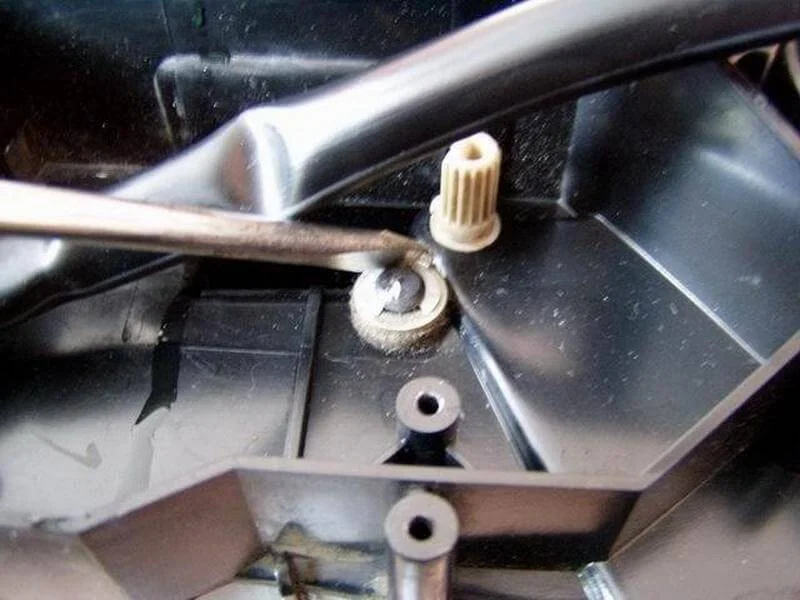
Remove the flap retaining rings with a screwdriver.
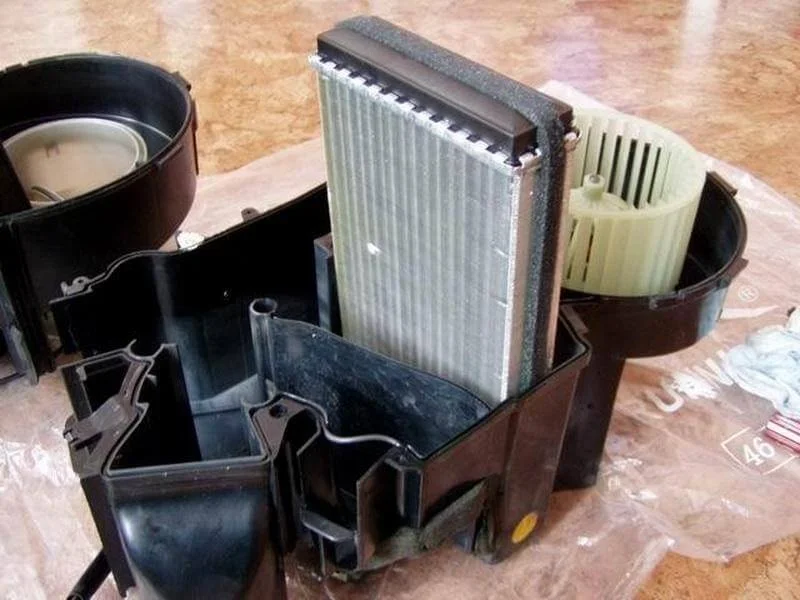
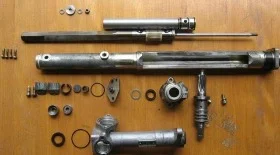
Separate the heater housing into two halves.
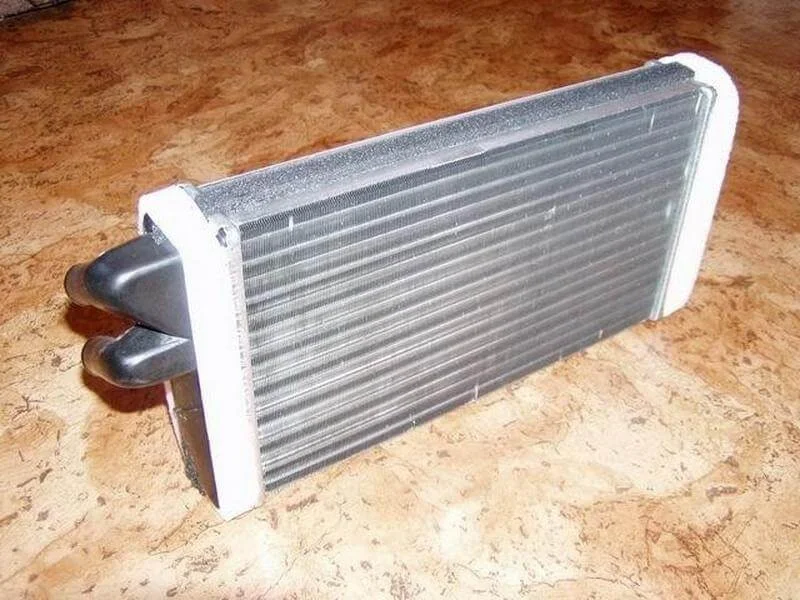
Remove the old matrix. Apply sealing foam around the perimeter of the new matrix.
Clear any debris and leaves from the inside of the heater unit.
Check the condition of the flaps for damage and ensure they seal tightly.
Reassemble the heater housing in reverse order. After assembly, it is recommended to apply sealant where the pipes exit. Replace the foam duct seals if necessary.
Install the heater unit back into the car in reverse order.
On 5-cylinder engines, bleeding the system is usually not required—air escapes naturally after running the engine at 3000–4000 rpm.
Was this guide useful?
Your feedback helps us improve our content.
Related Materials


Discussion (0)
No comments yet!