Chevrolet Lanos 1.5l 8V timing belt replacement
Do not underestimate the importance of checking the condition of the timing belt and inspecting it for delamination, cracks or scuffs to avoid issues such as bent valves in the event of failure.
Valves are also liable to bend on the vehicle featured in this photo guide — the Chevrolet Lanos with the 1.5-litre 8-valve (8V) engine.
Prepare the following tools for the replacement:
- Jack (if working on the ground)
- Screwdriver
- Socket set (10 to 19 mm)
- Ring spanners (12, 13, 14, 15 mm)
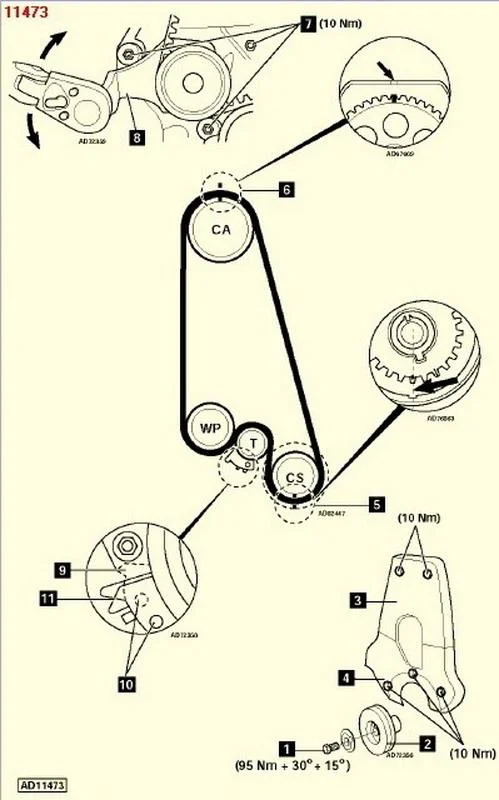
For clarity, I recommend referring to the illustration showing the general replacement principle.
Original timing belt kits, such as General Motors 95516736, are available for this engine. Alternatives include the Contitech CT 874 K1, Gates K015310XS, Bosch 1 987 948 625, and Ina 530 0004 10.
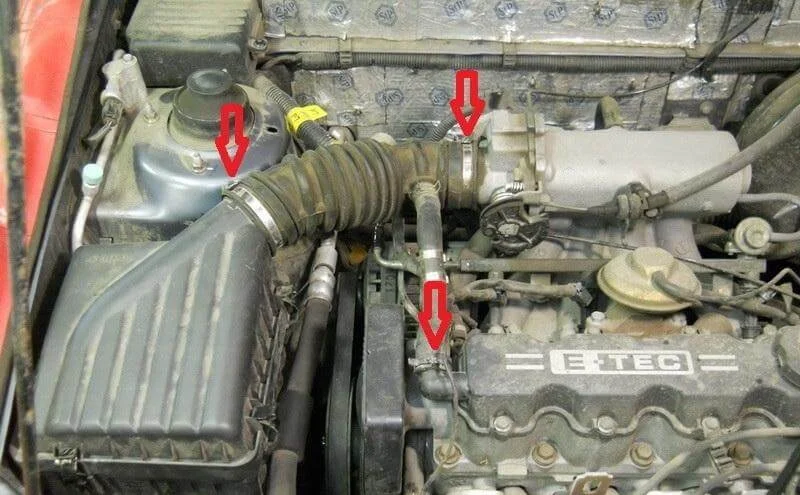
Remove the air intake hose and the air filter housing to facilitate the belt replacement.
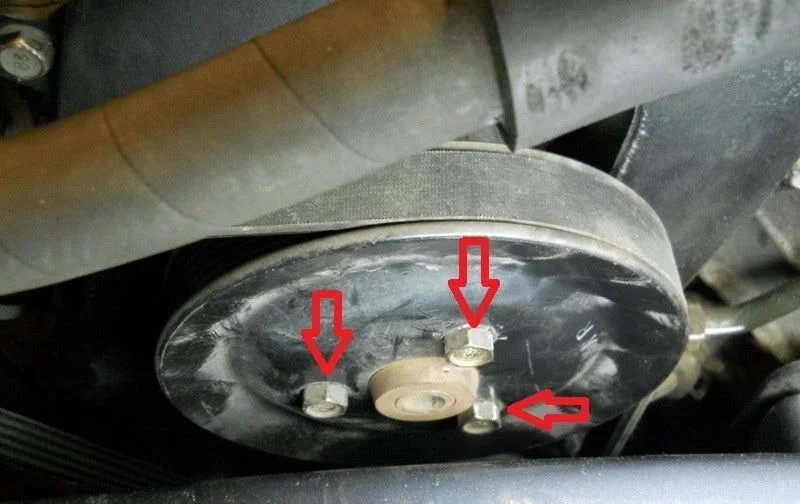
Loosen the three bolts securing the power steering pump pulley. Then unscrew the upper alternator mounting bolt, loosen the alternator belt tension and remove the belt. After that, remove the power steering pulley.
Following this sequence will make it easier to unscrew the bolts securing the pump pulley.
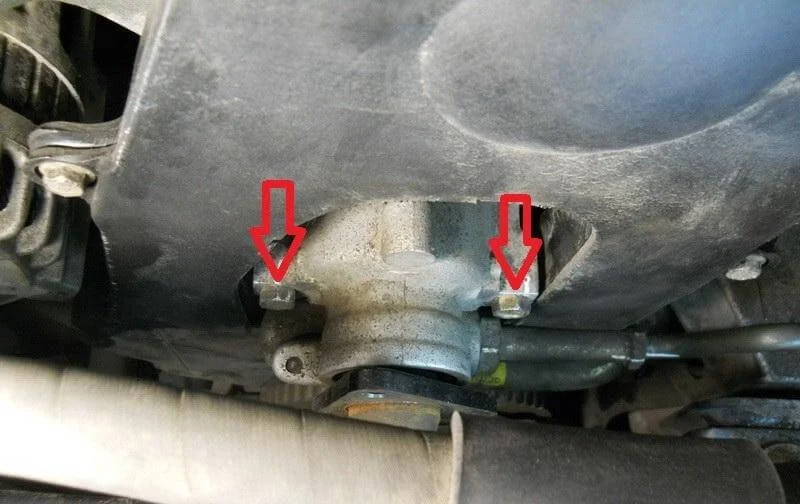
Unscrew the two 12 mm bolts securing the power steering pump housing to the cylinder block.
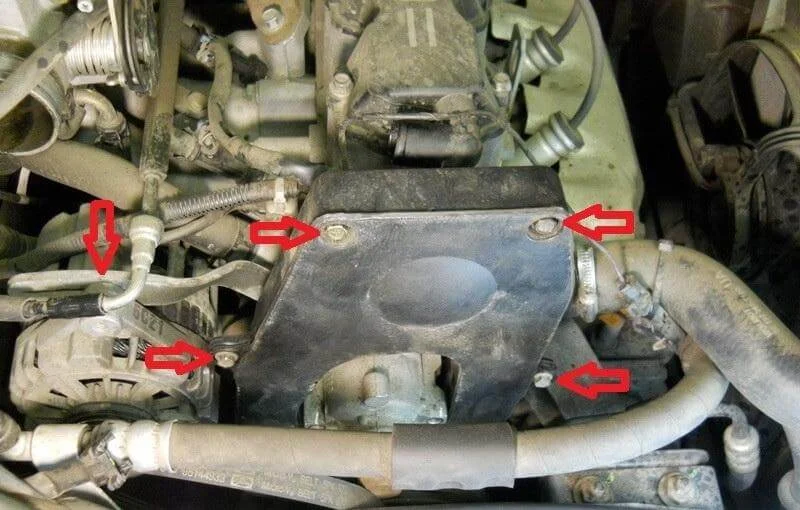
Unscrew the four 10 mm bolts securing the upper part of the timing belt cover and remove it.
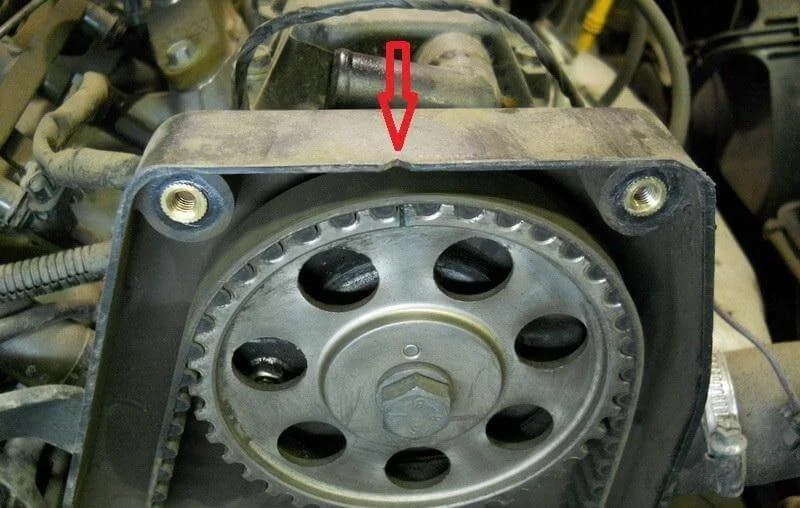
Set the piston of the first cylinder to Top Dead Centre (TDC).
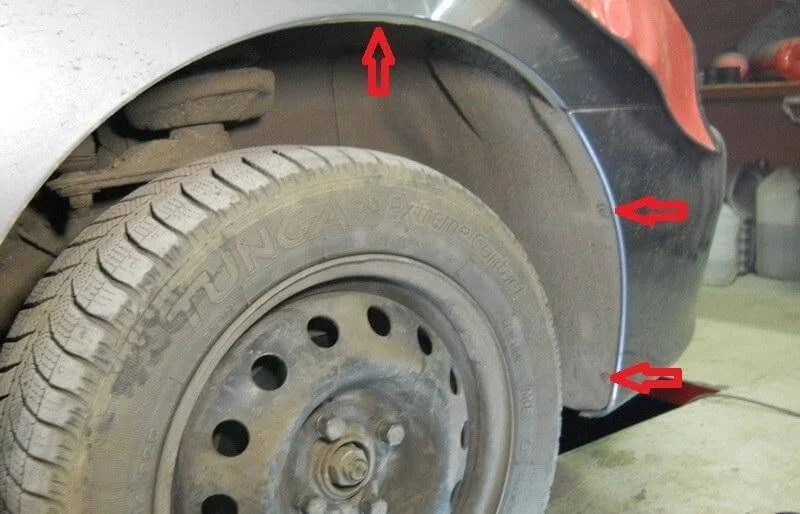
Now for the lower part of the engine. Remove the front right wheel and the wheel arch liner.
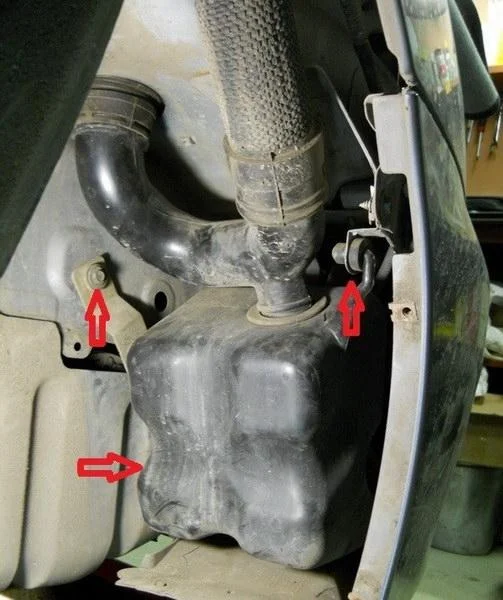
To make access to the plastic cover easier, you can remove the air resonator.
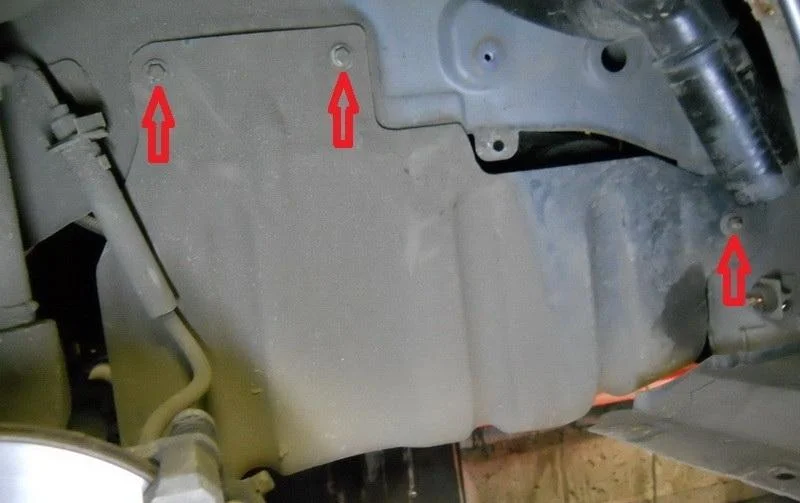
Unscrew the two bolts and two nuts (10 mm) to remove the plastic splash guard covering the engine belts from below and the side. If a metal sump guard is fitted, remove it beforehand.
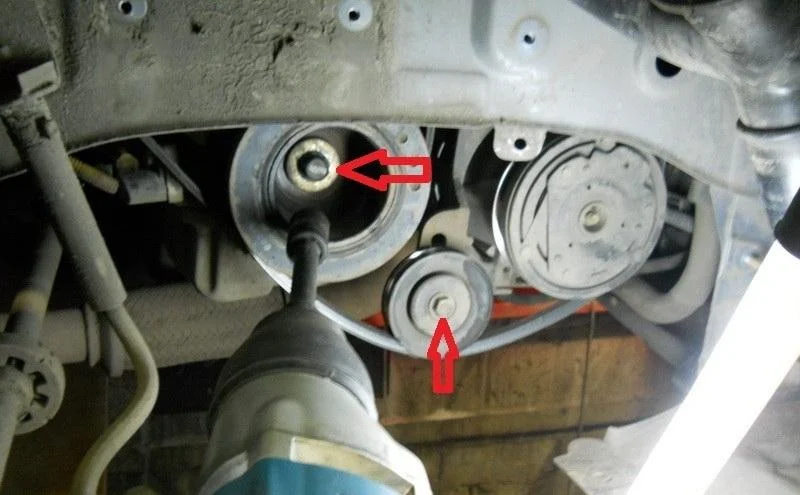
Loosen the air conditioning drive belt tensioner pulley and remove the belt. Use an impact wrench to unscrew the bolt securing the crankshaft pulleys.
If an impact wrench is not available, this bolt can be removed with the help of an assistant. They will need to engage 4th or 5th gear and press hard on the brake pedal. This will lock the crankshaft, allowing the bolt to be unscrewed using a good quality breaker bar with an extension and a 17 mm socket.
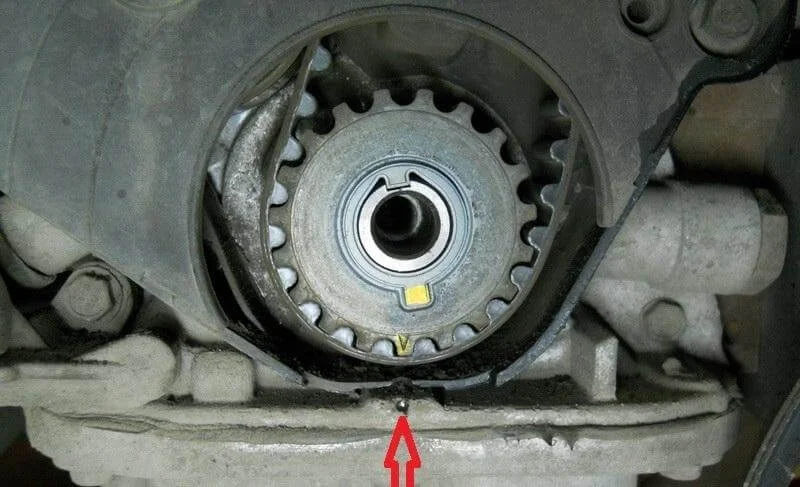
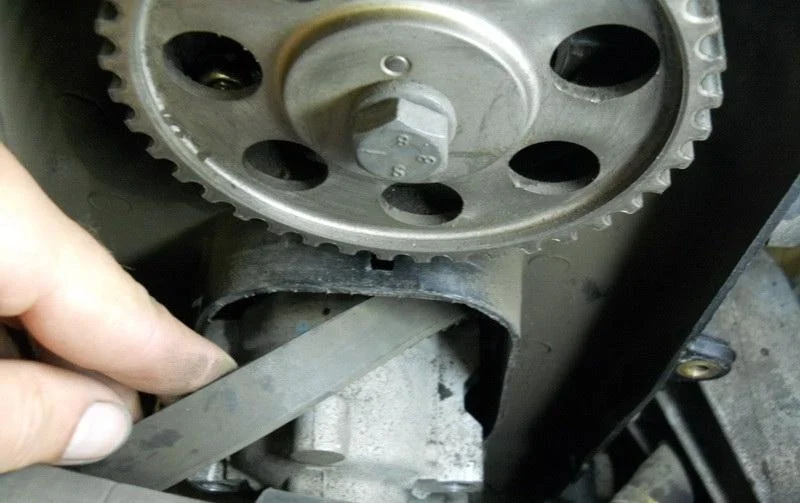
Pay attention to the crankshaft alignment mark. The mark on the toothed crankshaft sprocket must align with the corresponding mark (notch) on the rear timing belt cover (at the bottom).
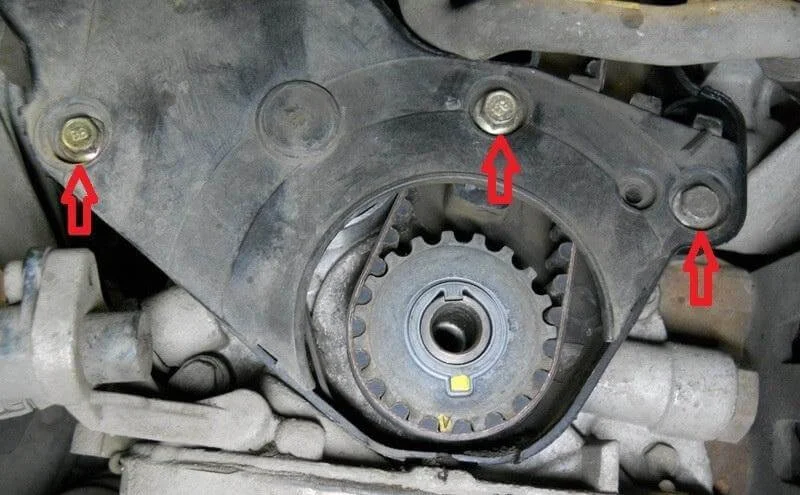
Unscrew the three 10 mm bolts securing the lower part of the timing belt cover.
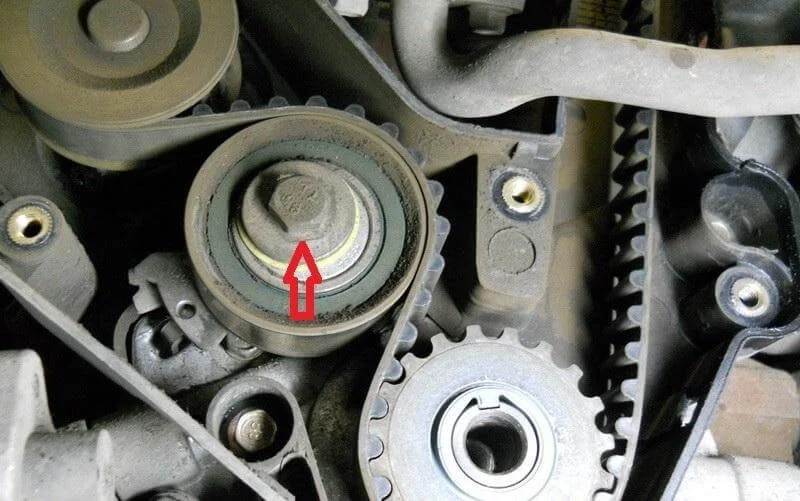
Align the holes on the movable and fixed tensioner plate and lock it in the retracted position using a small screwdriver or a drill bit (of suitable diameter). After this, you can remove the timing belt and the tensioner itself, which is secured to the engine block by a single bolt.
Removing the timing belt from the engine can be awkward: it needs to be carefully threaded through the narrow gap around the power steering pump housing.
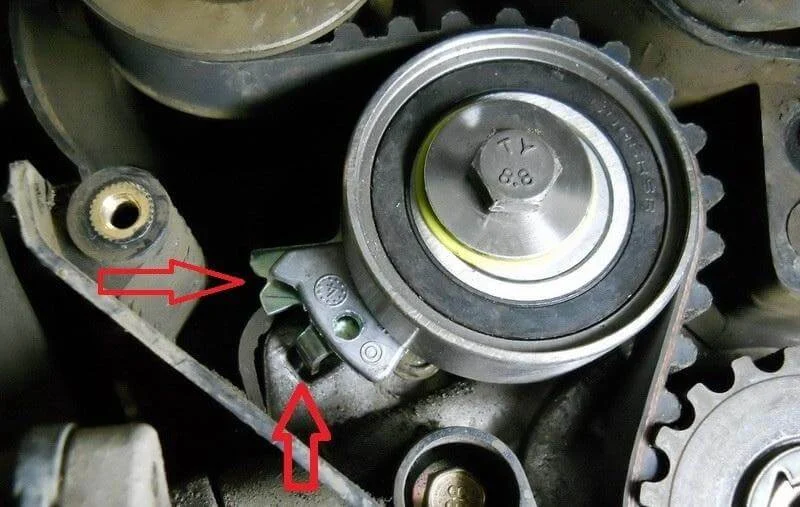
When installing the new belt, ensure that the pointer on the tensioner plate aligns with the corresponding notch in the bracket (tension). The tightening torque for the crankshaft pulley bolt is: 95 Nm + tighten further by 30° and 15°.
Check the alignment of the marks: the mark on the camshaft pulley should point upwards and align with the notch on the casing, and the mark on the crankshaft pulley should point downwards and align with the mark on the rear cover. Rotate the crankshaft manually two full turns and ensure the marks have not shifted.
Was this guide useful?
Your feedback helps us improve our content.


Discussion (0)
No comments yet!