Replacing the Timing Belt and Injection Pump on VW Transporter 2.5 TDI (ACV)
The vehicle has covered another 120,000 km — it is time to replace the injection pump and timing belts. The sequence of work described in this article is suitable for AXL, AJT, ACV, AXG, AHY, AYY, AYC, and AUF engines.
The main distinguishing feature of all engines from various years of manufacture is the sequence of bodywork disassembly at the initial stage. The powerful 111 kW (152 hp) versions have a specific auxiliary equipment configuration, but they are rare and differ only by a different (full-size) intercooler, a different ribbed belt drive system, AC radiator, variable geometry turbine, and a different intake system layout (AHY and AXG engines).
Necessary Tools and Equipment
To perform a high-quality belt replacement, the following tools will be required:
Tools for timing belt replacement
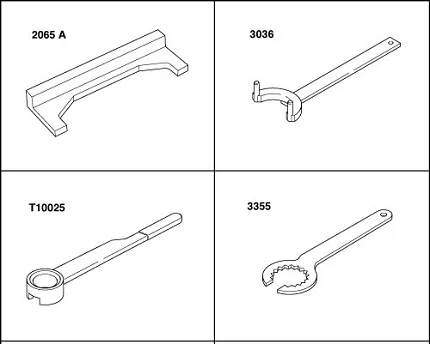
- 32 mm spanner for the tensioner pulley;
- crankshaft pulley holding tool;
- holding tool for the injection pump sprocket;
- holding tool for the camshaft sprocket;
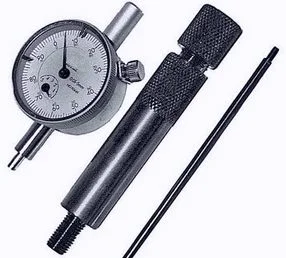
- dial indicator (dial gauge) with holder;
- feeler gauge;
- setting bar (locking plate);
- torque wrench (ranges 100-200 Nm and 20-60 Nm).
All work will be carried out over an inspection pit, so position the vehicle with the right-hand wheels as close to the edge as possible to ensure convenient access.
What Parts are Needed?
Part numbers for timing belt kits with tensioner pulleys will vary depending on the engine:
- 037 198 119 (AAC)
- 028 198 119 A (ABL)
- 074 198 119 M (AET,AEU,APL,AVT)
- 074 198 119 Q (ACV,AUF,AYC)
- 074 198 119 N (AJA)
- 074 198 119 P (AJT,AHY,AYY,AXG)
Toothed belt for Injection Pump:
- 074 130 113J (AJT,ACV,AYC,AUF,AHY,AXG,AYY)
- 074 130113 (AJA)
Tensioner pulley for Injection Pump belt:
- 074 109 243 C (AET,AEU,APL,AVT)
- 074 109 243 F (AJA,ACV,AYC,AUF)
- 074 109 243 E (AYY,AJT,AHY,AXG)
How to Replace the Timing and Injection Pump Belts on a Transporter 2.5?
First, the timing belt and injection pump belt need to be removed.
Removal:
- Radiator grille.
- Insulating belly pan.
- Mass Air Flow (MAF) sensor connector.
- Washer fluid reservoir filler neck extension.
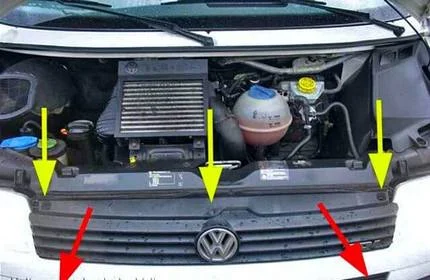
Removing the radiator grille on VW Transporter 2.5 TDI
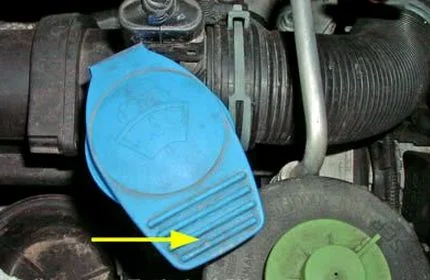
Washer tank extension VW Transporter 2.5 TDI
- Intercooler bracket.
- Air filter cover and pollen filter housing (remove the hose clamp from the intake duct first).
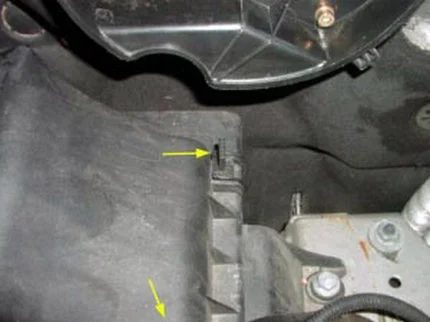
Air filter cover VW Transporter 2.5 TDI
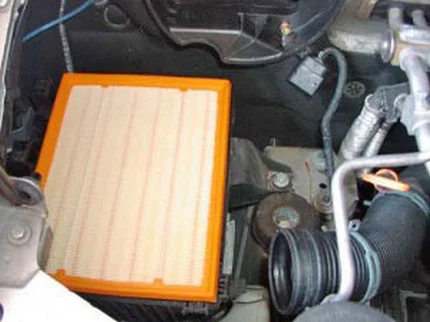
Air filter VW Transporter 2.5 TDI
Radiator frame mounting bolts
- Pivot the radiator frame together with the radiator forward.
- Turn the wheels to the full right lock.
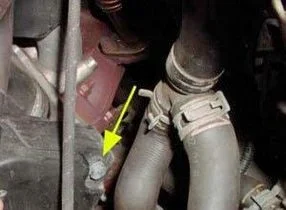
- Locate and disconnect the power steering pump hose clamp in the upper left part of the radiator; plug the tube ends with suitable stoppers.
- Push out the locking pins from the radiator frame mounts, then separate them.
- Swing the frame with the radiator to the right (no need to disconnect coolant hoses) and secure it with wire to prevent it from falling.
- Remove the protective covers for both belts, as well as the cylinder head cover (rocker cover).
VW toothed belt protective cover
Mounting for VW toothed belt cover
Cylinder head cover
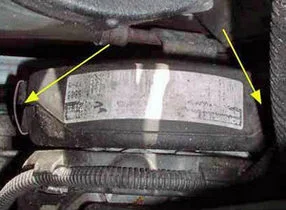
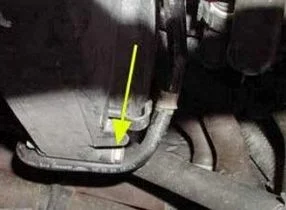
- Relieve pressure in the cooling system by opening and closing the expansion tank cap. Drain the coolant; you will need a container with a capacity of 8-10 litres beforehand.
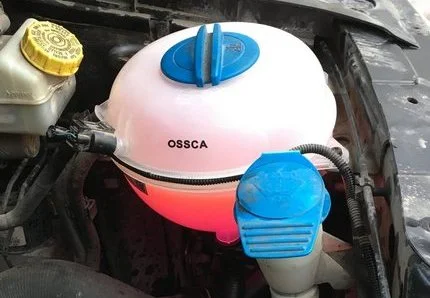
Expansion tank cap VW Transporter 2.5 TDI
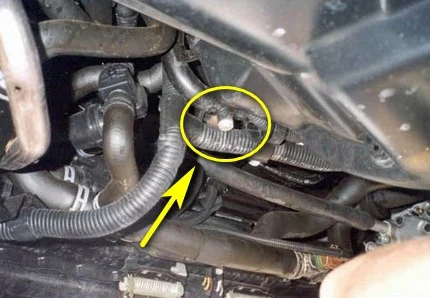
Coolant drain plug on VW Transporter 2.5 TDI
- Loosen the M8 bolts (3 pcs) on the power steering pump pulley.
- Grasp the ribbed belt with both hands to the left and right of the power steering pump and slowly pull the belt (pull in the direction of the arrow), gradually increasing force, then remove the belt from the power steering pump and other pulleys.
- Remove the power steering pulley and the ribbed belt idler pulleys.
- Set the crankshaft to Top Dead Centre (TDC) for Cylinder 1.
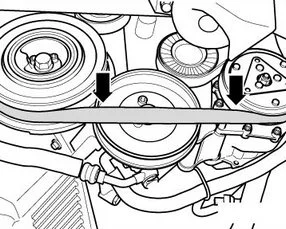
Ribbed belt VW Transporter 2.5 TDI
Crankshaft VW Transporter 2.5 TDI at TDC

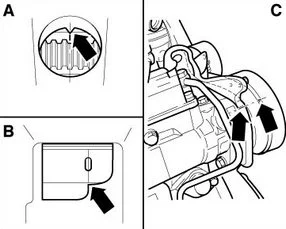
TDC Mark VW Transporter 2.5 TDI
The marks on the injection pump pulley/bracket C and flywheel/clutch housing A (Manual gearbox) or drive plate/clutch housing B (Automatic gearbox) must align perfectly. If the marks do not align, rotate the crankshaft one full turn clockwise.
- Lock the crankshaft and undo the centre bolt, then remove the crankshaft pulley damper.
Crankshaft centre bolt VW Transporter 2.5 TDI
- Remove the centre bolt of the vibration damper.
- Loosen the bolts fastening the vibration damper to the timing sprocket (M8 bolts) and remove two bolts located opposite each other.
- Undo the two remaining fastening bolts enough to separate the vibration damper from the lower crankshaft gear by tapping the bolt heads gently with a hammer.
- Remove the vibration damper.
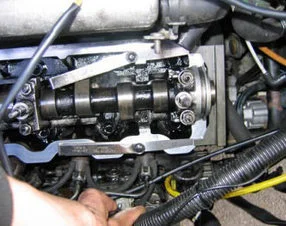
- Loosen the camshaft bolt using a counter-hold tool (by 3-5 turns).
Camshaft taper sprocket
- Using a hammer and a drift through the hole in the timing belt cover, knock the sprocket off the camshaft taper.
- Unscrew the two bolts fastening the inner plastic timing belt guard.
- The camshaft sprocket on the injection pump side is secured using a special wrench (3036); unscrew the bolt 3-5 turns.
- Unscrew the injection pump belt tensioner pulley, remove the injection pump belt, and also the sprocket from the camshaft on the injection pump side.
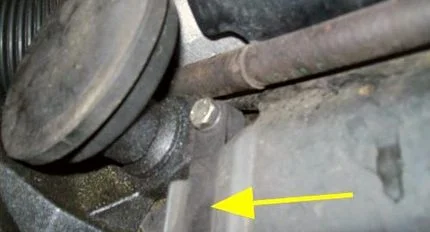
- Remove the far injection pump idler pulley and check the stud depth in the cylinder head housing.
- Unscrew the four bolts fastening the oil filler neck.
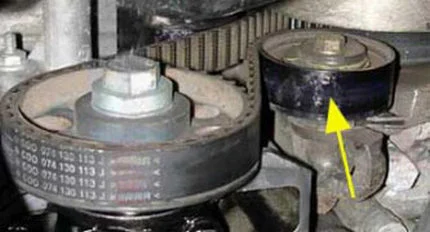
Injection pump belt tensioner pulley
Oil filler neck fastening bolts
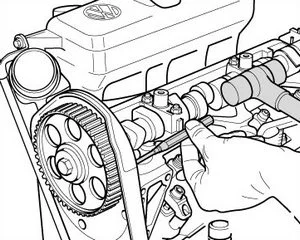
- Remove the valve cover, having first unscrewed the four 13 mm bolts.
- Remove the lower part of the timing belt cover.
- Mark the direction of rotation of the timing belt (mark only if it is not being replaced).
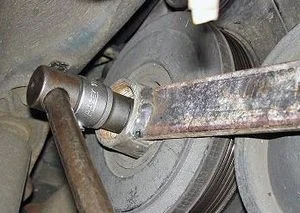
- Relieve the timing belt tensioner pulley using a 32 mm ring spanner, having first unscrewed the 13 mm fastening bolt, and remove the pulley.

Lower part of the timing belt cover VW Transporter 2.5 TDI
Timing belt tensioner pulley VW Transporter 2.5 TDI
- Remove the timing belt.
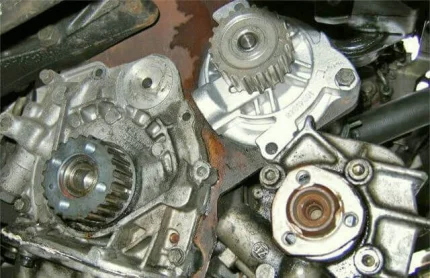
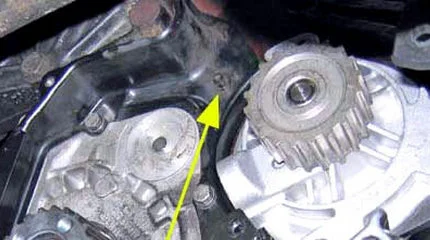
- Unscrew the three water pump fastening bolts and remove the pump.
- Remove the inner plastic timing belt guard.
The engine is disassembled; preparatory work begins.
Installing Injection Pump and Timing Belts
Setting Injection Timing
- Remove the 12 mm plug from the injection pump housing; screw the adapter for the dial indicator into the threaded hole.
- Insert the dial indicator (approximate range 0... 3 mm) into the adapter with a preload of approximately 2.0 mm.
Adapter and dial indicator
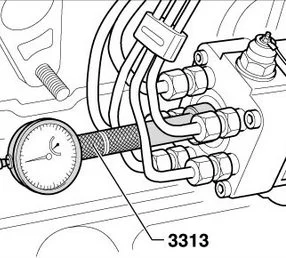
Dial indicator (dial gauge)
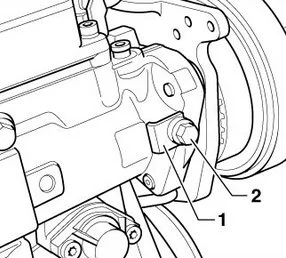
Spacer 1 and locking bolt 2
- Check if the marks on the injection pump housing and pulley align.
- Loosen the locking bolt (2) on the injection pump.
- Remove the spacer (1).
- Set the indicator to "0".
- To ensure the injection pump plunger is at Bottom Dead Centre (BDC), smoothly rotate the injection pump pulley using a 21 mm ring spanner (clockwise). Once the dial indicator needle stops moving, BDC is reached; set the dial indicator to "0".
- Slowly rotate the injection pump drive pulley counter-clockwise using the 21 mm spanner until the dial indicator needle moves to 0.55 mm.
- Tighten the locking bolt 1 on the injection pump to 30 Nm.
- Remove the dial indicator and screw the plug back into the hole.
- Check if the TDC mark on the flywheel aligns with the reference mark.
I chose an original manufacturer kit for replacement.
TDC Mark VW Transporter
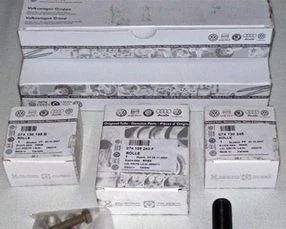
Timing belt replacement kit

Timing belt and tensioner pulleys for Volkswagen Transporter 2.5 TDI
Installing Timing Belt and Water Pump
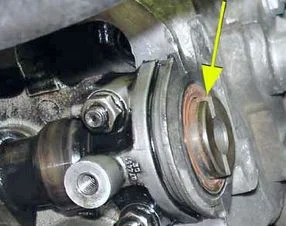
While everything is disassembled, check the condition of the camshaft oil seals and the front crankshaft oil seal.
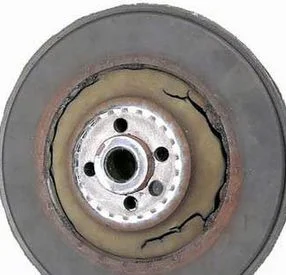
Condition of the old damper
New camshaft oil seal front face
Front crankshaft oil seal rear face
All metal and plastic parts have been cleaned.
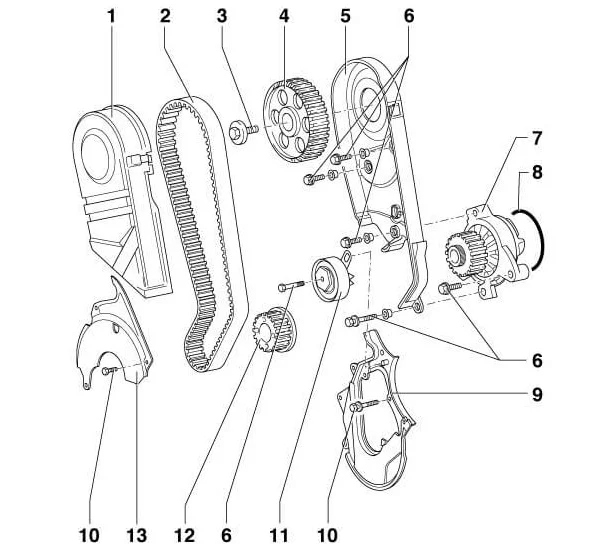
1 – Upper timing belt cover; 2 – Timing belt; 3 – Fastening bolt (80 Nm); 4 – Camshaft sprocket; 5 – Rear timing belt guard; 6 – Bolt 10 Nm; 7 – Water pump; 8 – O-ring; 9 – Lower cover; 10 – Cover retaining bolt; 11 – Tensioner pulley; 12 – Timing belt gear; 13 – Cover.
Begin assembly:
- Check if the TDC mark on the flywheel aligns with the reference mark.
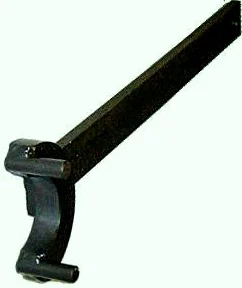
- Lock the camshaft using the setting bar (2065 A).
Locking the camshaft with template 2065 A
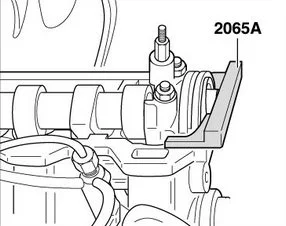
Template 2065 A for camshaft locking
Inserting feeler gauge into camshaft slot
- Insert a feeler gauge into the camshaft slot (typically = 0.40 mm)
- Start installing:
a) Water pump — apply a thin layer of sealant to the rubber O-ring for safety before installation, then loosely insert three bolts to centre the pump; tighten only the right-hand bolt, remove the other two.

Installing the coolant pump
b) Inner timing belt cover — screw in the two bolts that secure both the pump and the guard; install the two upper bolts securing the guard to the head using thread locker.
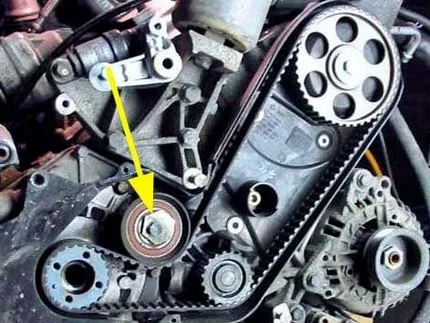
c) Camshaft sprocket — hand-tighten the fastening bolt; check for no misalignment and free rotation of the toothed pulley.
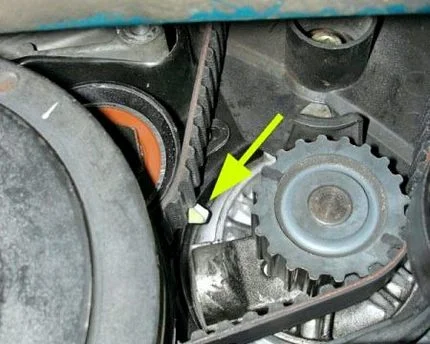
d) Install the tensioner pulley (1) so that the tensioner tab (2) engages with the stop pin on the lower part of the belt cover.
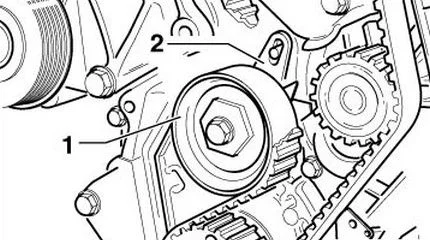
Tensioner pulley 1 and tensioner tab 2
Stop pin in the lower part of the timing belt cover
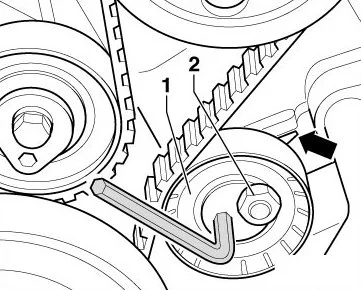
e) Fit the timing belt, starting from the crankshaft. 1. Tighten the tensioner pulley mounting bolt slightly.
1. To tension the toothed belt, rotate the pulley clockwise; the right edge of pointer (A) must align with the right edge of pointer (B).
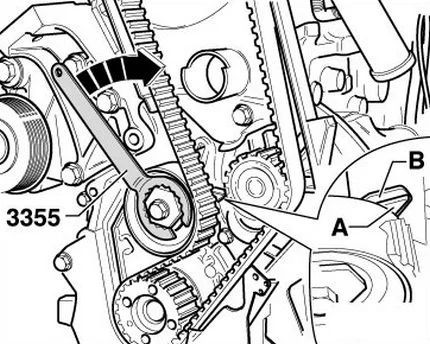
Tensioning the toothed belt
Timing belt tension indicator pointer on VW Transporter 2.5 TDI (ACV)
Counter-hold tool -3036- for tightening camshaft sprocket bolt
- Tighten the tensioner pulley bolt to 20 Nm.
- Check that the crankshaft has remained at TDC Cylinder 1; correct if necessary.
- Tighten the camshaft pulley bolt using the counter-hold tool (3036); remember to account for bolt strength: 8.8 = 85 Nm, 10.9 = 100 Nm.
- Remove the setting bar (2065 A) from the camshaft.
- Install the lower belt cover.
- Install the torsional vibration damper.
- Install the holding tool (T10025) and tighten the central damper/crankshaft bolt (torque 160 Nm). Tighten further in two stages – 90 degrees each. It is advisable to lightly oil the thread and the head of the central bolt.
- Rotate the crankshaft two turns in the direction of engine rotation so that the crankshaft returns to TDC Cylinder 1.ATTENTION! A diamond-coated washer is installed between the damper and the crankshaft sprocket.
Valve cover Volkswagen Transporter IV
- Re-check the position of the tensioner pulley pointer. If the right edges of pointers -A- and -B- do not align, repeat the tensioning process.
- Close the outer timing belt cover.
- Install the valve cover.
- Bolt on the oil filler neck.
Installing the Injection Pump Belt
- Check that the original mark aligns with the TDC mark on the flywheel.
- Place the belt onto the injection pump pulley.
- Insert the belt into the injection pump sprocket and secure the camshaft sprocket; the sprocket will need to be rotated later.
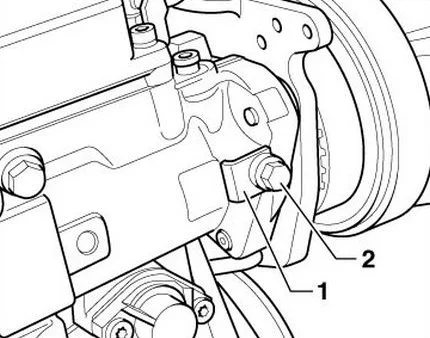
- Check the installation position of the idler pulley:
- Rotate the idler pulley so that the pointer aligns with the contour of the cylinder head flange.
- Tighten the nut (2) to 20 Nm.
Idler pulley nut 2
Timing belt tensioner pulley 1
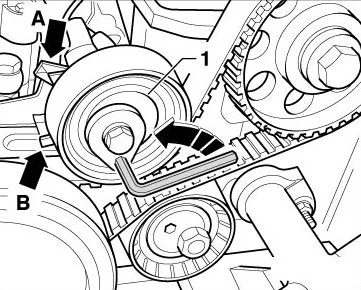
- Install the tensioner pulley (1) so that the tensioner tab engages with the recess in the bracket (arrow B). Tighten the mounting bolt slightly.
- To tension the toothed belt, rotate the tensioner pulley counter-clockwise to a position where both pointers are opposite each other (arrow A).
- Tighten the mounting bolt to 15 Nm.
- Tighten the injection pump sprocket mounting nut to 160 Nm. Use counter-hold tool -3036-. Ensure that torque is not transmitted to the injection pump pulley locked in the start-of-injection position while tightening.
- Loosen the locking bolt (2) on the injection pump.
- Install the spacer (1) and tighten the locking bolt to 12 Nm.
Spacer and locking bolt
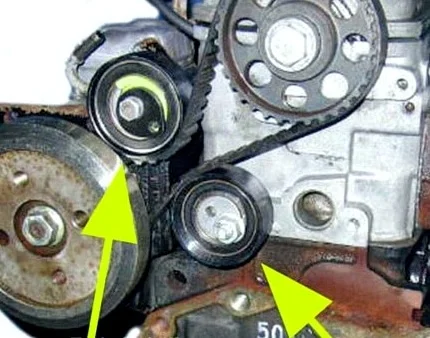
Timing belt tensioners
- Rotate the crankshaft two turns so that it returns to TDC Cylinder 1.
Check the position of the marks on the injection pump tensioner pulley (arrow A). When correctly positioned, the pointers will be opposite each other. A slight misalignment of the front pointer is permissible, but the pointer must under no circumstances go beyond the contour of the plate on which the rear pointer is located. If the front pointer has gone beyond the plate contour of the second one, tensioning must be repeated.
Install the injection pump belt guard.
Also install all previously removed parts, refill the coolant, start the engine; after starting, check all connections for fluid leaks, install the insulating belly pan, and the vehicle is ready to drive.
Source: vwts.ru
Was this article useful?
Your feedback helps us improve our content.


Discussion (0)
No comments yet!