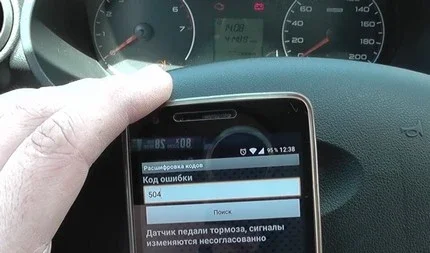
Error P0504: Meaning and Causes

The diagnostic trouble code P0504 stands for Brake Switch A/B Correlation (or mismatch between sensor 1 and 2 signals). It appears when the ECU receives contradictory information regarding the current position of the brake pedal.
Most frequently, error P0504 is recorded in Lada (Kalina, Granta, Priora, Vesta, Largus), Datsun (On-DO, mi-DO), Renault (Logan, Duster), Toyota (Corolla, Land Cruiser Prado), and other models where this data is transmitted to the controller via a four-pin brake light switch.
In this article, we will discuss why error P0504 occurs and how to find and eliminate the cause of the discrepancy in brake sensor signals.
Symptoms and Conditions for DTC P0504
DTC P0504 is triggered by specific signals sent to the electronic control unit (ECU) from the brake light limit switch. In a number of vehicles, particularly Lada models with an electronic accelerator pedal, two pairs of contacts are combined within the switch housing: normally closed (for brake pedal position) and normally open (for the brake light circuit). When the pedal is depressed, the first contact opens, and the second closes.
Information about the state of both contacts is sent to the ECU. If their values do not correspond to each other—for example, if both contacts are closed or open simultaneously, or if the accelerator pedal is pressed while the brake pedal is registered as depressed—error P0504 is generated.
Since this algorithm ensures the safety of vehicle operation, in the event of malfunctions in the electronic throttle system or repeated discrepancies between the brake and accelerator pedal sensor signals, the engine may enter limp mode (emergency operation mode).
Therefore, along with error code P0504, certain symptoms may manifest:
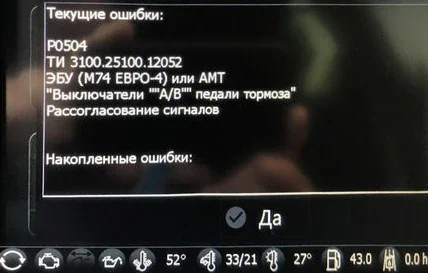
P0504 error description in diagnostic software
- The brake lights stay on constantly or do not illuminate when the brake pedal is pressed.
- Cruise control does not activate.
- Dynamics deteriorate: engine speed does not rise above 1250–1500 rpm and/or drops to idle during acceleration; the engine stalls or fails to start.
- On vehicles with automatic transmission, there may be problems shifting the gear selector.
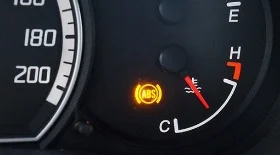
- The Check Engine light illuminates on the dashboard (usually after the error is detected multiple times).
Causes of Brake Sensor Correlation Errors and Solutions
In most cases, error P0504 arises due to a malfunction of the brake light limit switch or its incorrect adjustment (if adjustment is required). However, a failure is also possible if bulbs in the rear lights burn out or non-standard bulbs are installed. The main causes of brake sensor signal discrepancy and ways to eliminate them are reviewed in the table below.
| Causes and solutions for error P0504 | ||
| Faulty Element | Reason for Failure | How to Eliminate |
|---|---|---|
| Brake light limit switch | Incorrect adjustment | Adjust the position so that the plunger is fully retracted into the housing when the pedal is released |
| Weakened or broken spring | Replace the spring or replace the sensor itself | |
| Burnt or oxidised contacts | Clean the contact plates with sandpaper or a needle file, or replace the switch entirely | |
| Brake light bulbs | Filament burnt out | Replace the bulb |
| Non-standard bulbs with lower resistance installed (e.g., LED) | Add a resistor to the circuit, replace with CAN-bus compatible bulbs, or revert to standard bulbs | |
| Fuse | Brake light circuit fuse has blown | Replace the fuse; if it blows again, check the circuit for a short circuit |
| Circuit between the limit switch, ECU, brake lights, and battery | Broken wires, damaged insulation, or contact terminals | Visually check the integrity of wires and contacts; check wiring continuity with a tester or test light |
| ECU | Damaged contacts, failure of elements on the controller board | Replace contacts and faulty components |
After eliminating the cause of the malfunction, it is necessary to clear error code P0504 using a diagnostic scanner or a dedicated app; otherwise, the engine may continue to operate in limp mode.
Diagnostic Procedure for Error P0504
To perform certain diagnostic operations when error P0504 appears, a multimeter or a test light is required. If you do not have an assistant to check the operation of the limit switch and the state of the brake lights, you can reverse up to a wall so that the glow of the brake lights is visible in the mirrors.
- Check the brake lights by pressing and releasing the brake pedal several times. The lamps should light up when the brake pedal is depressed by 2–3 cm and go out when released. Blinking or flickering indicates a poor contact, while intermittent failure indicates incorrect adjustment or wear of the limit switch.
- If the lamps do not light up when the pedal is pressed, ensure that the brake light circuit fuse has not blown.
- Inspect the limit switch connector; ensure it is secure and there is no external damage.
- Check the brake light limit switch and its adjustment. The detailed checking procedure is analysed in the next section.
- Check the power supply to the sensor using a multimeter or a test light. Power (12 V) should be constantly supplied to one of the terminals. Refer to the vehicle's wiring diagram to identify the corresponding contact. If there is no power, sequentially check the relevant circuit.
- If power is present and the sensor is functioning, check the signal output to the corresponding ECU contacts using a multimeter with the pedal pressed and released. The presence of signals indicates a malfunction within the controller itself.
click to enlarge
Testing, Repair, and Adjustment of the Brake Light Switch on Various Car Makes
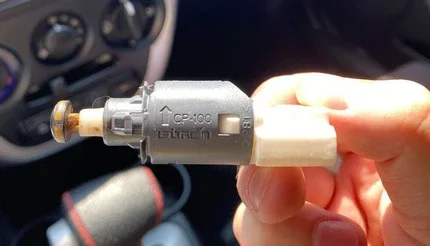
Inside the four-pin brake switch, there are two pairs of contacts, the state of which depends on the position of the plunger: when fully depressed and fully extended. One pair is always closed (resistance close to zero), and the other is open (resistance of several kOhms or more). If for some reason the contact group does not work properly, error P0504 occurs.
Testing the Brake Light Switch
Checking the brake light switch involves testing the continuity of the contact pairs in the normal position—with the plunger extended and with it depressed, simulating a brake pedal press. The normal contact states of a working switch for some popular models are given in the table below.
| Model | Contact State | |
|---|---|---|
| Plunger Depressed (Pedal released) | Plunger Extended (Pedal pressed) | |
| Toyota Rav4 | 3–4 closed 1–2 open | 3–4 open 1–2 closed |
| Lada (Priora, Kalina, Granta, 4x4) Datsun (on-DO, mi-DO) Gazelle Next, Business | 1–4 open 2–3 closed | 1–4 closed 2–3 open |
| Lada (Largus, Vesta, XRAY) Renault (Logan, Duster) | 3–4 open 1–2 closed | 3–4 closed 1–2 open |
If the test shows that the contacts open and close properly, error P0504 may be related to either incorrect adjustment of the brake light switch (not required on all models) or faulty wiring and other causes listed above. If the multimeter readings do not match the parameters of a working switch, it must be replaced or repaired.
Repairing the Brake Pedal Limit Switch
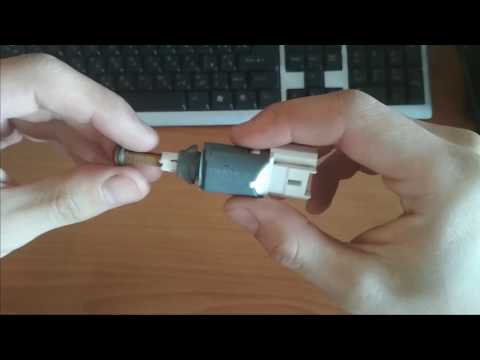
Diagnosis and repair of the brake light switch: video
The two main reasons for the failure of the brake light limit switch are oxidised or burnt contacts and a broken or weakened spring. An indirect sign of the second problem is a shorter plunger travel compared to a working one, or excessive free play.
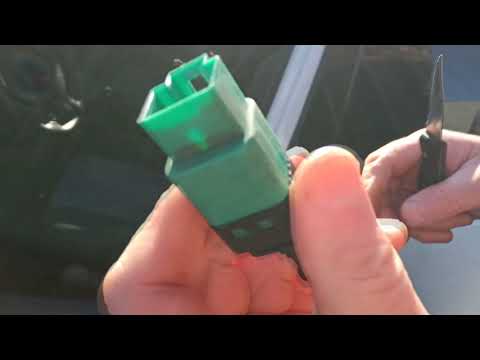
To repair the switch, it must be removed. First, disconnect the connector by pressing the release tab. In some cars, such as the Lada Kalina and Granta, you need to unscrew a fastening nut; in others, like the Lada Largus and Vesta, simply turn the housing 90 degrees anti-clockwise and remove it from the mount.
Next, disassemble the sensor housing, which is held together by clips, and inspect the condition of the spring and contacts. Oxidised or burnt contacts can be cleaned with sandpaper and treated with a contact cleaner. A broken spring should be replaced with a new one of similar length (for the switch 1118-3720010 installed on Lada cars, a spring with a diameter and height of 6–8 mm is suitable), and a weakened one can be stretched, although this will only help temporarily.
Switch replacement and adjustment: video
Adjusting the Brake Pedal Switch
Error P0504 in Lada (Priora, Kalina, Granta, 4x4), Datsun (on-DO, mi-DO), Gazelle Next, and Business models with the old-type switch (part number 1118-3720010) and other models with a similarly constructed brake light switch may be due to incorrect adjustment. In this case, the switch is secured to the brake pedal bracket using a pair of nuts.
The correct position is considered to be when the gap between the plunger tip and the switch housing does not exceed 0.5–1 mm when the brake pedal is not pressed. If the distance is greater, the pressure from the pedal stop is insufficient to depress the plunger enough to close and open the corresponding contacts.
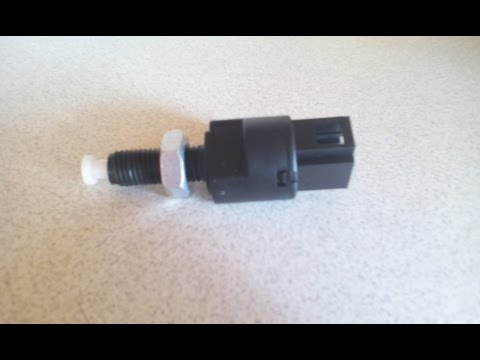
Newer types of switches that lock onto the bracket without a nut (removed by turning the housing), particularly those installed on some Lada (part number 21700372001000) and Renault (part number 8200168238) cars, are self-adjusting. Before installation, simply pull out the ribbed plunger; it will automatically assume the correct position after mounting.
New type limit switch
Adjusting the new type switch: video
The switch has a plunger with a mushroom-shaped head that protrudes fully. After installing the limit switch, you must gently release the pedal so that it returns to the top position. The pedal will click the plunger into the correct setting as required.
Was this article useful?
Your feedback helps us improve our content.
Related Materials


Discussion (0)
No comments yet!