Chevrolet Captiva Timing Belt Replacement
It is recommended to replace the timing belt on the Chevrolet Captiva (2.4 engine) every 90,000–100,000 km or every 4 years, according to the maintenance schedule. If inspection reveals cracks, tears, or traces of oil on the rubber, replacement must be carried out immediately.
This work is often combined with replacing the coolant pump (water pump), as its service life is comparable to that of the timing drive. Coolant leaks in the area of the timing belt cover are a sure sign that intervention is needed.
Tools and Parts
- Standard set of spanners and sockets;
- Set of hex keys and Torx bits;
- Jack and axle stand;
- Torque wrench (to observe tightening torques);
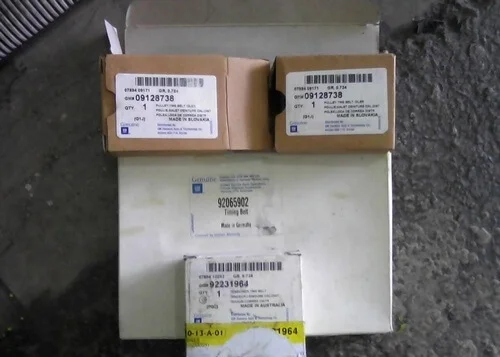
- Original timing belt General Motors 92065902 or analogues: CT 924, 94824, 5461 XS;
- Original tensioner pulley General Motors 90528603 or analogues: 531 0626 30, T43106;
- Original idler pulley (2 required) General Motors 09128738 or analogues (Ina 532 0039 10, SKF VKM 25212).
Prepare the new timing belt kit: the belt, the tensioner pulley and two idler pulleys.
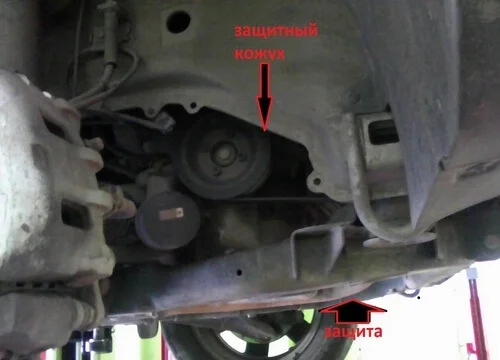
Remove the front right wheel. Remove the plastic splash shield and the undertray (sump guard) to gain access to the crankshaft pulley.
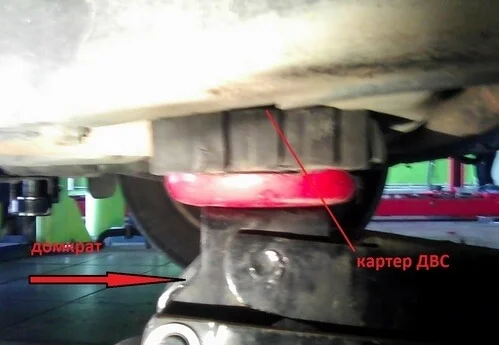
Place a jack under the engine sump (be sure to use a wooden block to avoid damaging the oil pan). Raise the engine slightly to take the load off the right-hand engine mount.
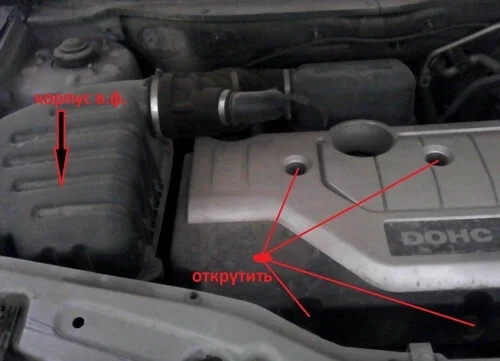
Disconnect the mass air flow (MAF) sensor connector and remove the air filter housing assembly with the intake pipe. Remove the decorative engine cover.
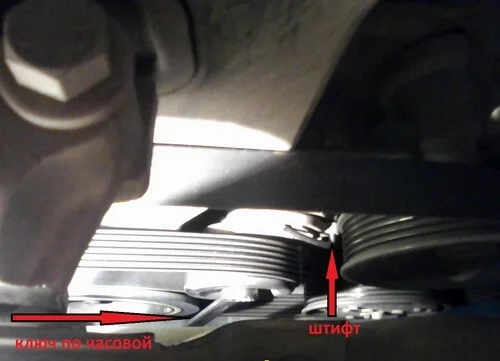
Remove the auxiliary drive belt. To do this, use a spanner to rotate the tensioner pulley clockwise until the holes on the housing align, then lock it with a pin (or drill bit). Remove the alternator belt.
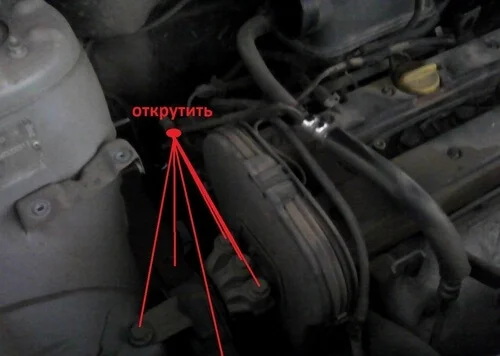
Undo the mounting bolts and remove the right-hand engine mount, which blocks access to the timing mechanism.
Lock the flywheel and undo the central bolt (or mounting bolts) of the crankshaft pulley. Remove the auxiliary drive pulley.
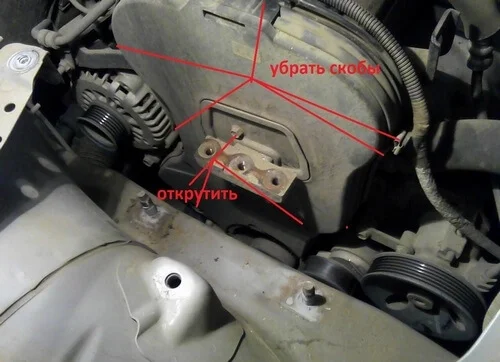
Undo the bolts securing the plastic timing belt covers. Remove the engine mount bracket, as well as the upper and lower timing belt protection covers.
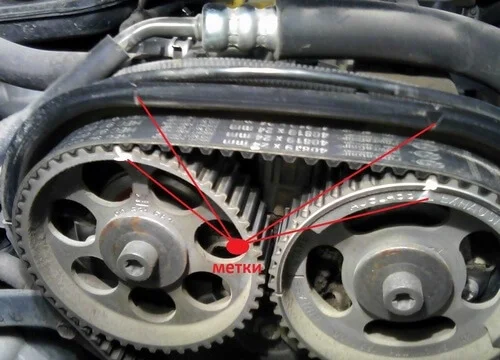
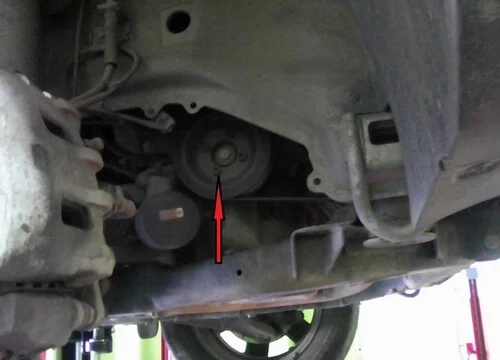
Set the piston of the first cylinder to the TDC (Top Dead Centre) position. To do this, rotate the crankshaft using the bolt. The marks on the camshaft gears should face each other (align horizontally).
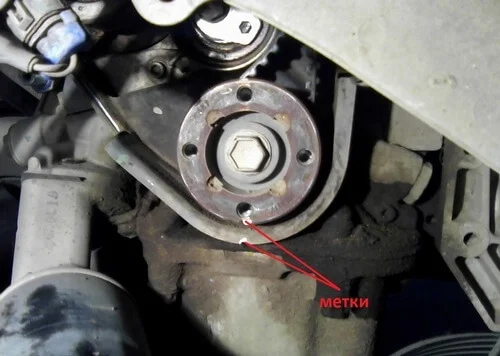
Ensure that the mark on the crankshaft sprocket aligns with the corresponding mark (notch) on the housing (at the bottom).
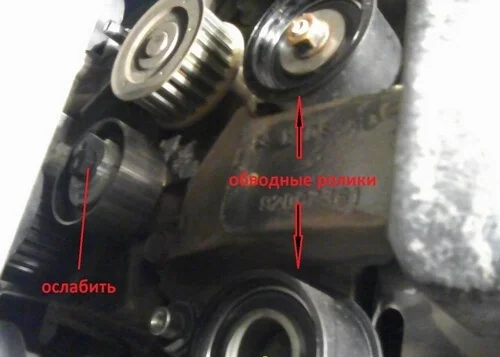
Loosen the tensioner pulley (usually done with a hex key, turning the pulley anti-clockwise to slacken it). Remove the old timing belt, the tensioner and the idler pulleys.
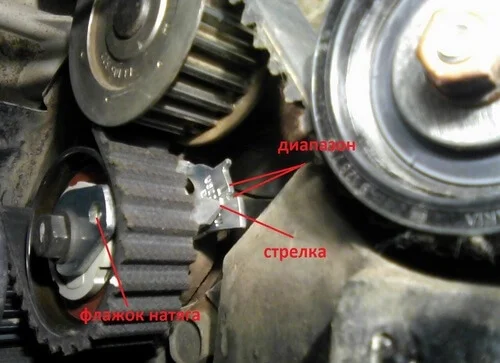
Install the new pulleys and belt. When tensioning the belt, align the pointer (arrow) on the movable part of the tensioner with the notch (mark) on the fixed plate, as shown in the photo. Rotate the crankshaft manually two full turns and check the alignment of all timing marks again.
Was this guide useful?
Your feedback helps us improve our content.


Discussion (0)
No comments yet!