Daewoo Matiz 0.8 Timing Belt Replacement
A useful photo report for all Daewoo Matiz owners who are not afraid to **replace the timing belt** themselves. For the Matiz 0.8 litre engine, you can buy a Gates 5434XS, BOSCH 1 987 948 778, Contitech CT910, or the more affordable Dayco 94809 belt.
However, the Daewoo Matiz 0.8 timing belt replacement interval must be shortened if cracks, creases, oil traces, or tears appear on the belt. No special tools are required, just a set of standard spanners and sockets.

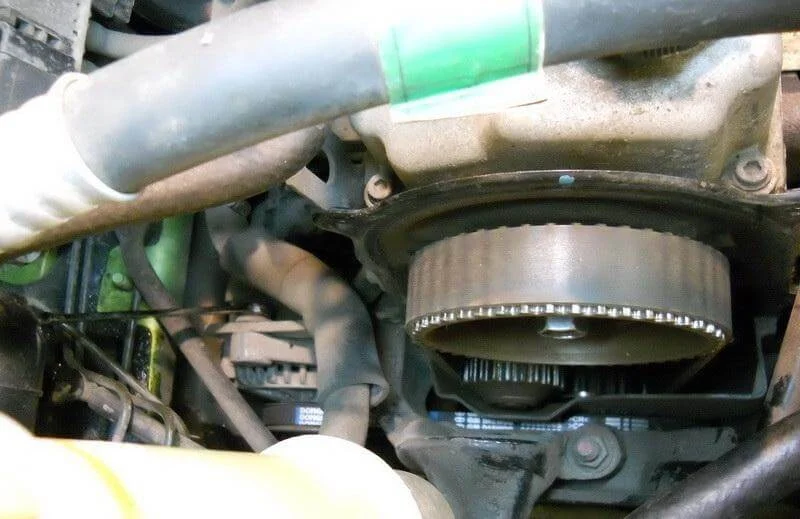
Despite the components under the bonnet being packed tightly together, there are no issues accessing the units and assemblies.

Using a 10 mm socket, unscrew the bolts and remove the upper protective cover that shields the timing belt.
Slacken the tension of the alternator, power steering, and air conditioning drive belts and remove them to free up access to the crankshaft pulley.
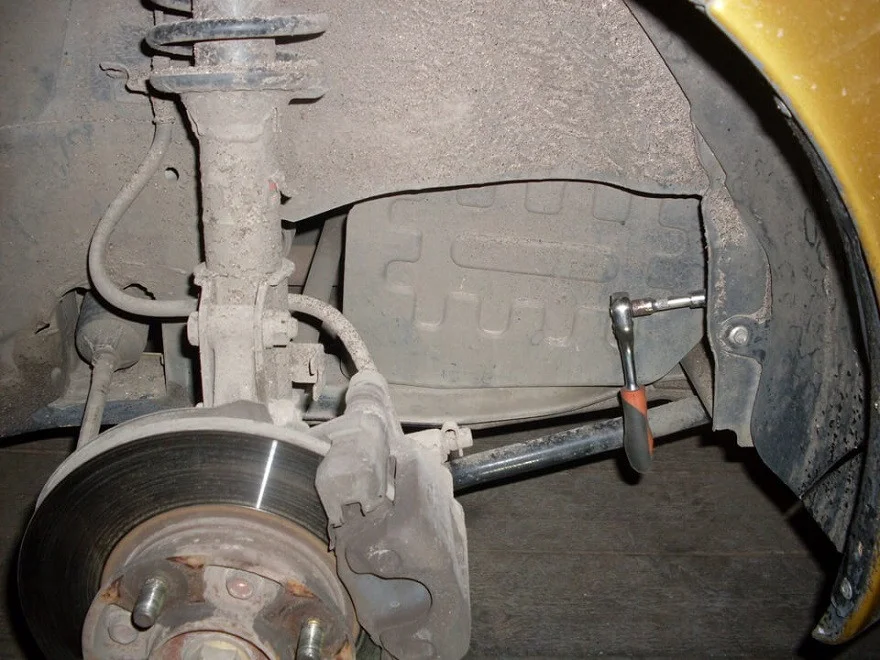
To access the lower part of the engine, jack up the car, remove the front right wheel, and the plastic inner wing liner (splash shield) behind it.
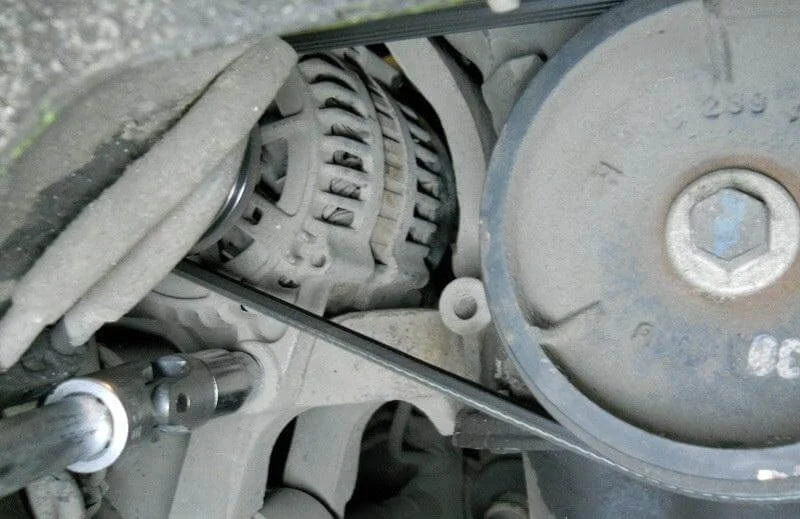
The alternator mounting often seizes, so to fully slacken the belt, it is recommended to loosen the lower alternator mounting bolt.
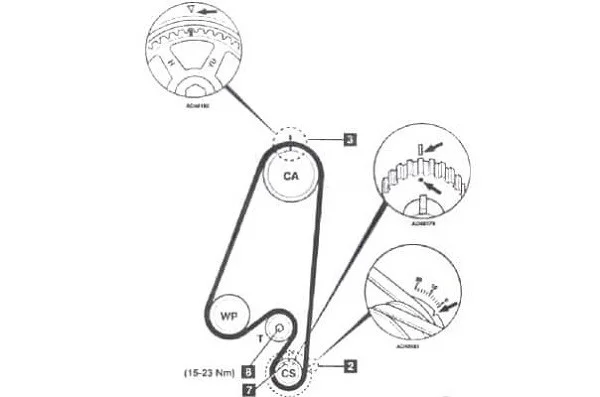
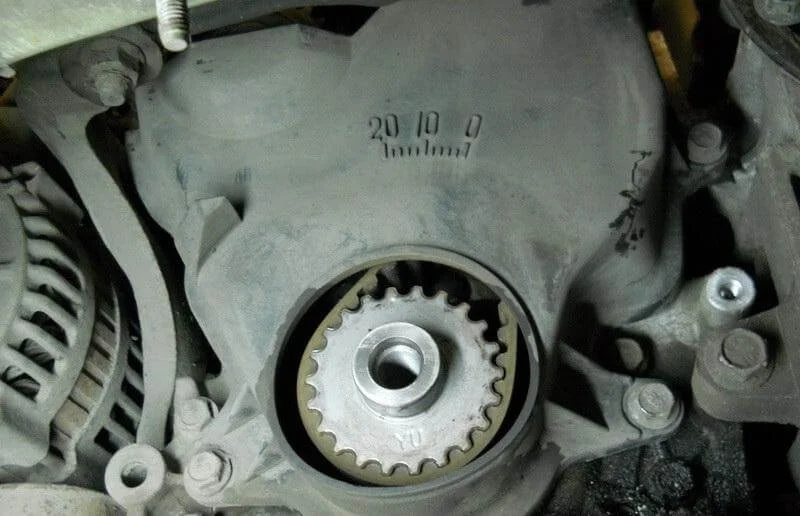
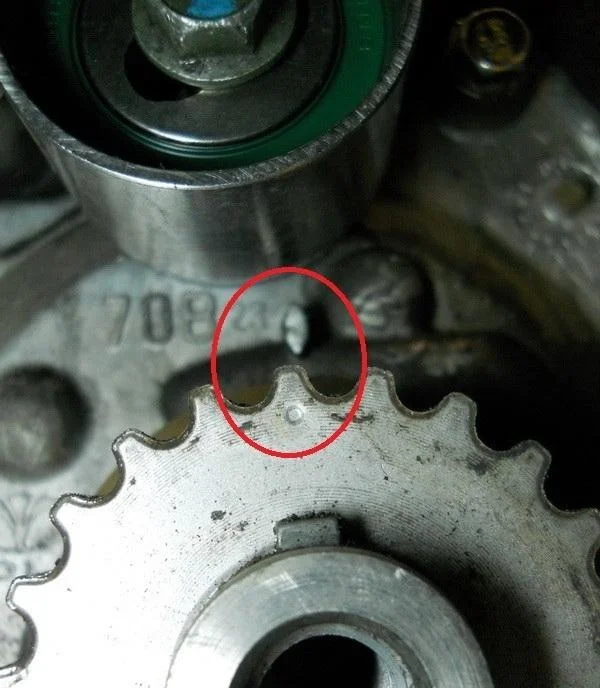
This is the general layout of all Daewoo Matiz timing marks that must be aligned precisely. Detailed photos of each mark's location follow below.
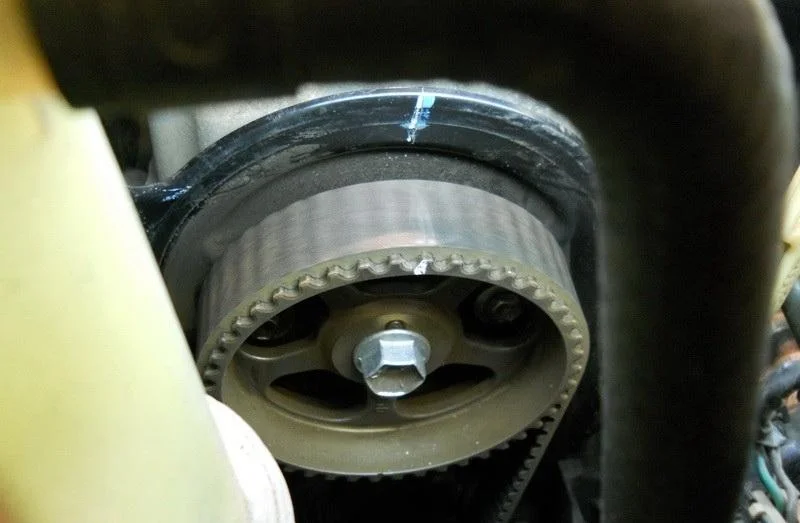
Screw the crankshaft pulley bolt back in (or use the hub nut with the wheel raised and a gear engaged) and turn the engine clockwise. Set the Top Dead Centre (TDC). The mark on the camshaft pulley must align with the notch on the rear cover.
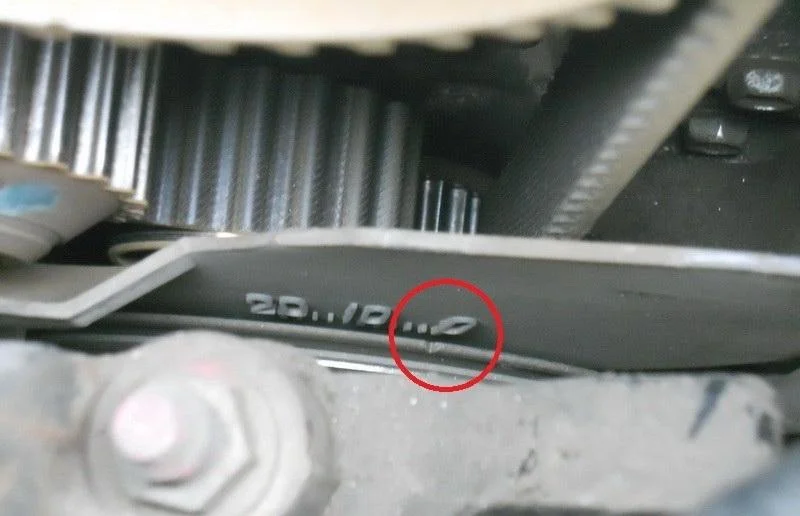
On the crankshaft accessory pulley, you will see a notch that must align with the '0' mark on the lower timing belt cover.
Unscrew the crankshaft bolt and remove the accessory drive pulley. To stop the crankshaft from turning, you can ask an assistant to press the brake pedal (on a manual gearbox with 5th gear engaged) or lock the flywheel with a screwdriver through the inspection window in the clutch housing.
To remove the lower timing cover, the oil dipstick tube is dismantled (carefully, so as not to damage the seal). The cover is secured by 10 mm bolts; remove it.
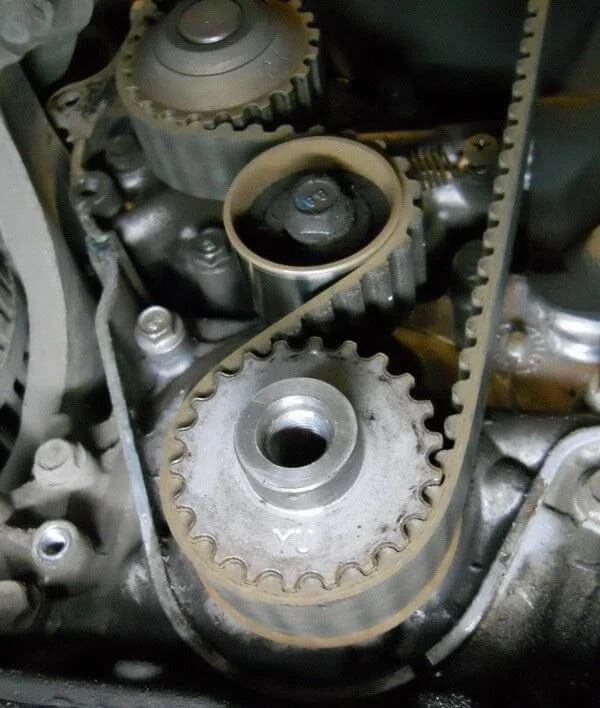
Loosen and unscrew the tensioner roller, then remove the old timing belt.
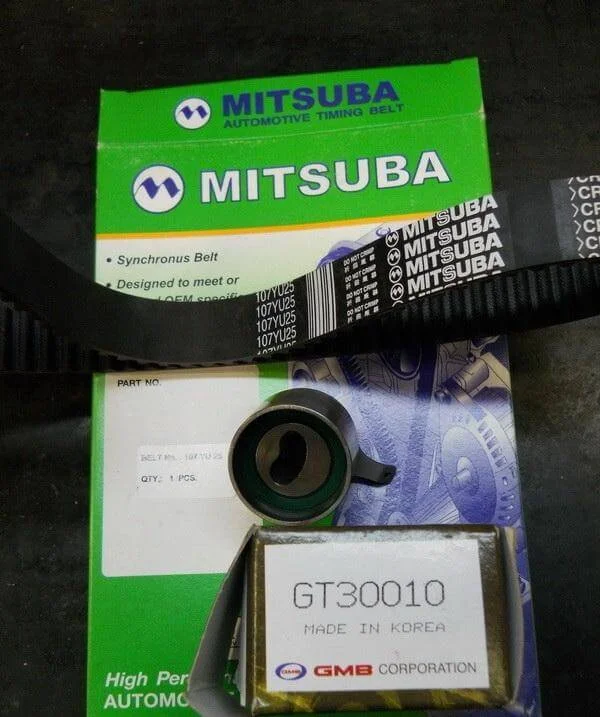
The timing belt and tensioner roller used in this photo report. Be sure to compare the length of the old and new belts.
Install the new roller and belt. **Important:** fit the belt onto the crankshaft sprocket first, then the camshaft sprocket, keeping the right (drive) side taut, and finally route it around the tensioner roller.
The roller spring should set the tension automatically, after which you tighten the roller fixing bolt (15–23 Nm). Rotate the crankshaft 2 turns and check the timing marks again. If they have moved, repeat the installation.
Reassemble in reverse order. Tighten the crankshaft pulley bolt to a torque of 65–75 Nm.
Was this guide useful?
Your feedback helps us improve our content.


Discussion (0)
No comments yet!